Transmission Fluid Cooler Inlet and Outlet Pipe Replacement (LM2)
Transmission Fluid Cooler Inlet and Outlet Pipe Replacement (LM2) Single Use Fasteners and Components Transmission Fluid Cooler Pipe Seal [6x] Transmission Fluid Cooler Seal Removal Procedure
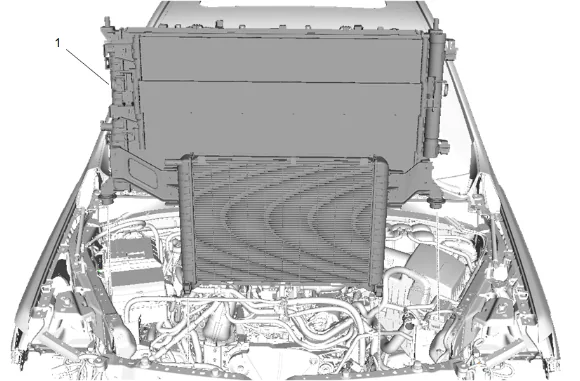
- Remove the air conditioning condenser, engine cooler fan and radiator as an assembly (1). Charge Air Cooler, Condenser, Fan Motor, and Radiator Assembly Removal and Installation
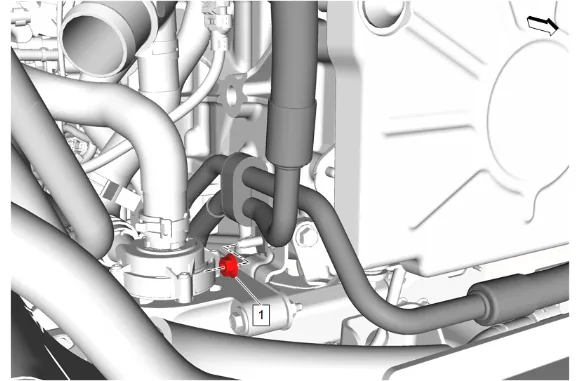
- Transmission Fluid Cooler Pipe Nut (1) » Remove
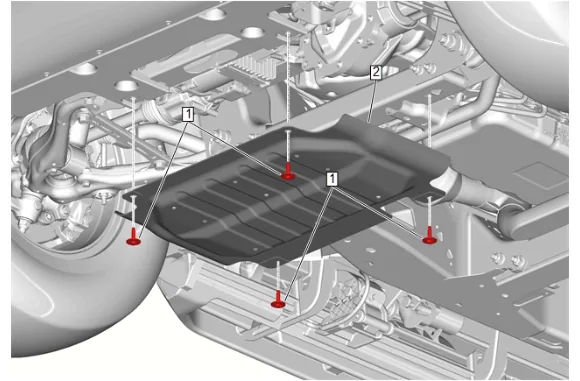
- {witthout RC1} Remove the underbody skid shield: 3.1. Underbody Skid Shield Bolt (1) » Remove [2x] 3.2. Underbody Skid Shield (2) » Remove
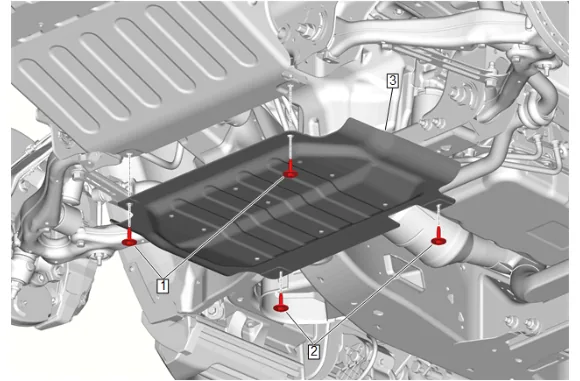
- {with RC1} Remove the underbody skid shield: 4.1. Underbody Skid Shield Bolt (1) » Remove [2x] 4.2. Underbody Splash Shield Bolt (2) » Remove [2x] 4.3. Underbody Skid Shield (3) » Remove
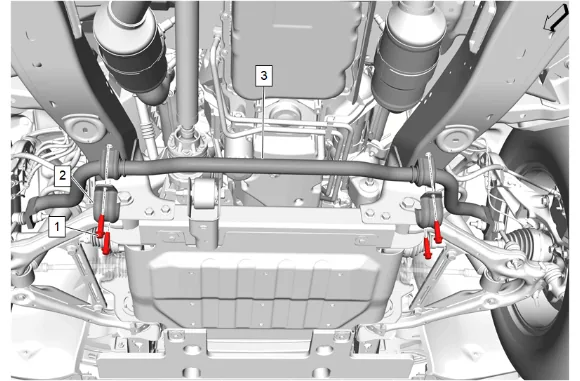
- Front Stabilizer Shaft Bolt (1) » Remove [4x]
- Front Stabilizer Shaft Clamp (2) » Remove [2x]
- Front Stabilizer Shaft (3) » Reposition
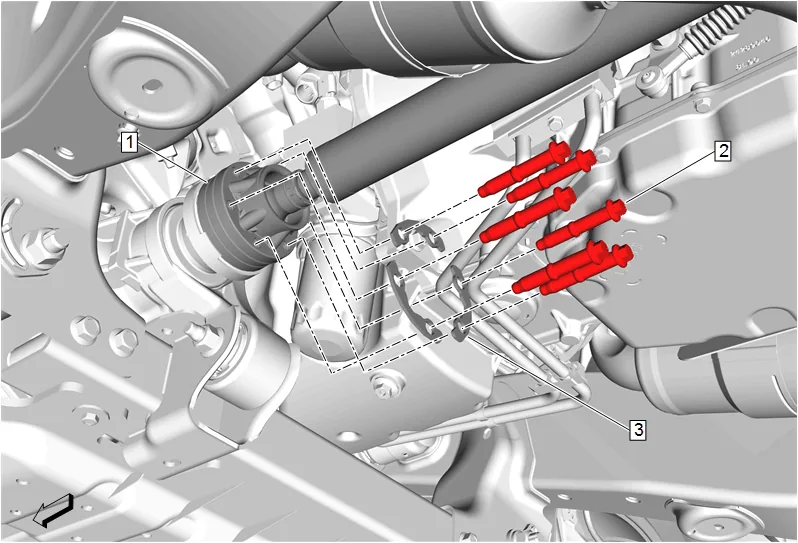
- Mark a reference point between the front axle propeller shaft (1) and the front differential drive pinion gear yoke.
- Front Axle Propeller Shaft Bolt (2) » Remove [6x]
- Front Axle Propeller Shaft Washer (3) » Remove [3x]
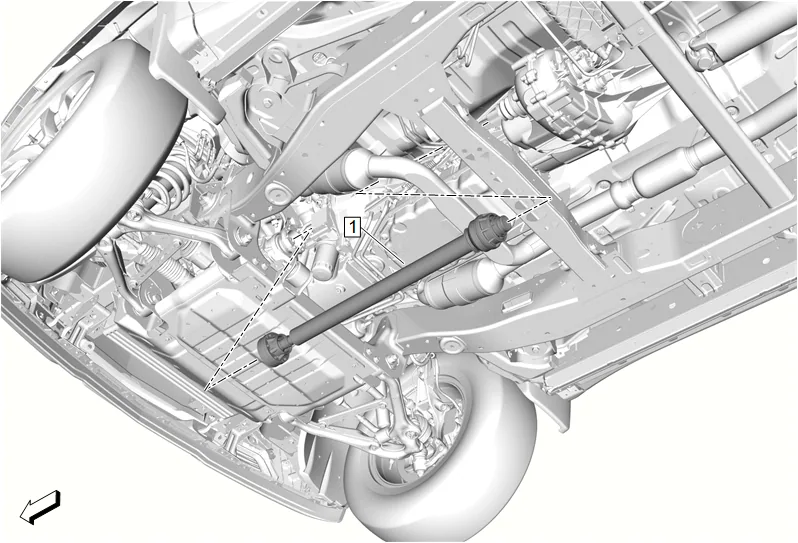
- Front Axle Propeller Shaft (1) » Reposition
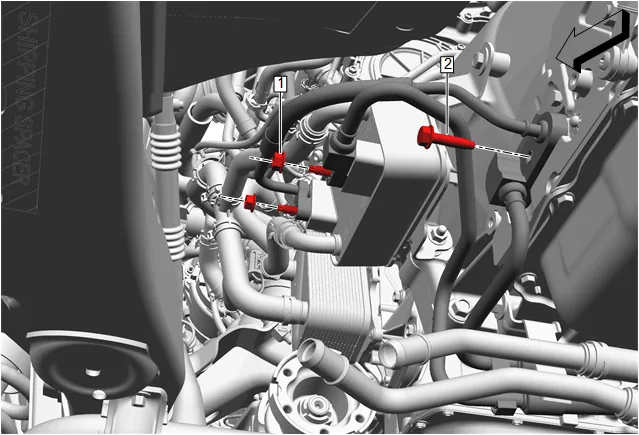
- Place a drain pan under the vehicle.
- Transmission Fluid Cooler Pipe Nut (1) » Remove [2x]
- Transmission Fluid Cooler Pipe Bolt (2) » Remove
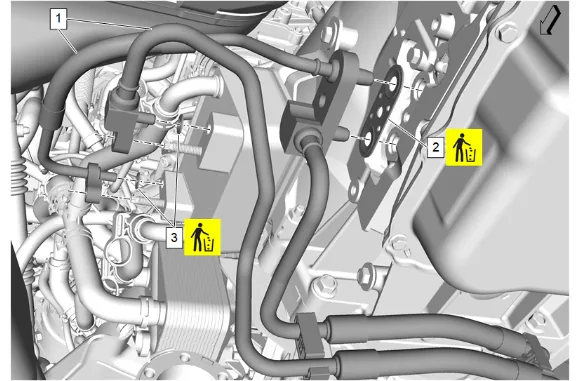
- Transmission Fluid Cooler Inlet and Outlet Pipe (1) » Reposition
- Transmission Fluid Cooler Seal (2) » Remove and DISCARD
- Transmission Fluid Cooler Pipe Seal (3) » Remove and DISCARD [2x]
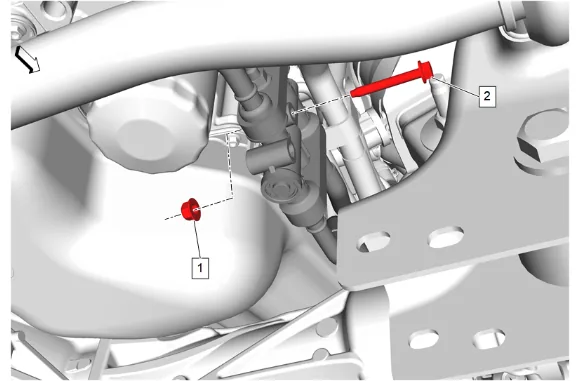
- Transmission Fluid Cooler Pipe Nut (1) » Remove
- Transmission Fluid Cooler Pipe Bolt (2) » Remove
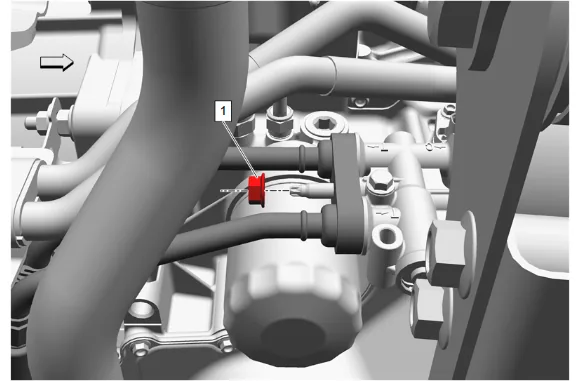
- Transmission Fluid Cooler Pipe Nut (1) » Remove
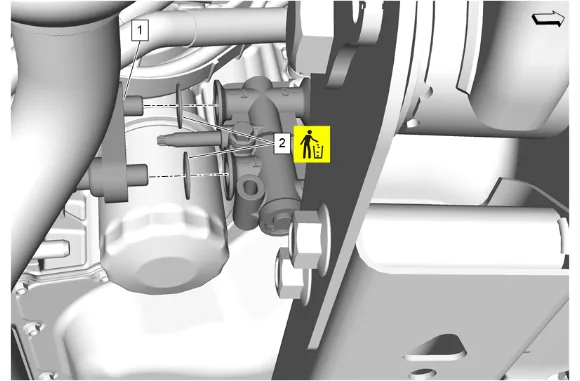
- Transmission Fluid Cooler Inlet and Outlet Pipe (1) » Reposition
- Transmission Fluid Cooler Pipe Seal (2) » Remove and DISCARD [2x]
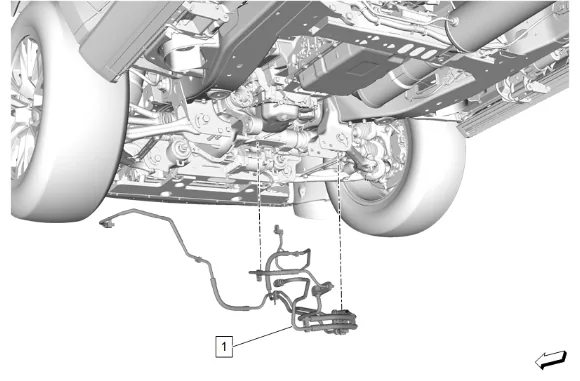
- Remove the upper section of the transmission fluid cooler inlet and outlet pipe (1) from the front of vehicle.
- Remove the lower section of the transmission fluid cooler inlet and outlet pipe (1) with bypass from the bottom of vehicle. Installation Procedure
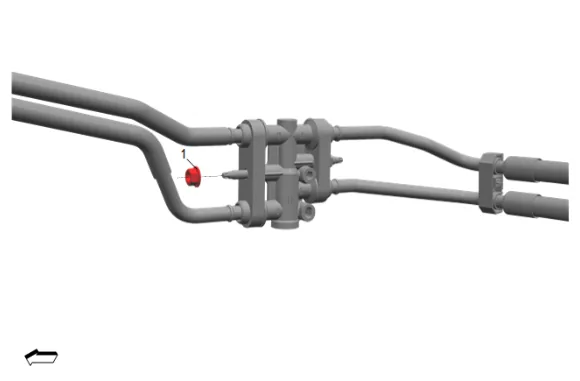
- Transmission Fluid Cooler Pipe Nut (1) » Remove
-
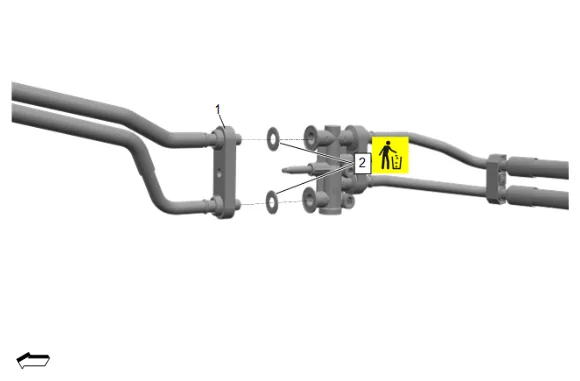
Transmission Fluid Cooler Inlet and Outlet Pipe (1) » Separate
-
Transmission Fluid Cooler Pipe Seal (2) » Remove and DISCARD [2x]
-
Install the lower section of the transmission fluid cooler inlet and outlet pipe (1) with bypass from the bottom of vehicle.
-
Install the upper section of the transmission fluid cooler inlet and outlet pipe (1) from the front of vehicle.
-
Transmission Fluid Cooler Pipe Seal (2) » Install NEW [2x]
-
Transmission Fluid Cooler Inlet and Outlet Pipe (1) » Install
-
Transmission Fluid Cooler Pipe Nut (1) » Install and tighten — Fastener Specifications
-
Transmission Fluid Cooler Pipe Nut (1) » Install and tighten — Fastener Specifications
-
Transmission Fluid Cooler Inlet and Outlet Pipe (1) » Install
-
Transmission Fluid Cooler Seal (2) » Install NEW
-
Transmission Fluid Cooler Pipe Seal (3) » Install NEW [2x]
-
Transmission Fluid Cooler Pipe Bolt (2) » Install and tighten — Fastener Specifications
-
Transmission Fluid Cooler Pipe Nut (1) » Install and tighten [2x] — Fastener Specifications
-
Clean the residue from the threaded holes of the front differential drive pinion gear yoke with denatured alcohol and allow to dry.
-
Remove the drain pan.
-
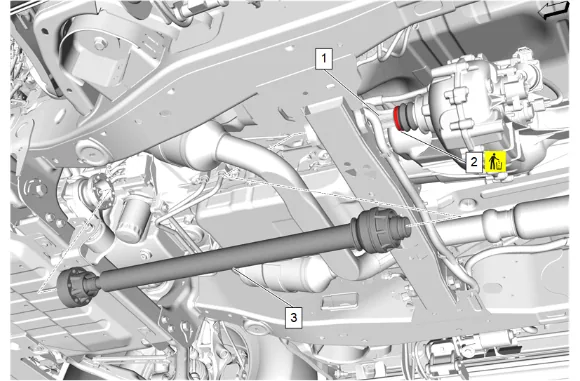
Front Axle Propeller Shaft (3) » Install
-
If NEW threaded components are being installed, loosen the adhesive using a metal pick or similar tool before proceeding. If threaded components are reused, prepare the threaded components using the following steps: 18.1. Remove any loose cured adhesive from the external threads of the components using a lint free cloth. 18.2. Thread the cleaned components into the internal mating threads and remove to loosen trapped cured adhesive. 18.3. Apply thread locking adhesive to the external threads of the components. Adhesives, Fluids, Lubricants, and Sealers 18.4. Ensure there are no gaps in the thread locking adhesive once applied to the component.
-
Align the reference marks made between the front axle propeller shaft (1) and the front differential drive pinion gear yoke.
-
Front Axle Propeller Shaft Washer (3) » Install [3x]
-
Install the 6 front axle propeller shaft bolts (2) and tighten in a crisscross pattern. Fastener Specifications
- Front Stabilizer Shaft (3) » Install
- Front Stabilizer Shaft Clamp (2) » Install [2x]
- If NEW threaded components are being installed, loosen the adhesive using a metal pick or similar tool before proceeding. If threaded components are reused, prepare the threaded components using the following steps: 24.1. Remove any loose cured adhesive from the external threads of the components using a lint free cloth. 24.2. Thread the cleaned components into the internal mating threads and remove to loosen trapped cured adhesive. 24.3. Apply thread locking adhesive to the external threads of the components. Adhesives, Fluids, Lubricants, and Sealers 24.4. Ensure there are no gaps in the thread locking adhesive once applied to the component.
- Front Stabilizer Shaft Bolt (1) » Install and tighten [4x] — Fastener Specifications
-
{with RC1} Install the underbody skid shield: 26.1. Underbody Skid Shield (3) » Install 26.2. Underbody Splash Shield Bolt (2) » Install and tighten [2x] — Fastener Specifications 26.3. Underbody Skid Shield Bolt (1) » Install and tighten [2x] — Fastener Specifications
-
{wwthout RC1} Install the underbody skid shield: 27.1. Underbody Skid Shield (2) » Install 27.2. Underbody Skid Shield Bolt (1) » Install and tighten [4x] — Fastener Specifications
-
Transmission Fluid Cooler Pipe Nut (1) » Install and tighten — Fastener Specifications
-
Install the air conditioning condenser, engine cooler fan and radiator as an assembly (1). Charge Air Cooler, Condenser, Fan Motor, and Radiator Assembly Removal and Installation
-
Check the transmission fluid level. Transmission Fluid Level and Condition Check
-
Inspect for Leaks