Starter Replacement (LM2)
Removal Procedure
- Disconnect the negative battery cable. Battery Negative Cable Disconnection and Connection
- Front Wheelhouse Liner - Right Side » Remove — Front Wheelhouse Liner Replacement
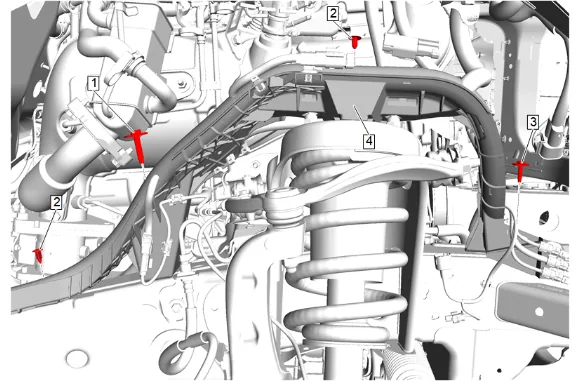
- Chassis Front Wiring Harness Bracket Bolt - Rear (1) » Remove
- Chassis Wiring Harness Front Bracket Retainer (2) » Remove [2x]
- Chassis Front Wiring Harness Bracket Bolt - Front (3) » Remove
- Remove the positive battery cable retainers from the chassis wiring harness front bracket.
- Chassis Wiring Harness (4) » Reposition
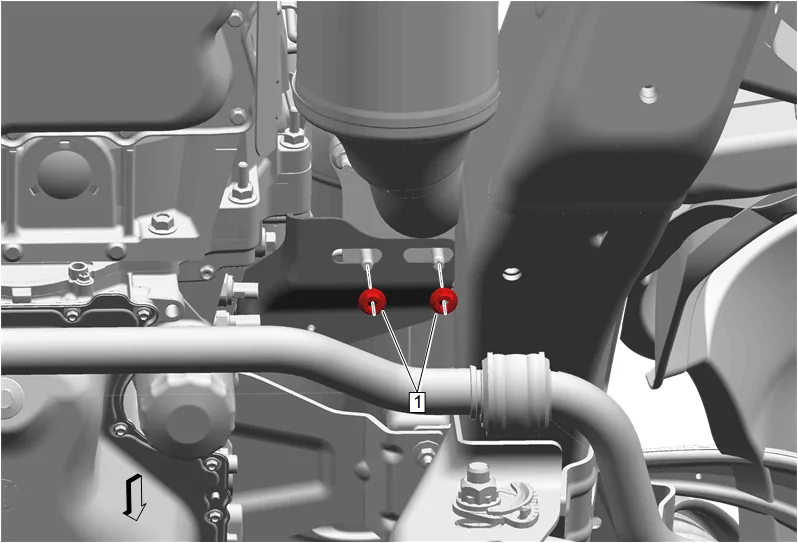
- Exhaust Front Pipe Nut (1) » Remove [2x]
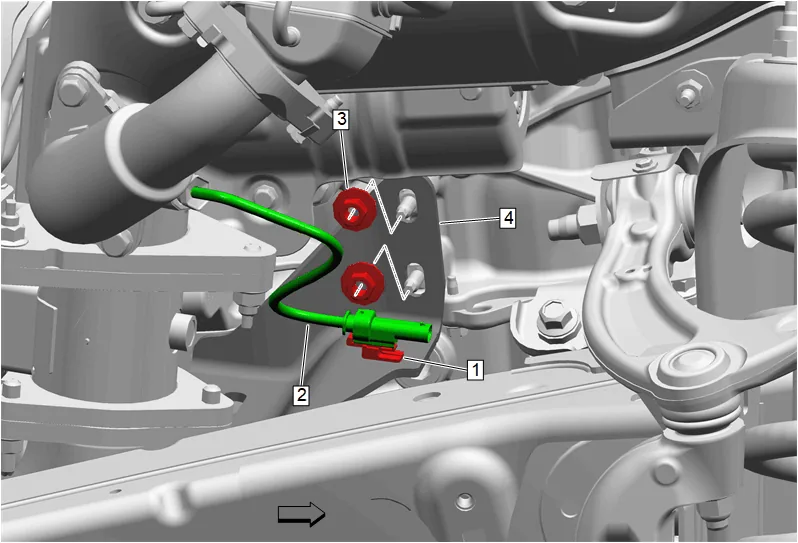
- Wiring Harness Retainer (1) @ Catalytic Converter Brace Bracket (4) » Remove
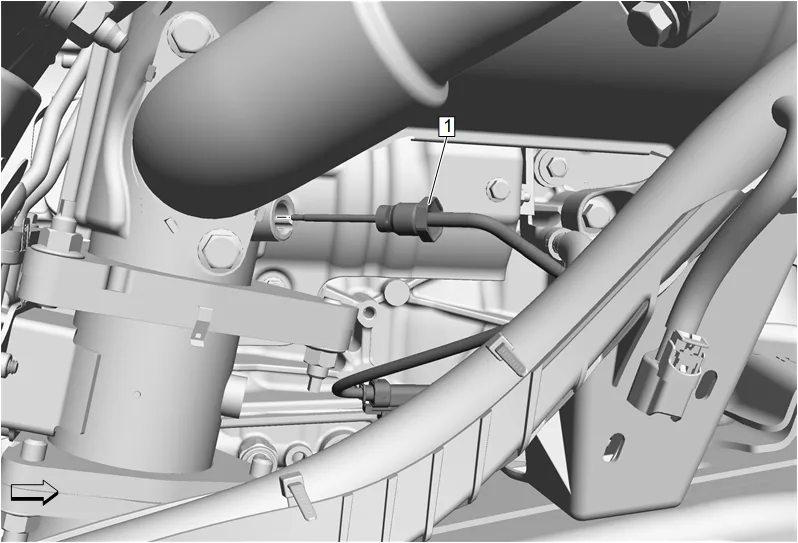
- Exhaust Temperature Sensor - Position 3 (1) » Remove and position aside
- Catalytic Converter Brace Bracket Nut (3) » Remove [2x]
- Catalytic Converter Brace Bracket » (4) Remove
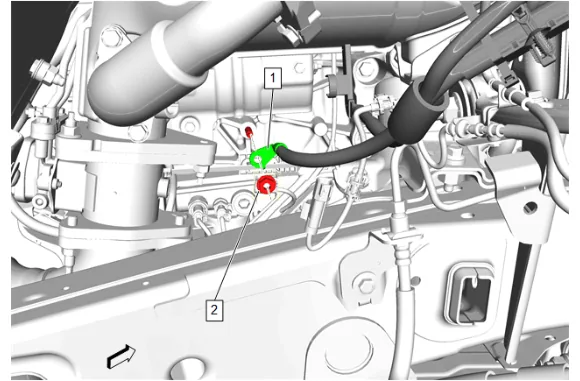
- Engine Wiring Harness Ground Nut (2) » Remove
- Starter Solenoid Cable (1) » Remove
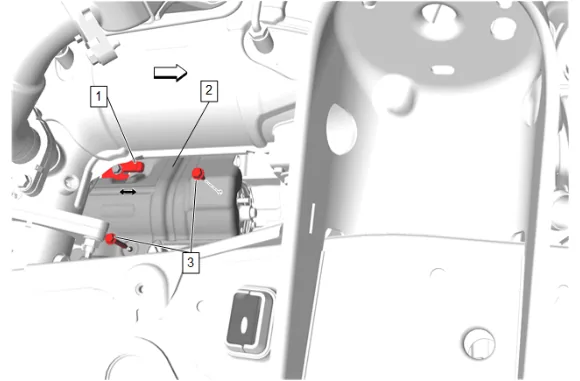
- Starter Heat Shield Bolt (3) » Remove [2x]
- Disengage the starter heat shield (2) from the retainer (1) .
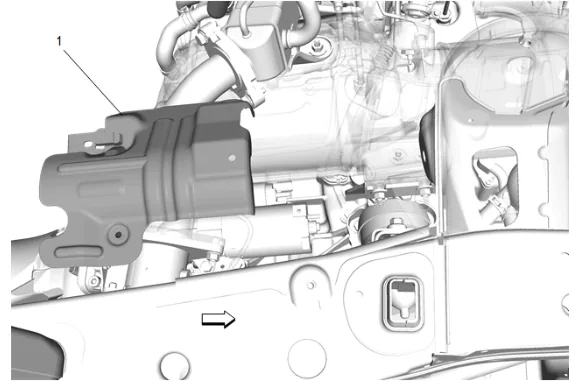
- Starter Heat Shield (1) » Remove
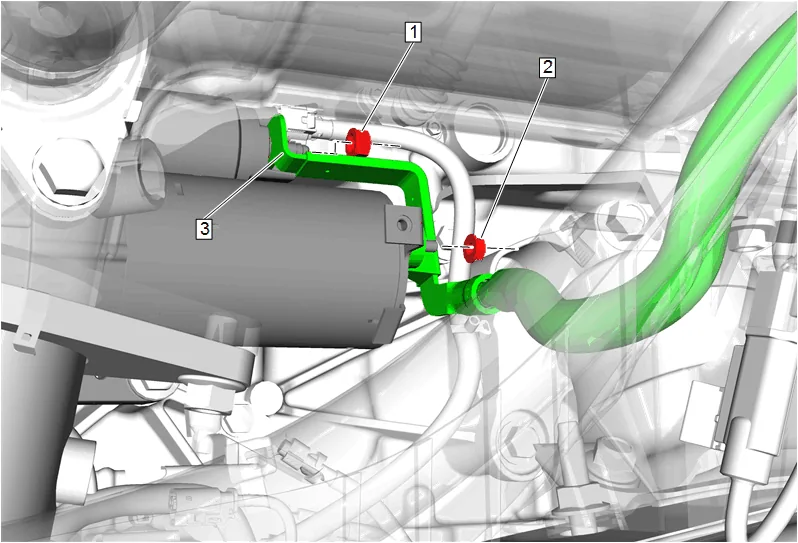
- Starter Solenoid Cable Nut (1) » Remove
- Wiring Harness Conduit Nut (2) » Remove
- Starter Solenoid Cable (3) » Remove
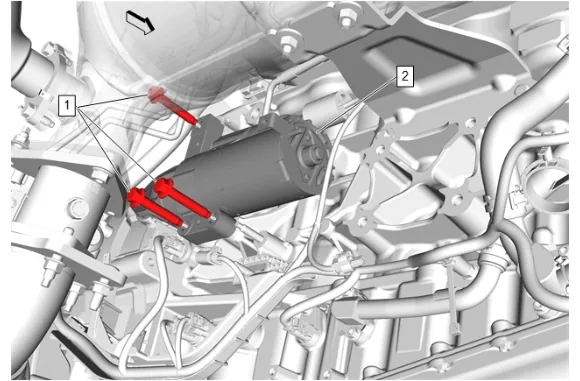
- Starter Bolt (1) » Remove [3x]
- Reposition the starter (2) to access the electrical connector.
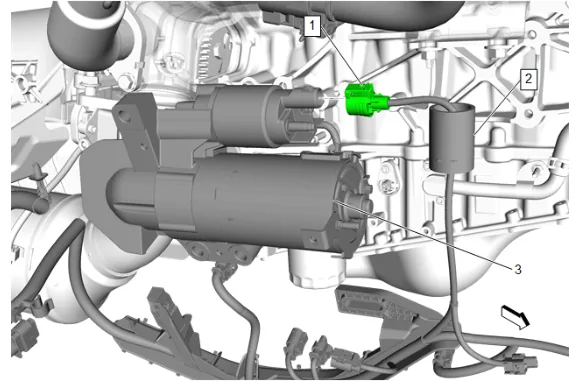
- Reposition the protective sleeve (2).
- Electrical Connector (1) » Disconnect
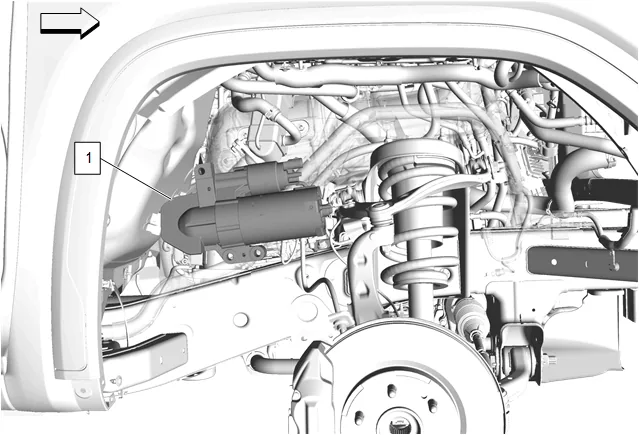
- Remove the starter (1) through the wheel well.
-
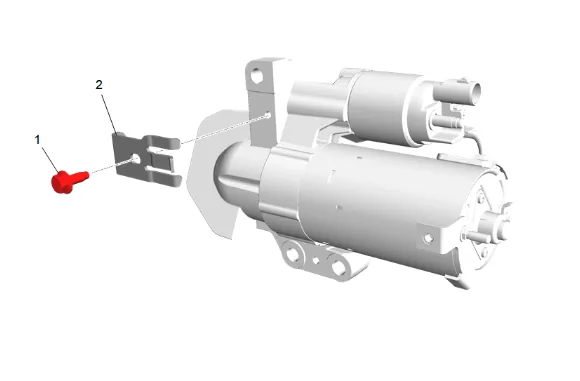
Starter Shield Bolt (1) » Remove
-
Starter Shield Retainer (2) » Remove Installation Procedure
-
Starter Shield Retainer (2) » Install
-
Starter Shield Bolt (1) » Install and tighten — Fastener Specifications
-
Install the starter (1) through the wheel well.
-
Electrical Connector (1) » Connect
-
Install the protective sleeve (2).
-
Starter Bolt (1) » Install and tighten [3x] — Fastener Specifications
-
Starter Solenoid Cable (3) » Install
-
Starter Solenoid Cable Nut (1) » Install and tighten — Fastener Specifications
-
Wiring Harness Conduit Nut (2) » Install and tighten — Fastener Specifications
-
Starter Heat Shield (1) » Install
-
Engage the starter heat shield (2) into the retainer (1).
-
Starter Heat Shield Bolt (3) » Install and tighten [2x] — Fastener Specifications
-
Starter Solenoid Cable (1) » Install
-
Engine Wiring Harness Ground Nut (2) » Install and tighten — Fastener Specifications
-
Catalytic Converter Brace Bracket (4) » Install
-
Catalytic Converter Brace Bracket Nut (3) » Install and tighten [2x] — Fastener Specifications
-
Exhaust Temperature Sensor - Position 3 (1) » Install and tighten — Fastener Specifications
-
Wiring Harness Retainer (1) @ Catalytic Converter Brace Bracket (4) » Install
-
Exhaust Front Pipe Nut (1) » Install and tighten [2x] — Fastener Specifications
-
Chassis Wiring Harness (4) » Install
-
Install the positive battery cable retainers to the chassis wiring harness front bracket.
-
Chassis Front Wiring Harness Bracket Bolt - Front (3) » Install and tighten — Fastener Specifications
-
Chassis Front Wiring Harness Bracket Bolt - Rear (1) » Install and tighten — Fastener Specifications
-
Chassis Wiring Harness Front Bracket Retainer (2) » Install [2x]
-
Front Wheelhouse Liner - Right Side » Install — Front Wheelhouse Liner Replacement
-
Connect the negative battery cable. Battery Negative Cable Disconnection and Connection