Sunroof Control Module Replacement (Long Wheel Base)
- Disable the SIR system. SIR Disabling and Enabling
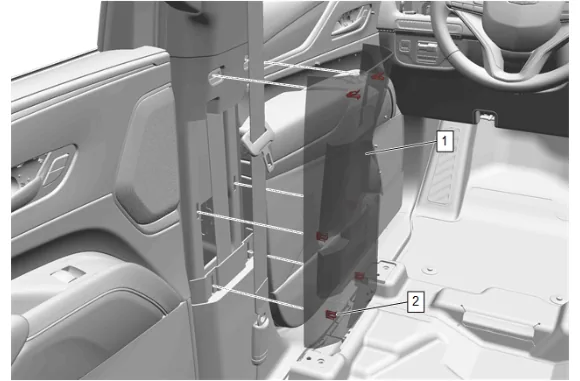
- Move both front seats fully forward.
- Use a flat bladed plastic tool between the center pillar center trim panel (1) and the center pillar upper trim panel to disengage the upper retaining clips (2) on both sides of the vehicle.
- Pull from both sides of the center pillar center trim panel (1) to release the middle and lower retaining clips (2) on both sides of the vehicle.
- Center Pillar Center Trim Panel (1) » Remove [2x]
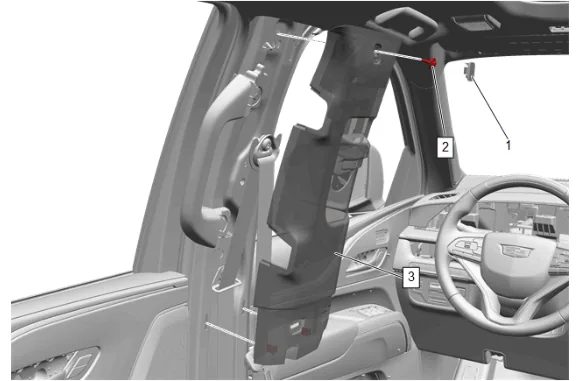
- Center Pillar Upper Trim Panel Bolt Cap (1) » Remove [2x]
- Center Pillar Upper Garnish Molding Bolt (2)» Remove [2x]
- Pull the center pillar upper trim panel (3) toward the inside of the vehicle to disengage the retaining clips on both sides of the vehicle.
- Center Pillar Upper Trim Panel (3) » Reposition [2x]
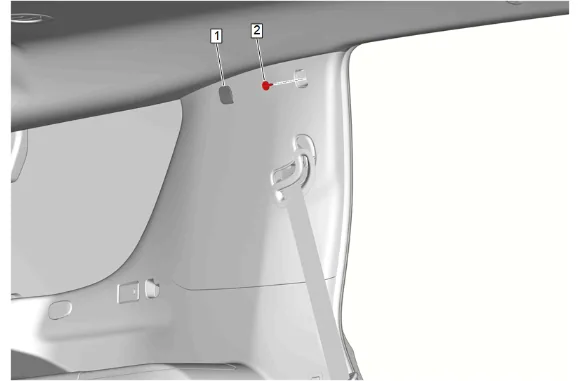
- Quarter Window Trim Finish Panel Bolt Cap (1) » Remove [2x]
- Quarter Window Trim Finish Panel Bolt (2) » Remove [2x]
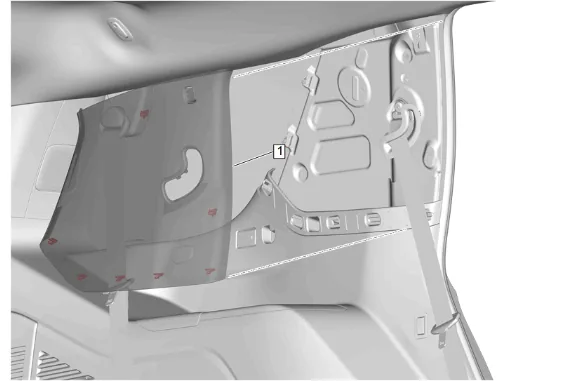
- Using a flat-bladed plastic trim tool, release the retaining clips on both sides of the vehicle.
- Body Lock Pillar Upper Trim Panel (1) » Reposition [2x]
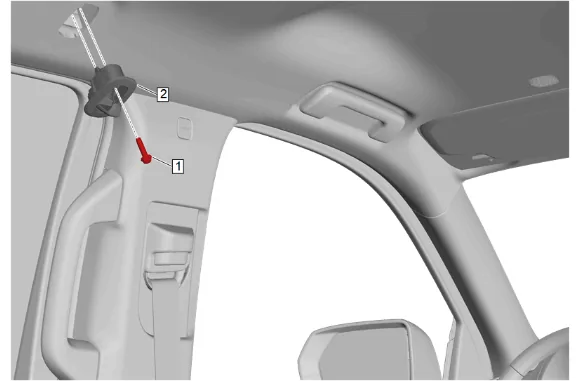
- Place the coat hook (2) in the open position.
- Coat Hook Bolt (1) » Remove [2x]
- Coat Hook (2) » Remove [2x]
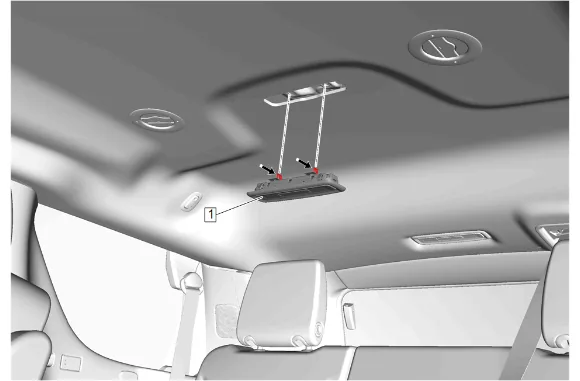
- Using a suitable plastic trim tool, release the retaining tabs on the rear seat position center reading and courtesy lamp (1).
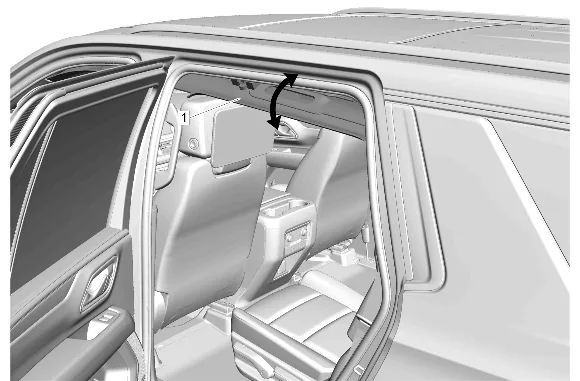
- Lower the headlining trim panel (1).
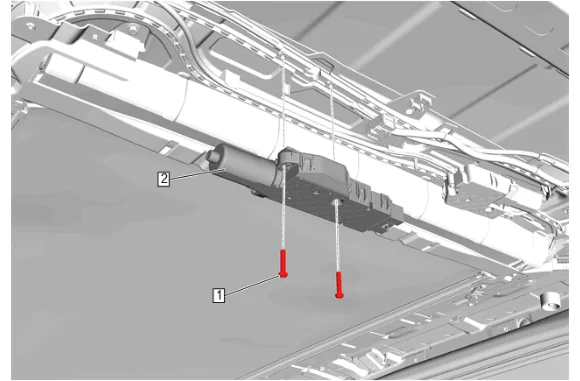
-
Disconnect the electrical connector.
-
Sunroof Actuator Motor Bolt (1) » Remove [2x]
-
Sunroof Control Module (2) » Remove Installation Procedure
-
Sunroof Control Module (2) » Install
-
If a NEW threaded component is being installed, loosen the adhesive using a metal pick or similar tool before proceeding. If threaded component is reused, prepare the threaded component using the following steps: 2.1. Remove any loose cured adhesive from the external threads of the component using a lint free cloth. 2.2. Thread the cleaned component into the internal mating threads and remove to loosen trapped cured adhesive. 2.3. Remove loose debris from internal and external threads using compressed air. 2.4. Apply liquid thread locking adhesive in a strip along half of the length of the external threads, starting at the tip, just prior to installation. Adhesives, Fluids, Lubricants, and Sealers
-
Sunroof Actuator Motor Bolt (1) » Install and tighten [2x] — Fastener Specifications
-
Connect the electrical connector.
-
Headlining Trim Panel (1) » Install
-
Apply pressure upward on the rear seat position center reading and courtesy lamp (1) to engage the retaining tabs.
-
Coat Hook (2) » Install [2x]
-
Coat Hook Bolt (1) » Install and tighten [2x] — Fastener Specifications
-
Body Lock Pillar Upper Trim Panel (1) » Reposition [2x]
-
Quarter Window Trim Finish Panel Bolt (2) » Install and tighten [2x] — Fastener Specifications
-
Quarter Window Trim Finish Panel Bolt Cap (1) » Install [2x]
-
Center Pillar Upper Trim Panel (3) » Install [2x]
-
Center Pillar Upper Garnish Molding Bolt (2)» Install and tighten [2x] — Fastener Specifications
-
Center Pillar Upper Trim Panel Bolt Cap (1) » Install [2x]
-
Align the retaining clips (2) with the upper and lower trim panels on both sides of the vehicle.
-
Center Pillar Center Trim Panel (1) » Install [2x]
-
Perform the necessary initialization procedure. Sunroof/Sunshade Motor Initialization
-
Enable the SIR System. SIR Disabling and Enabling