Front Disc Brake Pads Replacement (J55)
Single Use Fasteners and Components Front Disc Brake Pad Retaining Spring
- Inspect the fluid level in the brake master cylinder reservoir.
- If the brake fluid level is higher than midway between the maximum-full point and the minimum allowable level, remove brake fluid to the midway point before proceeding.
- If the brake fluid level is midway between the maximum-full point and the minimum allowable level, no brake fluid needs to be removed before proceeding.
- Disconnect the battery negative cable. Battery Negative Cable Disconnection and Connection
- Raise and support the vehicle. Lifting and Jacking the Vehicle
- Remove the front tire and wheel assemblies. Tire and Wheel Removal and Installation
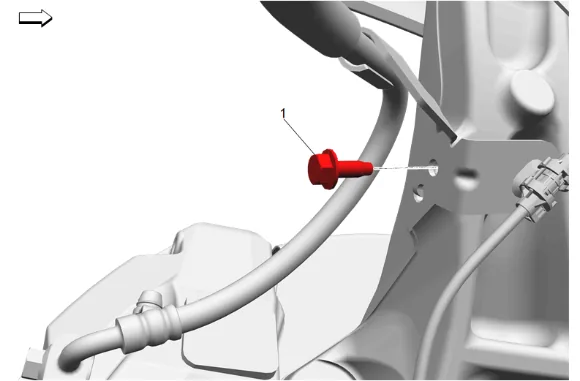
- Front Brake Hose Bracket Bolt (1) » Remove
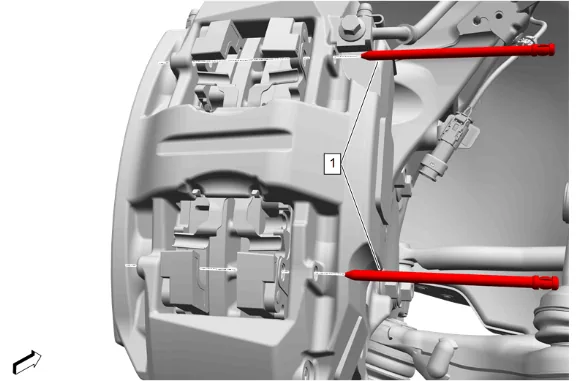
- Front Disc Brake Pad Pin (1) » Remove [2x]
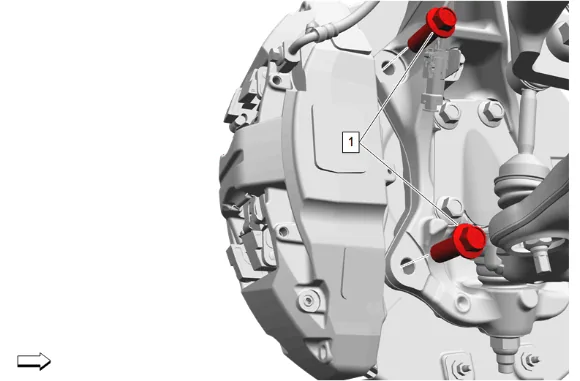
- Front Brake Caliper Bolt (1) » Remove [2x]
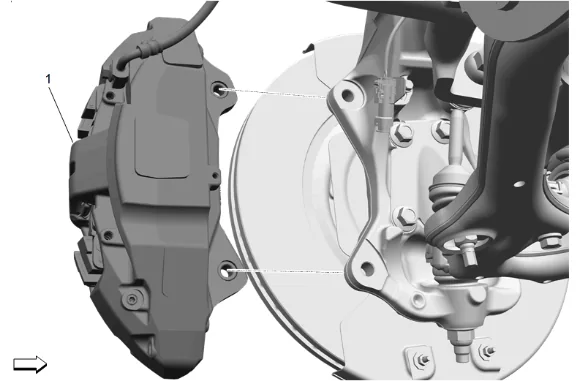
- Remove the brake caliper and support with heavy mechanics wire. (1)
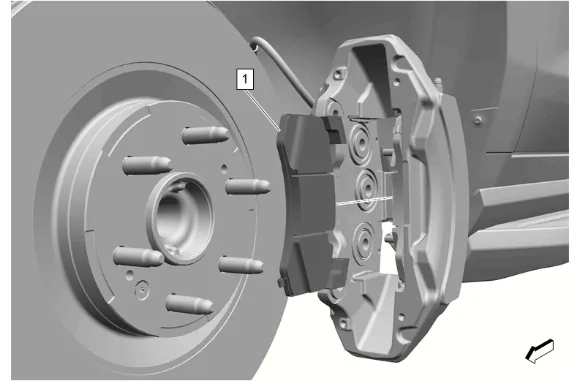
- Front Disc Brake Inner Pad (1) » Remove
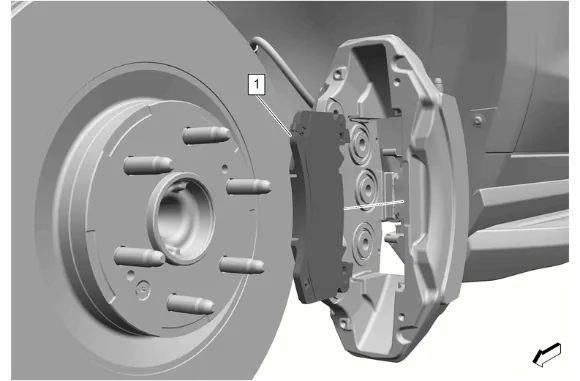
- Front Disc Brake Outer Pad (1) » Remove
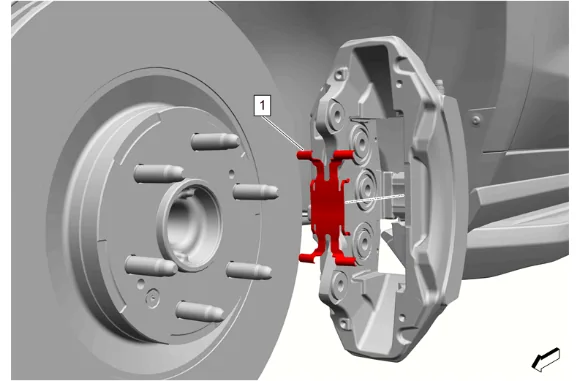
- Front Disc Brake Pad Retaining Spring (1) » Remove and DISCARD Installation Procedure
- Use a suitable tool to compress the front brake caliper pistons into the front brake caliper.
-
Apply approximately 0.09 - 0.15 g (0.003 - 0.005 oz) of anti-seize lubricant to each end of the disc brake pad abutments which contact the brake caliper. Adhesives, Fluids, Lubricants, and Sealers
-
Front Disc Brake Pad Retaining Spring (1) » Install NEW
-
Front Disc Brake Outer Pad (1) » Install
-
Front Disc Brake Inner Pad (1) » Install
-
Front Disc Brake Pad Pin (1) » Install [2x]
-
Front Brake Caliper (1) » Install
-
If NEW threaded components are being installed, loosen the adhesive using a metal pick or similar tool before proceeding. If threaded components are reused, prepare the threaded components using the following steps: 8.1. Remove any loose cured adhesive from the external threads of the components using a lint free cloth. 8.2. Thread the cleaned components into the internal mating threads and remove to loosen trapped cured adhesive. 8.3. Apply thread locking adhesive to the external threads of the components. Adhesives, Fluids, Lubricants, and Sealers 8.4. Ensure there are no gaps in the thread locking adhesive once applied to the component.
-
Front Brake Caliper Bolt (1) » Install and tighten [2x] — Fastener Specifications
-
Front Brake Hose Bracket Bolt (1) » Install and tighten — Fastener Specifications
-
Install the front tire and wheel assemblies. Tire and Wheel Removal and Installation
-
With the engine OFF, gradually apply the brake pedal to approximately 2/3 of its travel distance.
-
Slowly release the brake pedal.
-
Wait 15 seconds, then repeat steps 12 - 13 until a firm brake pedal is obtained. This will properly seat the brake caliper pistons and brake pads.
-
Connect the battery negative cable. Battery Negative Cable Disconnection and Connection
-
Fill the brake master cylinder reservoir to the maximum-full level with GM approved brake fluid from a clean, sealed brake fluid container. Brake Master Cylinder Reservoir Filling
-
Burnish the brake pads and rotors. 17.1. Select a smooth road with little or no traffic. 17.2. Accelerate the vehicle to 48 km/h (30 mph).