Rear Suspension 2 or 4 Corner Air Leveling Position Sensor Replacement
Rear Suspension 2 or 4 Corner Air Leveling Position Sensor Replacement Removal Procedure
- Raise and support the vehicle. Lifting and Jacking the Vehicle
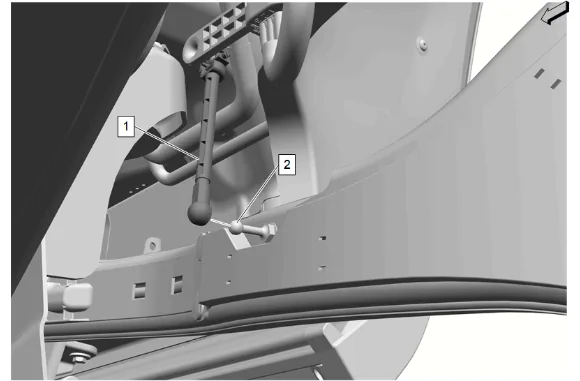
- Disconnect the rear suspension 2 or 4 corner air leveling position sensor link (1) from the electronic suspension position sensor link ball stud (2).
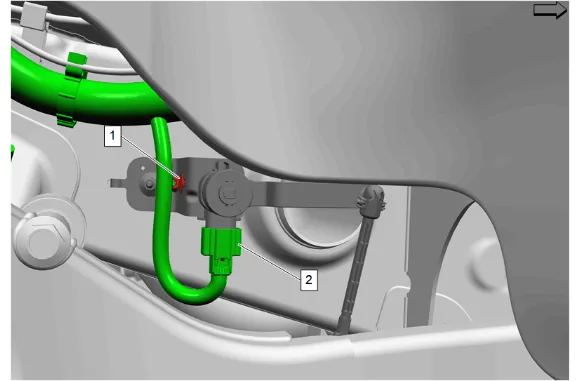
- Wiring Harness Clip (1) » Remove
- Disconnect the electrical connector (2) from the rear suspension 2 or 4 corner air leveling position sensor.
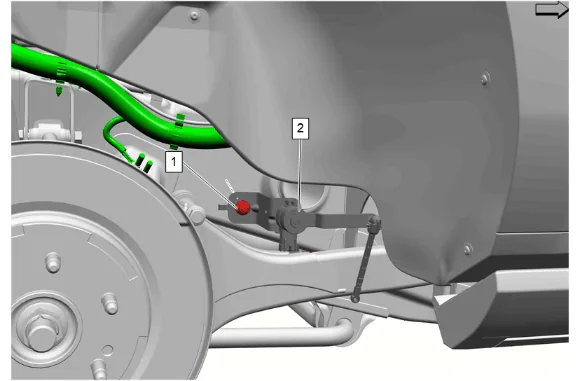
- Loosen the rear suspension 2 or 4 corner air leveling position sensor (1).
- Remove the rear suspension 2 or 4 corner air leveling position sensor (2) from the keyhole slot at the frame. Installation Procedure
- Insert the rear suspension 2 or 4 corner air leveling position sensor (2) into the keyhole slot at the frame.
- Tighten the rear suspension 2 or 4 corner air leveling position sensor (1). Fastener Specifications
- Wiring Harness Clip (1) » Install
- Connect the electrical connector (2) from the rear suspension 2 or 4 corner air leveling position sensor.
- Connect the rear suspension 2 or 4 corner air leveling position sensor link (1) to the electronic suspension rear position sensor link ball stud (2).
- Remove the support and lower the vehicle.
- Clear All Vehicle DTCs
- Perform the automatic level control trim height learn. Automatic Level Control Trim Height Learn