Rear Compartment Lift Window Replacement
Removal Procedure
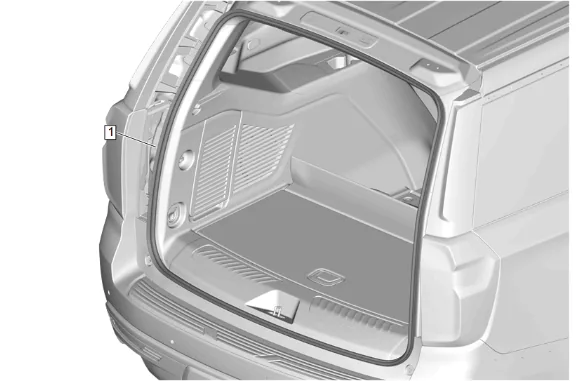
- Open the liftgate.
- Liftgate Weatherstrip (1) » Reposition
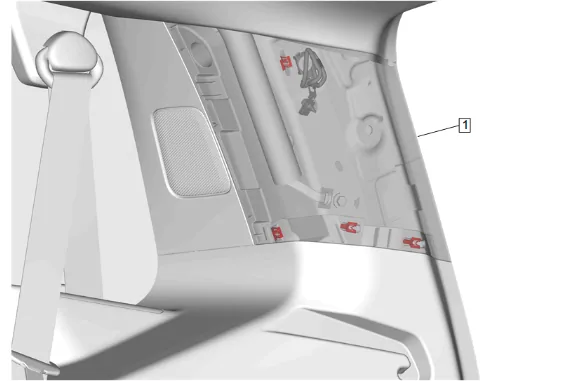
- Using a flat-bladed plastic trim tool, release the retaining clips.
- Pull the body side rear window garnish molding (1) outwards enough to access the tether fastener.
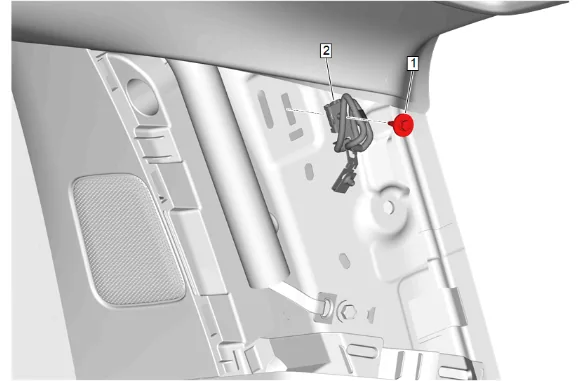
- Body Side Rear Window Garnish Molding Bolt (1) » Remove
- Body Side Rear Window Garnish Molding Tether Retaining Clip (2) » Remove
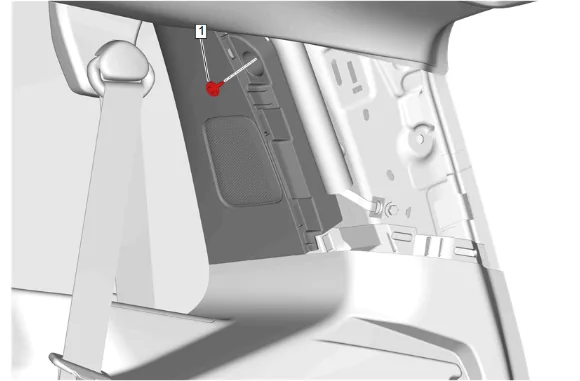
- Body Rear Corner Upper Garnish Molding Bolt (1) » Remove
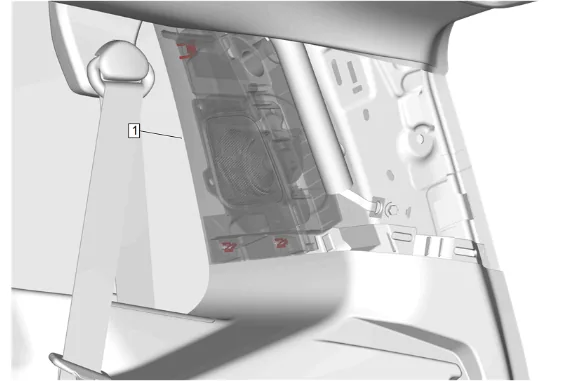
- Using a flat-bladed plastic trim tool, release the retaining clips.
- Body Rear Corner Upper Garnish Molding (1) » Reposition
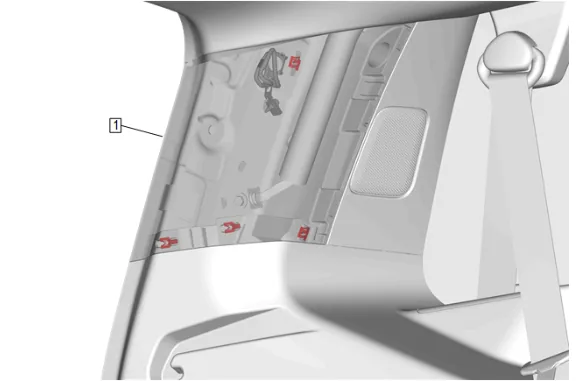
- Using a flat-bladed plastic trim tool, release the retaining clips.
- Pull the body side rear window garnish molding (1) outwards enough to access the tether fastener.
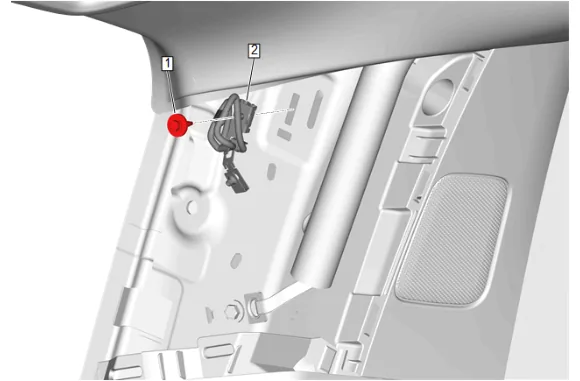
- Body Side Rear Window Garnish Molding Bolt (1) » Remove
- Body Side Rear Window Garnish Molding Tether Retaining Clip (2) » Remove
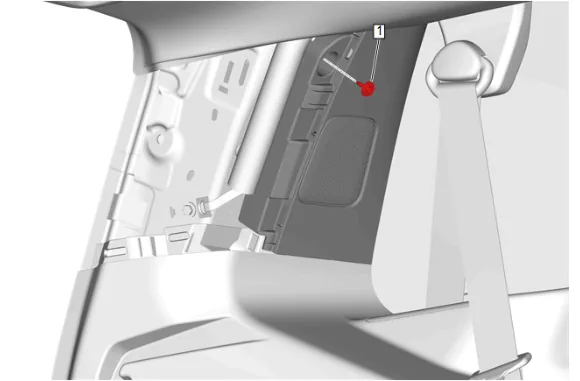
- Body Rear Corner Upper Garnish Molding Bolt (1) » Remove
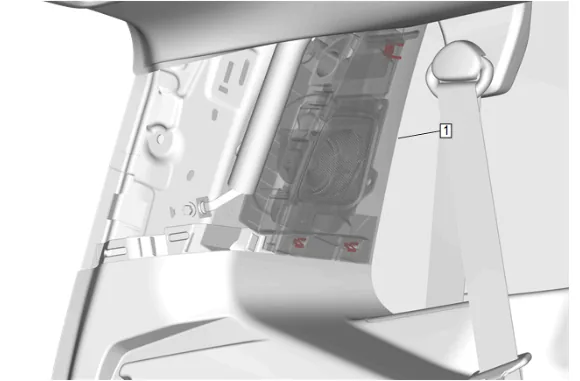
- Using a flat-bladed plastic trim tool, release the retaining clips.
- Body Rear Corner Upper Garnish Molding (1) » Reposition
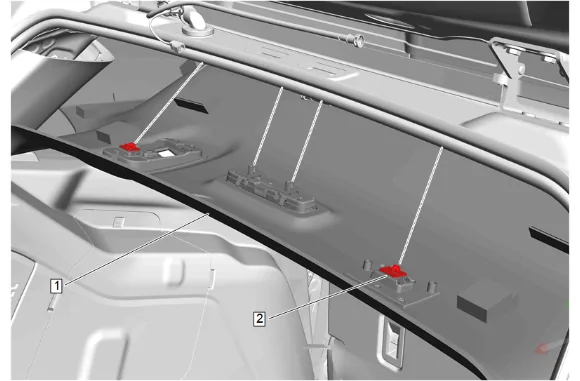
- Lower the headlining trim panel (1).
- Disengage the retaining clips (2) at the rear of the headliner trim panel.
- Disconnect the electrical connectors.
- Rear Window Washer Nozzle Hose Extension » Disconnect
- Disconnect the upper panel grommet from the body of the vehicle.
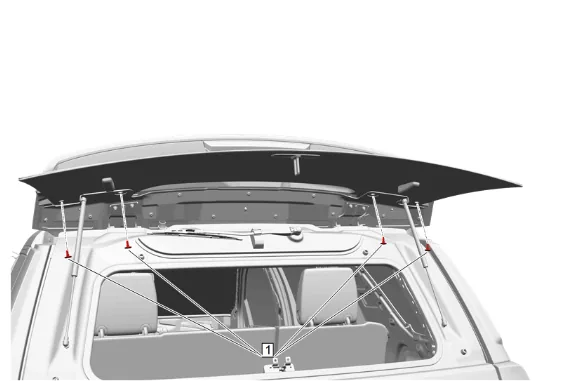
- Close the liftgate.
- Raise the rear compartment lift window.
- Rear End Spoiler Bolt (1) » Remove [4x]
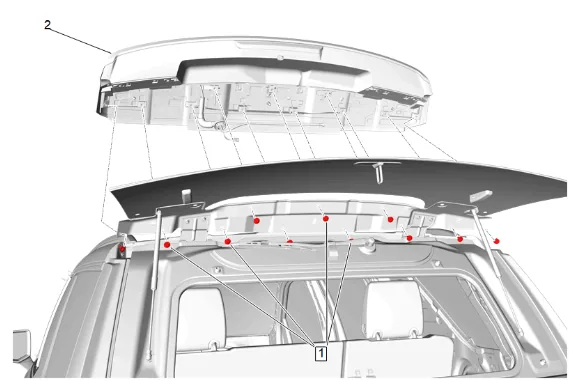
- Rear End Spoiler Bolt (1) » Remove [11x]
- Rear End Spoiler (2) » Remove
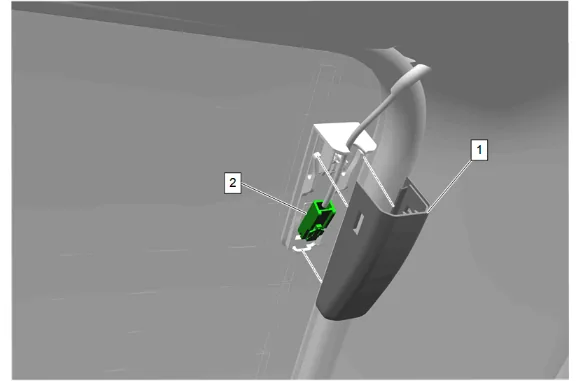
- Rear Window Defroster Electrical Connector Trim Cover (1) » Remove [2x]
- Rear Window Defroster Electrical Connector (2) » Disconnect [2x]
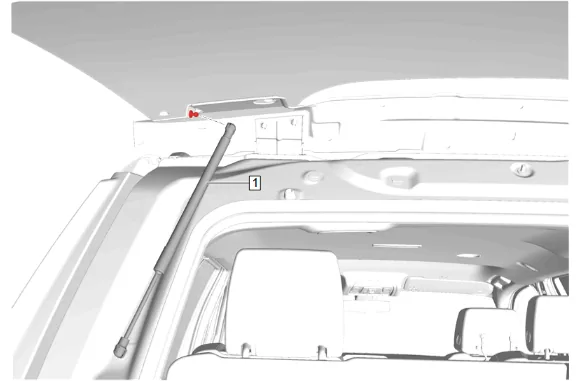
- Remove the rear compartment lift window strut (1) from the rear compartment lift window [2x].
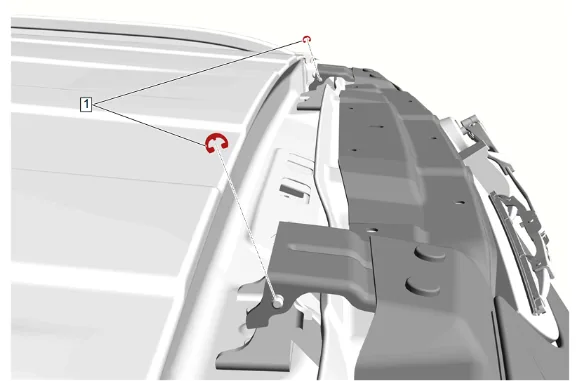
- Remove the liftgate hinge pin retainers (1).
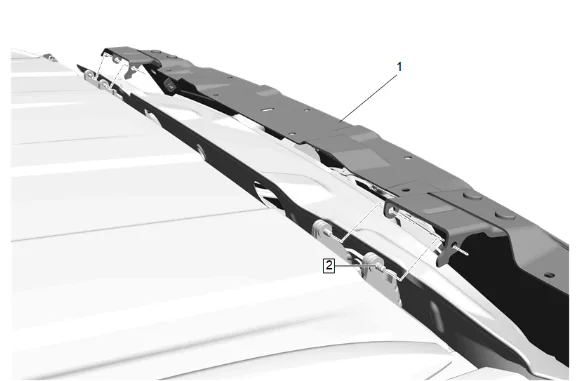
- With aid of assistance, lift and slid the rear compartment lift window (1) to the left side of the vehicle and remove from the hinge pins (2).
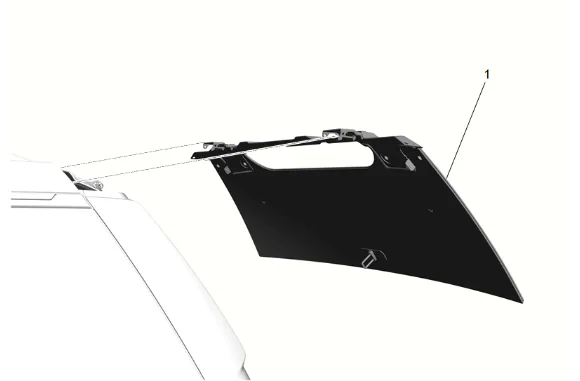
-
Rear Compartment Lift Window (1) » Remove Installation Procedure
-
Rear Compartment Lift Window (1) » Install
-
With aid of assistance, lift and slid the rear compartment lift window (1) to the right and onto the hinge pins (2).
-
Install the liftgate hinge pin retainers (1).
-
Install the rear compartment lift window strut (1) at window [2x].
-
Rear Window Defroster Electrical Connector (2) » Connect [2x]
-
Rear Window Defroster Electrical Connector Trim Cover (1) » Install [2x]
-
Rear End Spoiler (2) » Install
-
Rear End Spoiler Bolt (1) » Install and tighten [11x] — Fastener Specifications
-
Rear End Spoiler Bolt (1) » Install and tighten [4x] — Fastener Specifications
-
Close the rear compartment lid.
-
Open the liftgate.
-
Connect all electrical connectors.
-
Rear Window Washer Nozzle Hose Extension » Connect
-
Connect the liftgate upper panel grommet.
-
Engage the retaining clips (2) at the rear underside of the headlining trim panel (1).
-
Headlining Trim Panel (1) » Install
-
Body Rear Corner Upper Garnish Molding (1) » Reposition
-
Body Rear Corner Upper Garnish Molding Bolt (1) » Install and tighten — Fastener Specifications
-
Body Side Rear Window Garnish Molding Tether Retaining Clip (2) » Install
-
Body Side Rear Window Garnish Molding Bolt (1) » Install and tighten — Fastener Specifications
-
Body Side Rear Window Garnish Molding (1) » Install
-
Body Rear Corner Upper Garnish Molding (1) » Reposition
-
Body Rear Corner Upper Garnish Molding Bolt (1) » Install and tighten — Fastener Specifications
-
Body Side Rear Window Garnish Molding Tether Retaining Clip (2) » Install
-
Body Side Rear Window Garnish Molding Bolt (1) » Install and tighten — Fastener Specifications
-
Body Side Rear Window Garnish Molding (1) » Install
-
Liftgate Weatherstrip (1) » Reposition