Windshield Replacement
Single Use Fasteners and Components Windshield Outside Moisture/Ambient Light and Humidity Sensor Special Tools BO-24402-A Glass Sealant Remover Use a urethane adhesive systems which meet GM Specification GMW 15672. Equivalent regional tools: Special Tools Special Tools J–39822 Wiper Arm Puller Equivalent regional tools: Special Tools
- Disable the SIR system. SIR Disabling and Enabling
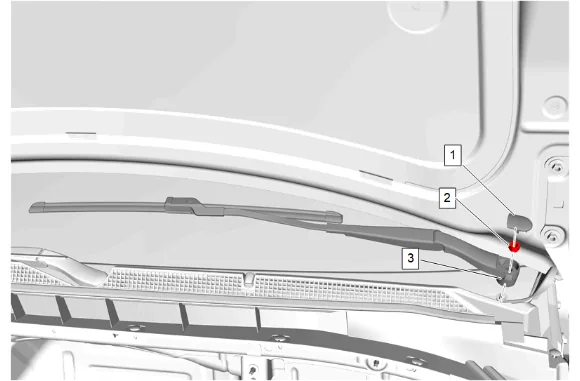
- Using the appropriate trim tool, remove the 2 windshield wiper arm finish caps (1) from both windshield wiper arms (3).
- Windshield Wiper Arm Nut (2) » Remove [2x]
- Use the J–39822 Wiper Arm Puller to remove the wiper arms (3) from the wiper motor pivot shaft.
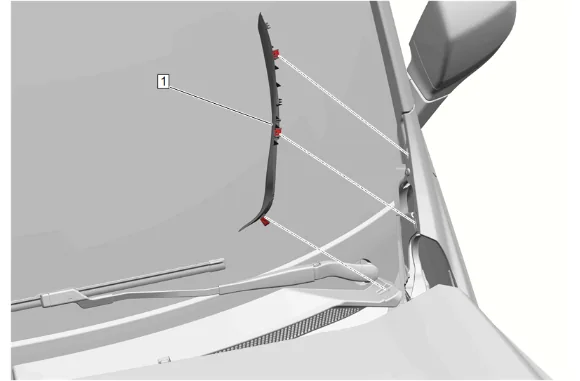
- Apply two layers of masking tape around the top edge of the service part to prevent paint damage.
- Using a suitable plastic trim tool, carefully release the 3 air inlet grille panel extension clips.
- Remove the air inlet grille panel extension (1)» Remove [2x]
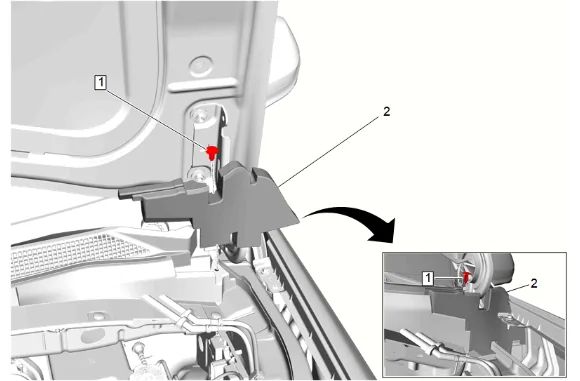
- Hood Rear Outer Air Inlet Seal Retainer (1) » Remove [2x]
- Hood Rear Outer Air Inlet Seal (2) » Remove [2x]
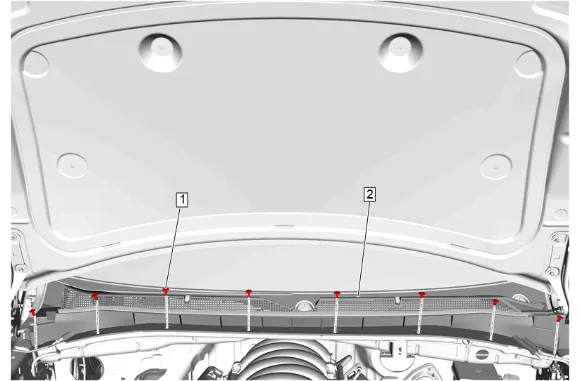
- Air Inlet Grille Panel Retainer (1) » Remove [8x]
- Disconnect the windshield washer nozzle hose from the windshield washer pump hose.
- Lift the front edge of the air inlet grille panel (2) and slide the panel forward from both hood hinges to remove.
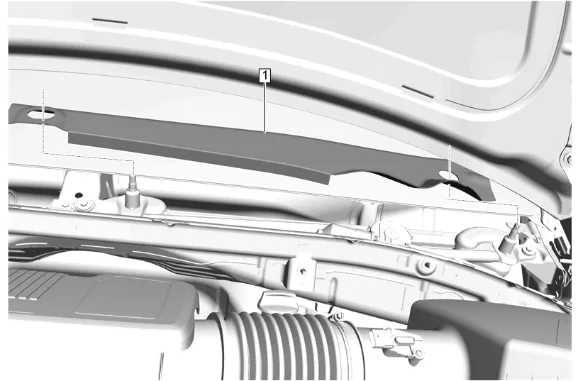
- Windshield Wiper System Module Shield (1) » Remove
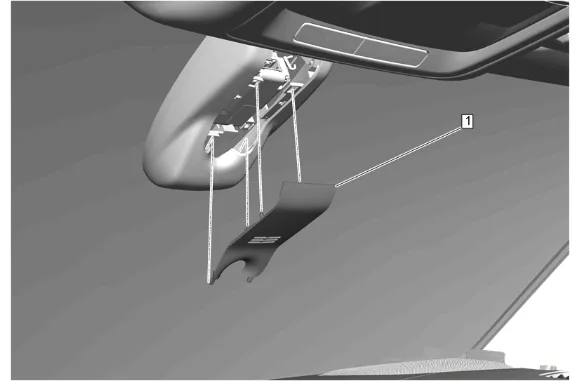
- Windshield Multifunction Sensor Mount Bracket Cover Insert (1) » Remove
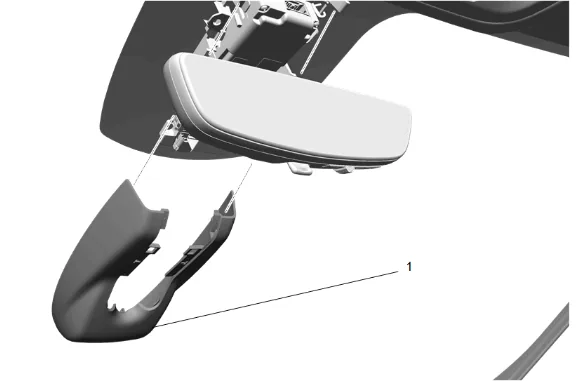
- Windshield Multifunction Sensor Mount Bracket Cover (1) » Remove
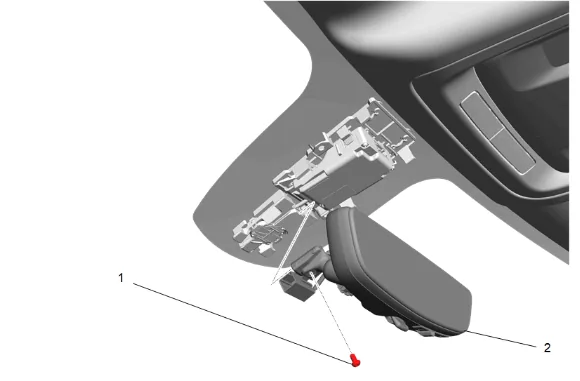
- Inside Rearview Mirror Bolt (1) » Remove
- Inside Rearview Mirror (2) » Remove
- Disconnect the electrical connectors.
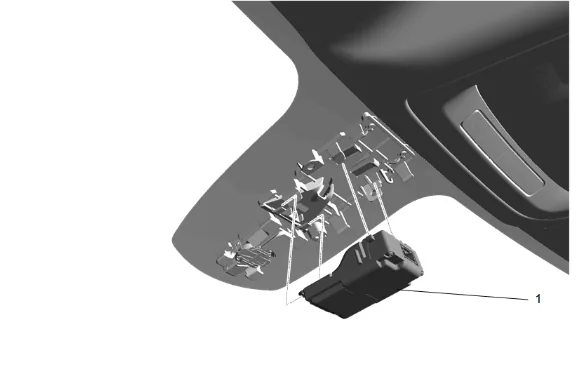
- Disconnect the electrical connector.
- Release the retaining tabs and rotate the front view camera (1) downward and slide the front view camera rearward to release.
- Front View Camera (1) » Remove
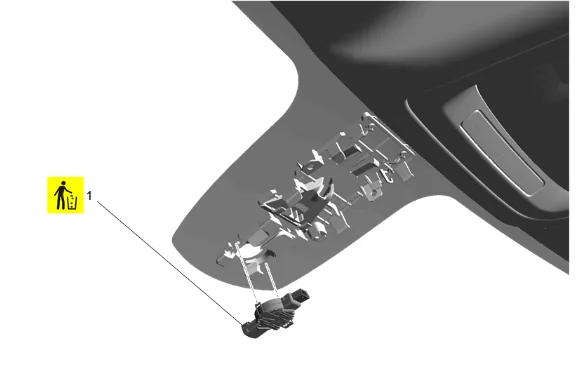
- Windshield Outside Moisture/Ambient Light and Humidity Sensor (1) » Remove and DISCARD
- Disconnect the electrical connector.
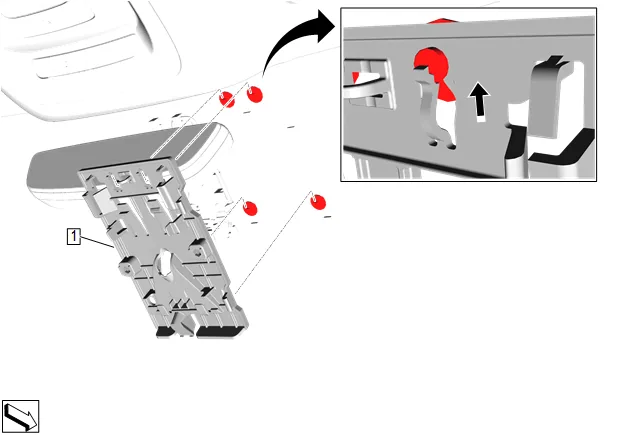
- Release the windshield multifunction sensor mount bracket (1) retaining tabs and slide the bracket upward to disengage the sensor farm pins.
- Gently pull the windshield multifunction sensor mount bracket (1) away from the windshield.
- Cover to protect the following parts from broken glass: Upper Dash Pad The defroster outlets and A/C outlets The seats and carpeting
- { If equipped } Remove the lower windshield supports from the cowl panel.
- { If equipped } Using the appropriate tool, carefully cut around the lace, start in the center working from side to side of the window to access the urethane adhesive bead.
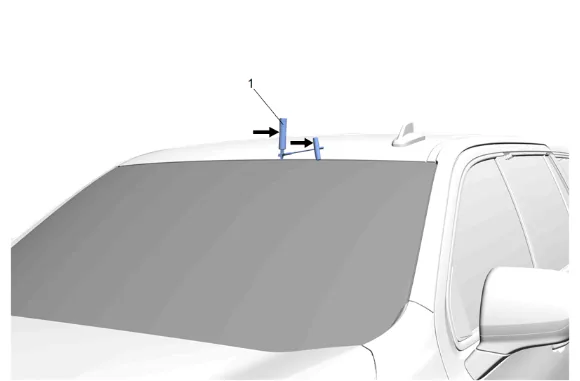
- Use BO-24402-A Glass Sealant Remover (1) to remove the window. Leave a base of urethane on the pinchweld flange. The only suitable lubrication is clear water.
-
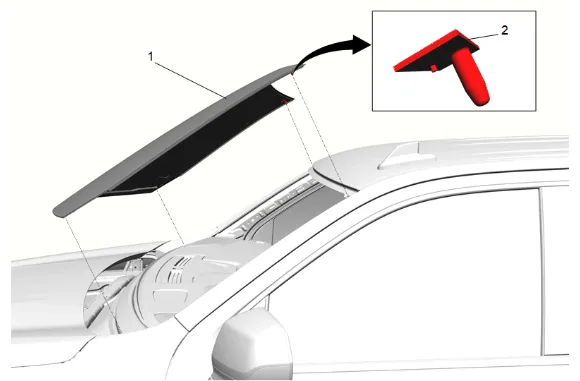
With the aid of an assistant, remove the windshield (1) and locating pin (2) from the vehicle. Installation Procedure
-
Windshield (1) » Install — Adhesive Installation of Windshields
-
With the aid of an assistant, install the windshield (1) and locating pin (2) to the vehicle.
-
Clean the inside of the windshield before installing the windshield multifunction sensor mount bracket (1).
-
Windshield Multifunction Sensor Mount Bracket (1) » Install
-
Windshield Outside Moisture/Ambient Light and Humidity Sensor (1) » Install NEW
-
Connect the electrical connector.
-
Front View Camera (1) » Install
-
Slide the front view camera (1) forward to engage and rotate the front view camera upward and secure the retaining tabs.
-
Connect the electrical connector.
-
Inside Rearview Mirror (2) » Install
-
Inside Rearview Mirror Bolt (1) » Install and tighten — Fastener Specifications
-
Connect the electrical connectors.
-
Windshield Multifunction Sensor Mount Bracket Cover (1) » Install
-
Windshield Multifunction Sensor Mount Bracket Cover Insert (1) » Install
-
Enable the SIR System. SIR Disabling and Enabling
-
Windshield Wiper System Module Shield (1) » Install
-
Air Inlet Grille Panel (2) » Install
-
Connect the windshield washer nozzle hose to the windshield washer pump hose.
-
Air Inlet Grille Panel Retainer (1) » Install [8x]
-
Hood Rear Outer Air Inlet Seal (2) » Install [2x]
-
Hood Rear Outer Air Inlet Seal Retainer (1) » Install [2x]
-
Air Inlet Grille Panel Extension (1) » Install [2x]
-
Remove the masking tape from the top edge of the service part.
-
Using a 50/50 mixture of isopropyl alcohol and clean drinkable water with a clean towel, remove any left over adhesive residue from the masking tape.
-
Clean the left and right side windshield wiper transmission pivot shaft splines with a soft wire brush before installing the windshield wiper arm (3).
-
Windshield Wiper Arm (3) » Install [2x]
-
Windshield Wiper Arm Nut (2) » Install and tighten [2x] — Fastener Specifications
-
Windshield Wiper Arm Finish Cap (1) » Install [2x]
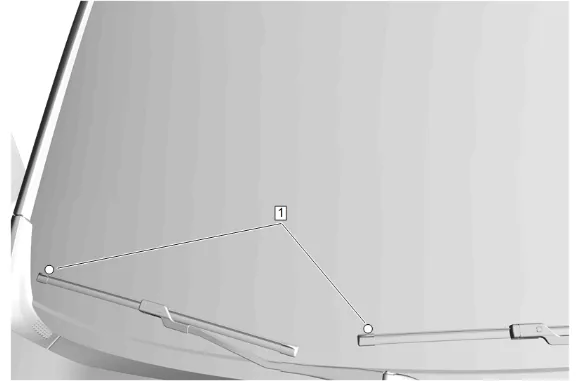
- If required, realign the windshield wipers to their respective alignment circles (1) on the windshield.
- Lubricate the windshield with clean washer fluid.
- Run the windshield wipers for two complete cycles then turn off the windshield wipers.
- Ensure the windshield wipers are in the full park position.