Multimedia Receptacle Replacement (with DCK)
Removal Procedure
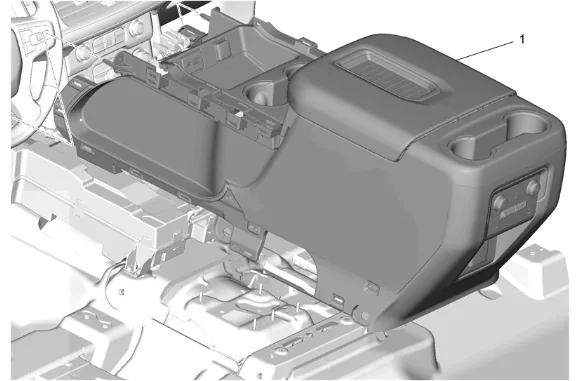
- Front Floor Console » Remove — Front Floor Console Removal and Installation
- Create a work area large enough to lay the front floor console out without damaging the panels.
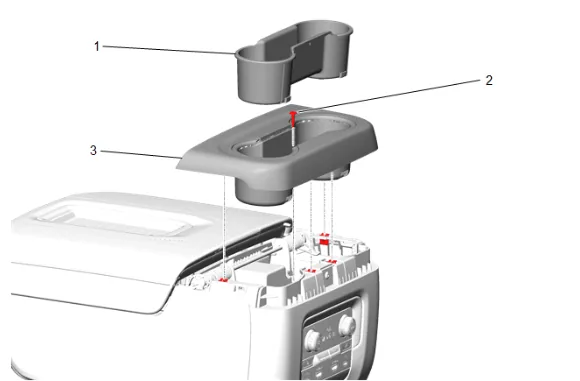
- Front Floor Console Rear Cup Holder Liner (1) » Remove
- Front Floor Console Cup Holder Bolt (2) » Remove
- Using a flat-bladed plastic trim tool, release the retaining clips.
- Front Floor Console Rear Cup Holder (3) » Remove
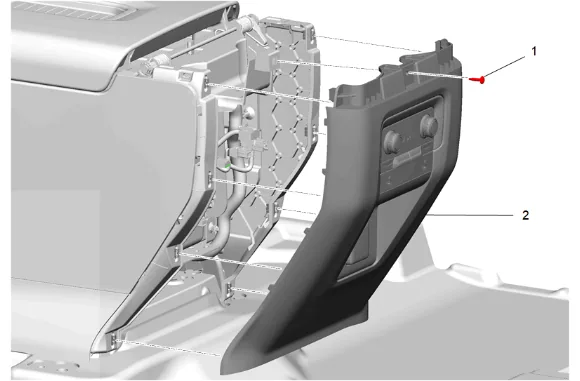
- Front Floor Console Rear Cover Bolt (1) » Remove
- Using a flat-bladed plastic trim tool, release the retaining clips.
- Front Floor Console Rear Trim Panel (2) » Remove
- Disconnect the electrical connectors.
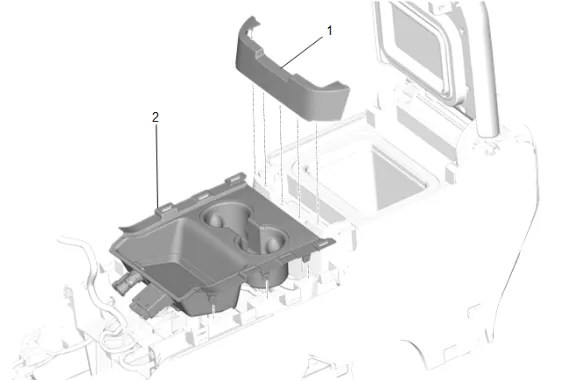
- Using a suitable plastic trim tool, release the retaining tabs.
- Front Floor Rear Console Side Trim Panel (1) » Remove
- Front Floor Console Cup Holder Trim Plate (2) » Remove
- Disconnect the electrical connectors.
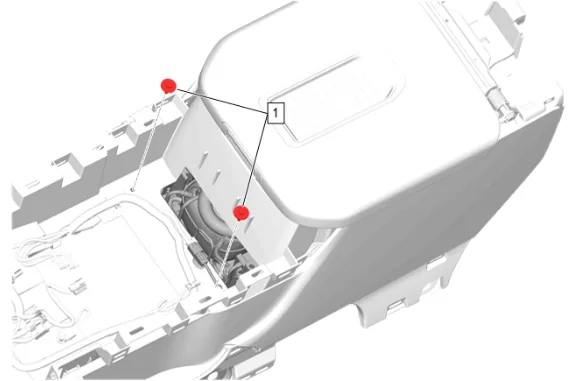
- Front Floor Console Intermediate Bracket Bolt (1) » Remove [2x]
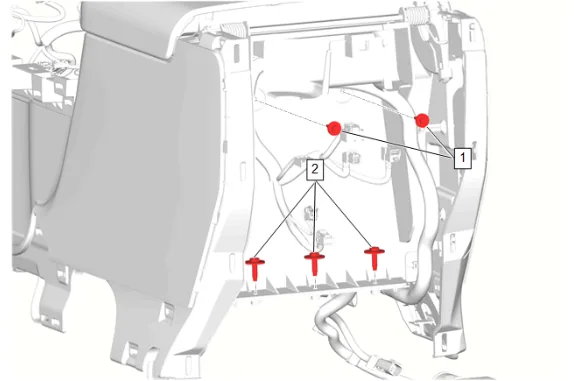
- Front Floor Console Compartment Bolt (1) » Remove [2x]
- Front Floor Console Rear Bracket Bolt (2) » Remove [3x]
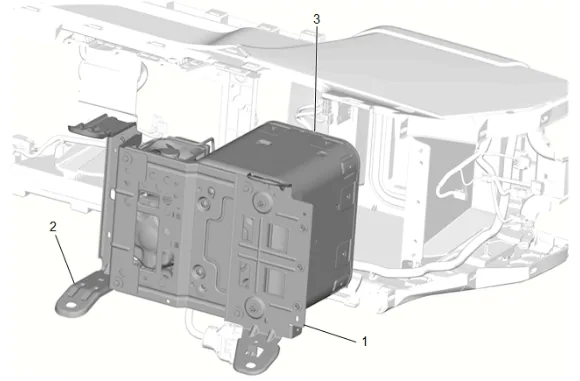
- Disconnect the electrical connector and remove the front floor console bracket (1), front floor console intermediate bracket (2) and front floor console compartment cooler (3) as an assembly.
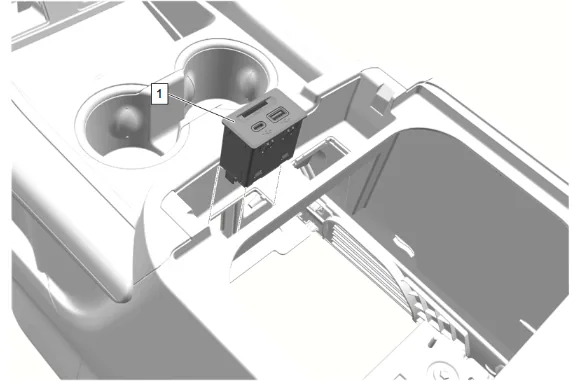
-
Open the front floor console armrest.
-
Disconnect the electrical connector.
-
Release the retaining tabs.
-
Multimedia Receptacle (1) » Remove Installation Procedure
-
Multimedia Receptacle (1) » Install
-
Secure the retaining tabs.
-
Connect the electrical connector.
-
Close the front floor console armrest.
-
Install front floor console bracket (1), front floor console intermediate bracket (2) and front floor console compartment cooler (3) as an assembly into the front floor console and connect the electrical connector.
-
Front Floor Console Compartment Bolt (1) » Install and tighten [2x] — Fastener Specifications
-
Front Floor Console Rear Bracket Bolt (2) » Install and tighten [3x] — Fastener Specifications
-
Front Floor Console Intermediate Bracket Bolt (1) » Install and tighten [2x] — Fastener Specifications
-
Connect the electrical connectors.
-
Front Floor Console Cup Holder Trim Plate (2) » Install
-
Front Floor Rear Console Side Trim Panel (1) » Install
-
Connect the electrical connectors.
-
Front Floor Console Rear Trim Panel (2) » Install
-
Front Floor Console Rear Cover Bolt (1) » Install and tighten — Fastener Specifications
-
Front Floor Console Rear Cup Holder (3) » Install
-
Front Floor Console Cup Holder Bolt (2) » Install and tighten — Fastener Specifications
-
Front Floor Console Rear Cup Holder Liner (1) » Install
-
Front Floor Console » Install — Front Floor Console Removal and Installation
-
Perform the necessary programming and setup procedure: Control Module References