Charge Air Cooler Replacement
Removal Procedure
- Drain the charge air cooling system. Charge Air Cooling System Draining and Filling
- Oil Filler Cap » Remove
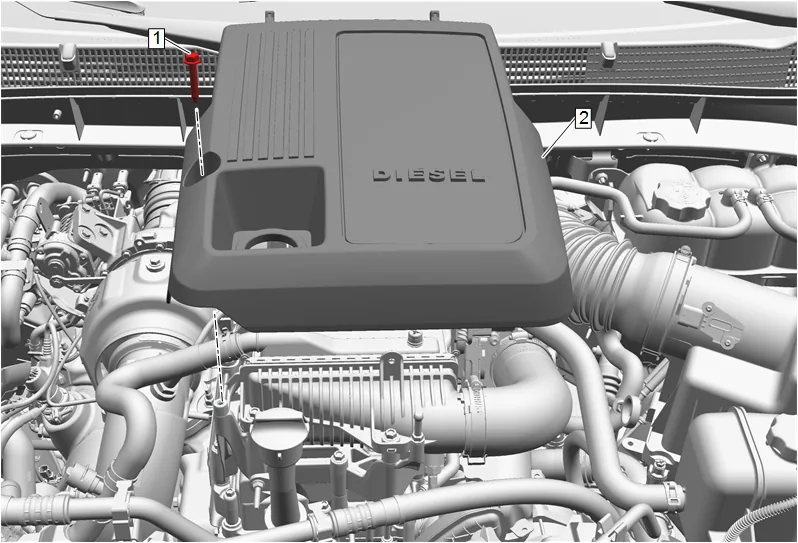
- Intake Manifold Cover Bolt (1) » Remove
- Intake Manifold Cover (2) » Remove
- Install the oil filler cap after removal of the intake manifold cover to prevent debris from falling into the engine.
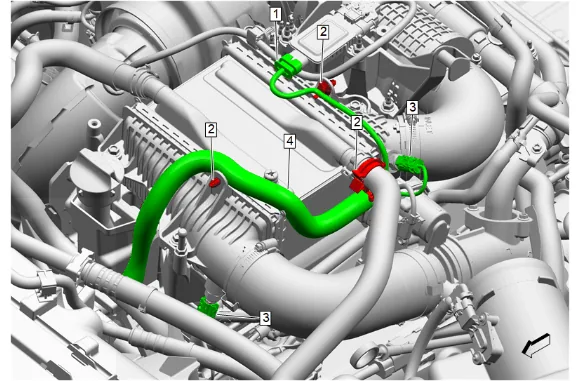
- Electrical Connector (1) @ Nitrogen Oxides Sensor » Disconnect
- Wiring Harness Retainer (2) @ Charge Air Cooler » Remove [3x]
- Electrical Connector (3) @ Charge Air Cooler » Disconnect [2x]
- Engine Wiring Harness (4) » Position aside
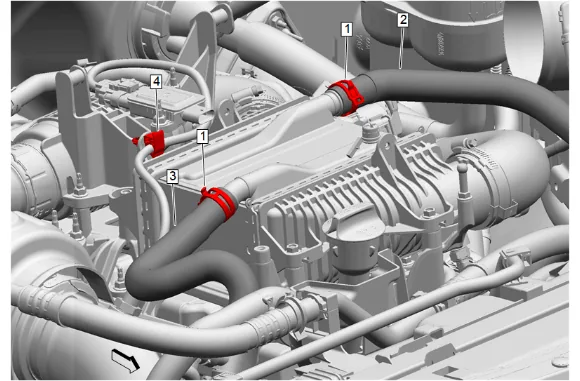
- Hose Clamp (1) » Disengage [2x] — Hose Clamp Replacement Guidelines - Spring Type
- Charge Air Cooler Coolant Pump Hose (2) @ Charge Air Cooler » Remove
- Charge Air Cooler Coolant Hose (3) @ Charge Air Cooler » Remove
- Wiring Harness Retainer (4) @ Charge Air Cooler » Remove
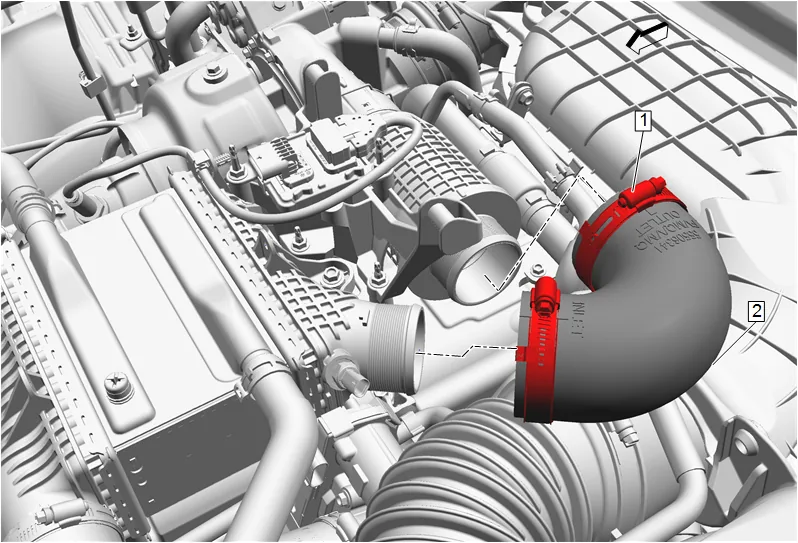
- Charge Air Cooler Inlet Air Hose Clamp (1) » Loosen until disengaged [2x]
- Charge Air Cooler Inlet Air Hose (2) » Remove
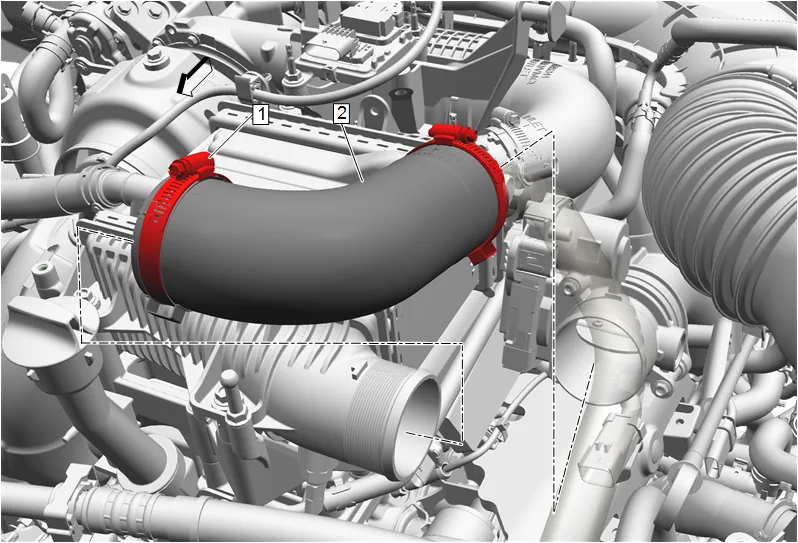
- Charge Air Cooler Outlet Air Hose Clamp (1) » Loosen until disengaged [2x]
- Charge Air Cooler Outlet Air Hose (2) » Remove
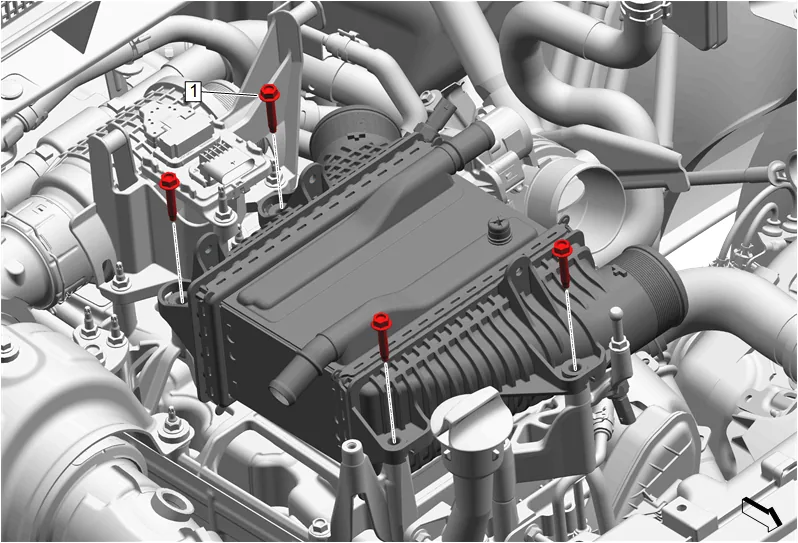
- Charge Air Cooler Bolt (1) » Remove [4x]
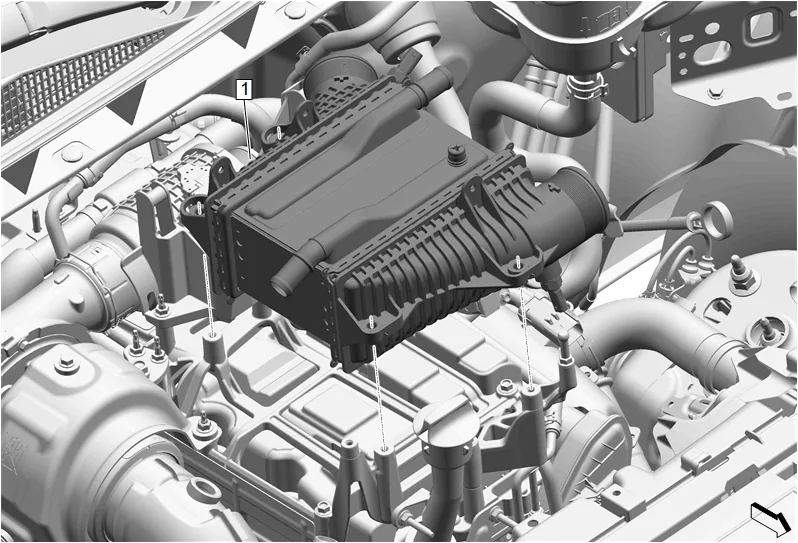
- Charge Air Cooler (1) » Remove
- Remove the injector flow identifier information label, using a heat gun.
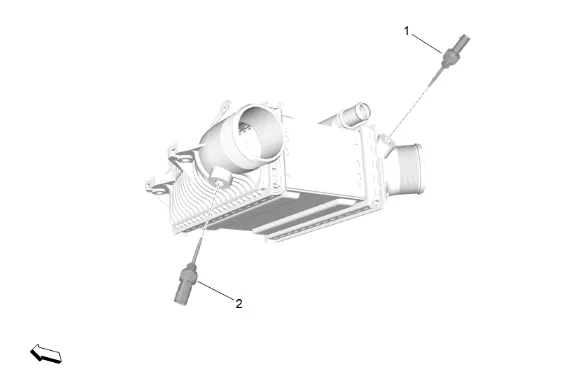
- Charge Air Cooler Air Temperature Sensor (1) » Remove
- Charge Air Temperature Secondary Sensor (2) » Remove Cleaning and Inspection Procedure - Required
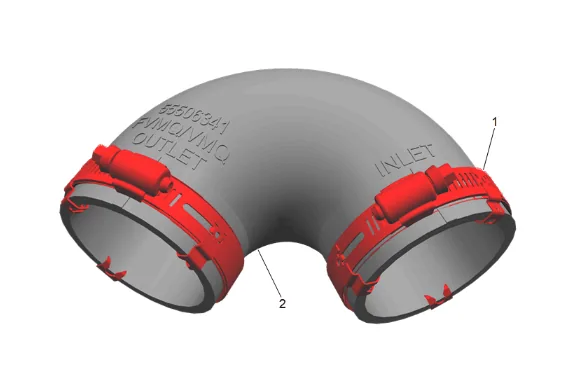
- Inspect the charge air cooler inlet air hose (2): 1.1. Use dish soap and water to clean the inside of the charge air cooler inlet air hose (2). Clean the interior of the hose, and allow to completely dry. Ensure any oil residue is removed from the hose internal interface surfaces. 1.2. Inspect the interior of the charge air cooler inlet air hose (2) for tears or delamination. Replace the hose if damage is found. 1.3. Inspect the charge air cooler inlet air hose clamps (1). Replace the charge air cooler inlet air hose (2) if damage is found or the clamp components are missing.
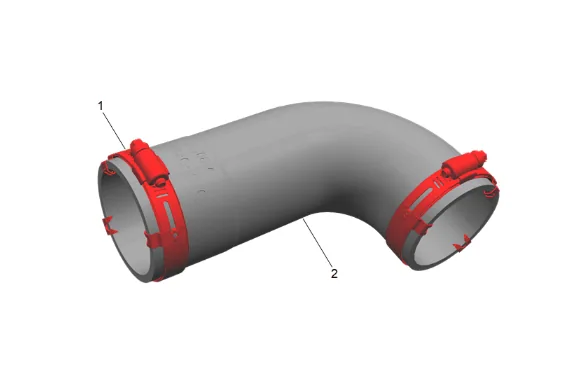
- Inspect the charge air cooler outlet air hose (2): 2.1. Use dish soap and water to clean the inside of the charge air cooler outlet air hose (2). Clean the interior of the hose, and allow to completely dry. Ensure any oil residue is removed from the hose internal interface surfaces. 2.2. Inspect the interior of the charge air cooler outlet air hose (2) for tears or delamination. Replace the hose if damage is found. 2.3. Inspect the charge air cooler outlet air hose clamps (1). Replace the charge air cooler outlet air hose (2) if damage is found or the clamp components are missing. Installation Procedure
-
Charge Air Temperature Secondary Sensor (2) » Install and tighten — Fastener Specifications
-
Charge Air Cooler Air Temperature Sensor (1) » Install and tighten — Fastener Specifications
-
Install the injector flow identifier information label.
-
Charge Air Cooler (1) » Install
-
Charge Air Cooler Bolt (1) » Install and tighten [4x] — Fastener Specifications
-
Charge Air Cooler Outlet Air Hose (2) » Install
-
Charge Air Cooler Outlet Air Hose Clamp (1) » Tighten [2x] — Fastener Specifications
-
Charge Air Cooler Inlet Air Hose (2) » Install
-
Charge Air Cooler Inlet Air Hose Clamp (1) » Tighten [2x] — Fastener Specifications
-
Wiring Harness Retainer (4) @ Charge Air Cooler » Install
-
Charge Air Cooler Coolant Hose (3) @ Charge Air Cooler » Install
-
Charge Air Cooler Coolant Pump Hose (2) @ Charge Air Cooler » Install
-
Hose Clamp (1) » Engage [2x] — Hose Clamp Replacement Guidelines - Spring Type
-
Engine Wiring Harness (4) » Reposition
-
Wiring Harness Retainer (2) @ Charge Air Cooler » Install [3x]
-
Electrical Connector (3) @ Charge Air Cooler » Connect [2x]
-
Electrical Connector (1) @ Nitrogen Oxides Sensor » Connect
-
Oil Filler Cap » Remove
-
Intake Manifold Cover (2) » Install
-
Intake Manifold Cover Bolt (1) » Install and tighten — Fastener Specifications
-
Oil Filler Cap » Install
-
Fill the charge air cooling system and inspect for leaks. Charge Air Cooling System Draining and Filling