Transmission Fluid Cooler Inlet and Outlet Pipe Replacement (L84, L87, 2WD with RC1)
Transmission Fluid Cooler Inlet and Outlet Pipe Replacement (L84, L87, 2WD with RC1) Single Use Fasteners and Components Air Conditioning Compressor and Condenser Hose Seal [2x] Transmission Fluid Cooler Pipe Fitting Seal [2x] Transmission Fluid Cooler Seal Removal Procedure
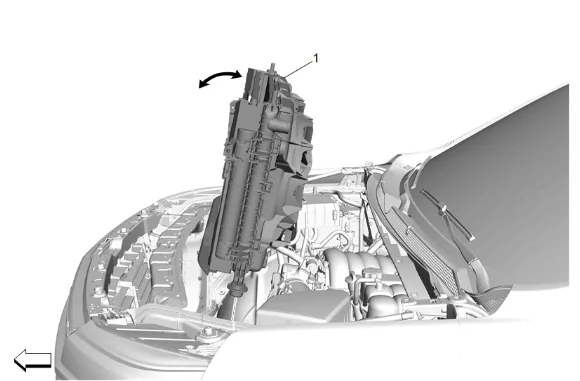
- Remove the condenser, fan, and radiator assembly (1). Condenser, Fan, and Radiator Assembly Removal and Installation
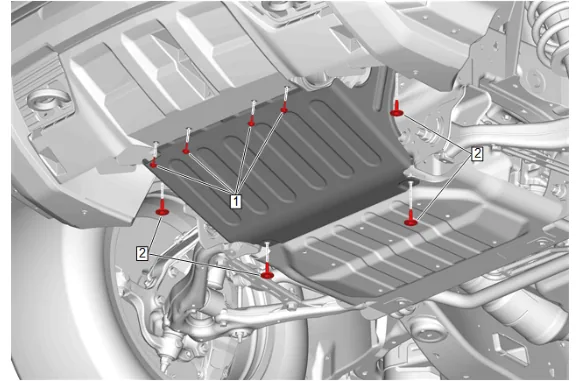
- Front Bumper Fascia Skid Plate Bolt (1) » Remove [4x]
- Underbody Splash Shield Bolt (2) » Remove [4x]
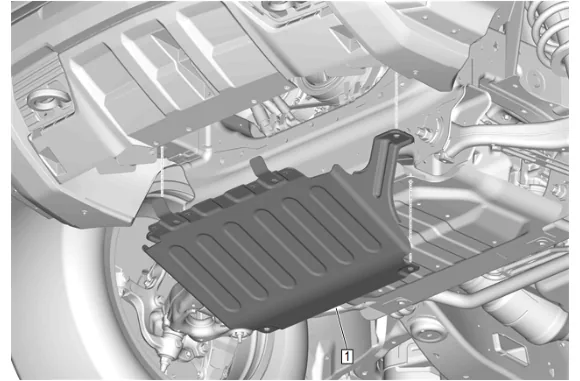
- Underbody Splash Shield (1) » Remove
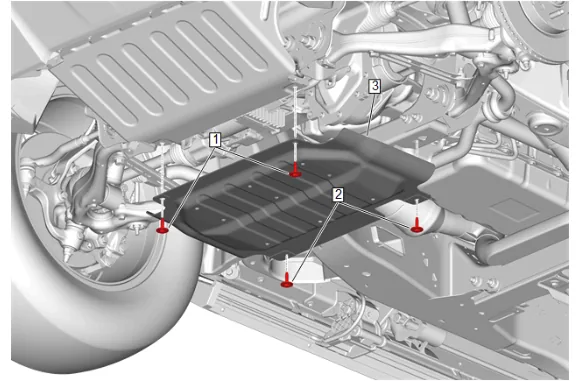
- Underbody Splash Shield Bolt (2) » Remove [2x]
- Underbody Skid Shield (3) » Remove
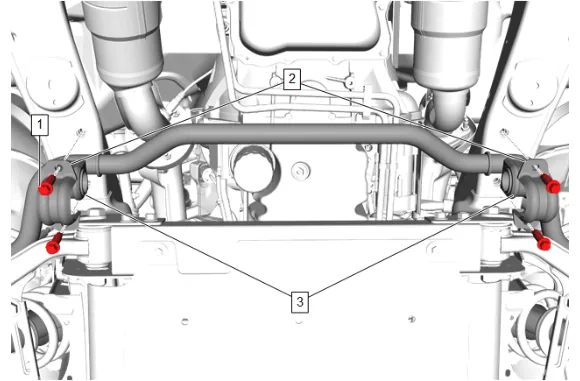
- Front Stabilizer Shaft Bolt (1) » Remove [4x]
- Front Stabilizer Shaft Clamp (2) » Remove [2x]
- Front Stabilizer Shaft Insulator (3) » Remove [2x]
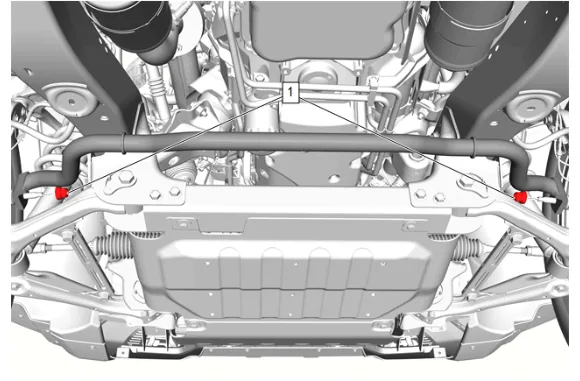
- Front Stabilizer Shaft Link Nut - Upper (1) @ Front Stabilizer Shaft » Remove [2x]
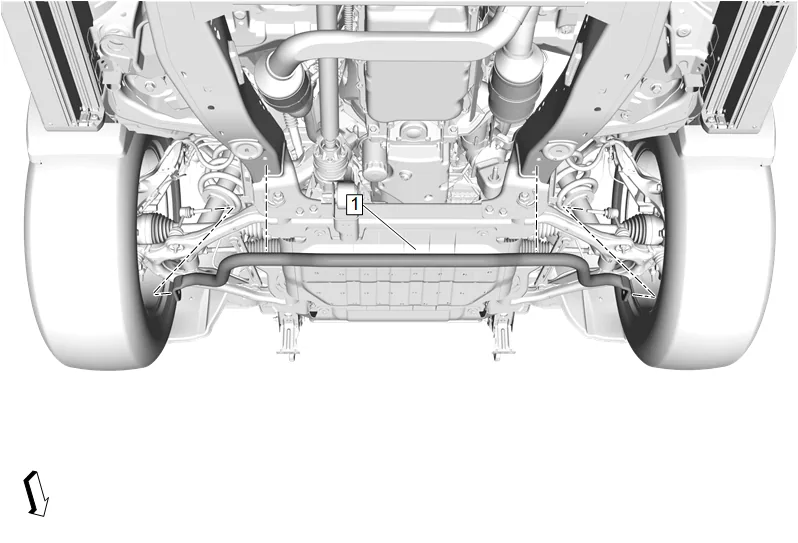
- Front Stabilizer Shaft (1) » Remove
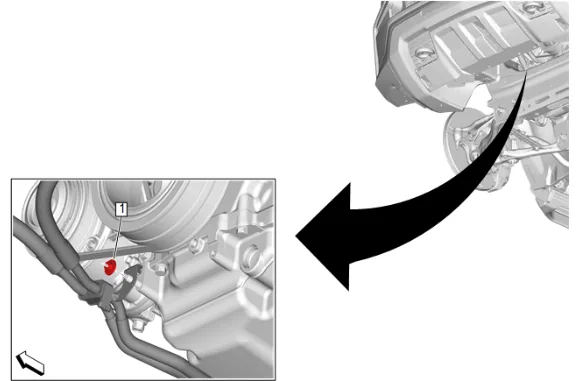
- Remove the transmission fluid auxiliary cooler pipe bracket nut (1).
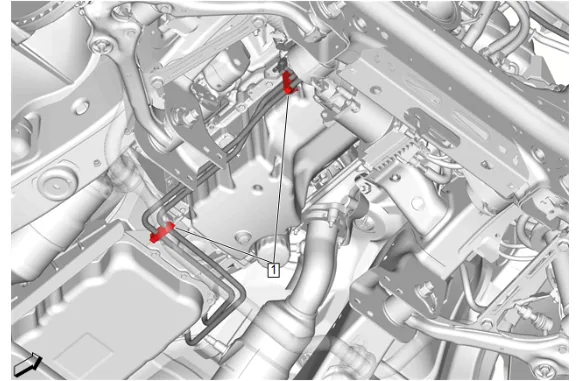
- Transmission Fluid Cooler Pipe Clip (1) » Open [2x]
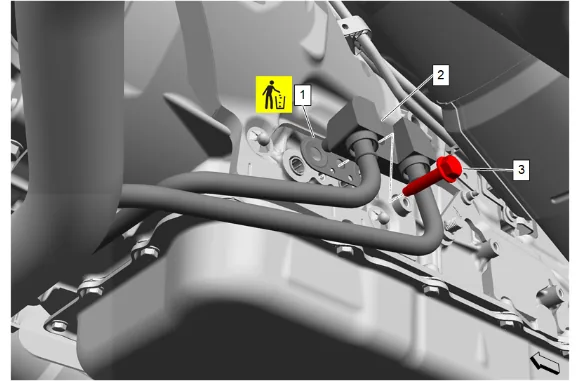
- Remove the transmission fluid cooler pipe connector bolt (3).
- Transmission Fluid Cooler Inlet and Outlet Pipe (2) @ Transmission » Remove
- Transmission Fluid Cooler Seal (1) » Remove and DISCARD
- Cap the fittings and plug the holes when removing the transmission fluid cooler pipes.
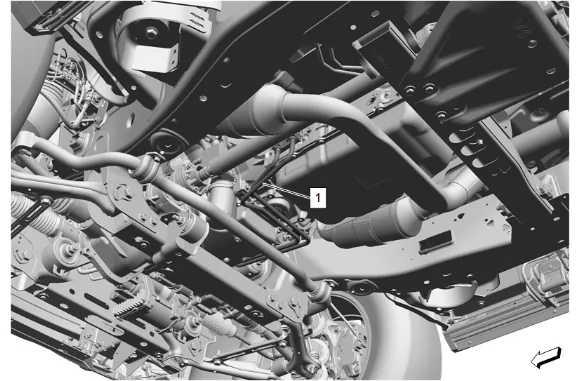
-
Maneuver the transmission cooler inlet and outlet pipe (1) as necessary to remove from under the vehicle. Installation Procedure
-
Maneuver the transmission cooler inlet and outlet pipe (1) as necessary to install.
-
Transmission Fluid Cooler Seal (1) » Install NEW
-
Transmission Fluid Cooler Inlet and Outlet Pipe (2) @ Transmission » Install
-
Install and tighten the transmission fluid cooler pipe connector bolt (3). Fastener Specifications
-
Transmission Fluid Cooler Pipe Clip (1) » Close [2x]
-
Install and tighten the transmission fluid auxiliary cooler pipe bracket nut (1). Fastener Specifications
-
Front Stabilizer Shaft (1) » Install
-
Front Stabilizer Shaft Link Nut - Upper (1) @ Front Stabilizer Shaft » Install and tighten [2x] — Fastener Specifications
- Front Stabilizer Shaft Insulator (3) » Install [2x]
- Front Stabilizer Shaft Clamp (2) » Install [2x]
- If NEW threaded components are being installed, loosen the adhesive using a metal pick or similar tool before proceeding. If threaded components are reused, prepare the threaded components using the following steps: 11.1. Remove any loose cured adhesive from the external threads of the components using a lint free cloth. 11.2. Thread the cleaned components into the internal mating threads and remove to loosen trapped cured adhesive. 11.3. Apply thread locking adhesive to the external threads of the components. Adhesives, Fluids, Lubricants, and Sealers 11.4. Ensure there are no gaps in the thread locking adhesive once applied to the component.
- Front Stabilizer Shaft Bolt (1) » Install and tighten [4x] — Fastener Specifications
-
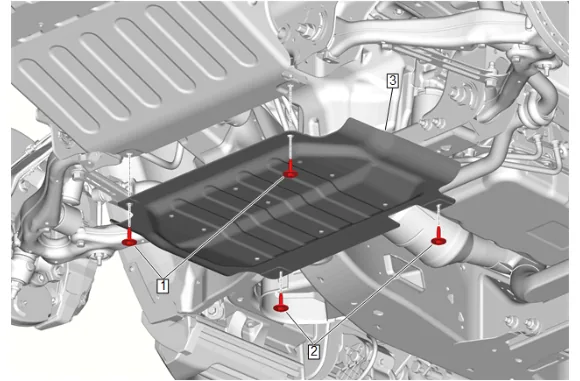
Underbody Skid Shield (3) » Install
-
Underbody Splash Shield Bolt (2) » Install and tighten [2x] — Fastener Specifications
-
Underbody Splash Shield (1) » Install
-
Underbody Splash Shield Bolt (1) » Install and tighten [4x] — Fastener Specifications
-
Underbody Splash Shield Bolt (2) » Install and tighten [4x] — Fastener Specifications
-
Lower the vehicle.
-
Install the condenser, fan, and radiator assembly (1). Condenser, Fan, and Radiator Assembly Removal and Installation
-
Check the transmission fluid level. Transmission Fluid Level and Condition Check