Wiring Systems and Power Management | Diagnostic Information and Procedures | Document ID: 3229275
Coaxial, USB, and LVDS (Low Voltage Differential Signaling) Cable Repairs
The GM Global LVDS and USB and Coaxial (coax) cable repair strategy uses the replacement of cables to
repair vehicle issues. These cables can be found in the Electric Parts Catalogue (EPC) by first identifying the
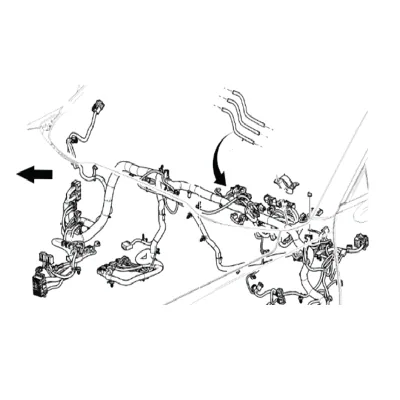
main harness that contains the needed cable and then looking for the cable references in the graphic
Coaxial Cable Repairs — figure 1
Except for cables contained within a hybrid connector (cable plus non-cable circuits), Cables come complete
with cable, terminals and connectors fully assembled. In cases where cable connector bodies are damaged,
the complete cable must be replaced. If the cable is contained within a hybrid connector the replacement
cable assembly will not include the hybrid connector body. Additionally, for Coax only, some cables must be
replaced as an assembly when multiple Coax segments are together as one assembly.
Cable Repair Procedure
Identify the faulty/damaged cable
Identify the type of cable and utilize the Electric Part Catalogue to obtain the correct parts.
Disconnect the faulty/damaged cable connectors at both ends.
Route the cable along the harness, use tie-straps to attach the new service cable to existing harnesses or
brackets.
Reconnect the connectors to the components.
Cut the connectors off of the old cable as close to the harness breakout as possible without damaging the
harness.
Ethernet or Automotive Audio Bus A2B Wiring Repair
The GM Global Ethernet cable repair strategy uses the replacement of cables to repair vehicle issues. These
cables can be found in the Electric Parts Catalogue (EPC) by first identifying the main harness that contains
the needed cable and then looking for the cable references in the graphic
Identify the faulty/damaged Ethernet cable.
Identify the type of cable and utilize the Electric Part Catalogue to obtain the correct parts.
Disconnect the faulty/damaged cable connectors at both ends.
Remove the terminals from both connectors using the proper terminal removal tool.
Overlay the properly twisted pair of wires provided in Ethernet Wiring Repair kit.
Neatly route and secure Ethernet wiring to existing harness taking up the extra length without pinching
or bunching up the wires.
Use felt tape/foam to prevent the cable from rattling, as needed.
Insert terminals into connectors.
Reconnect the connectors to the components.
Cut any replaced wires and/or connectors off of the old cable, as close to the harness breakout as
possible, without damaging the harness.