Rear Floor Mat Replacement
Removal Procedure
- Disable the SIR system. SIR Disabling and Enabling
- Remove the driver and the passenger seats. Front Seat Removal and Installation
- { If equipped } Remove the front center seat. Front Center Seat Removal and Installation
- Remove the rear seats. Rear Seat Removal and Installation
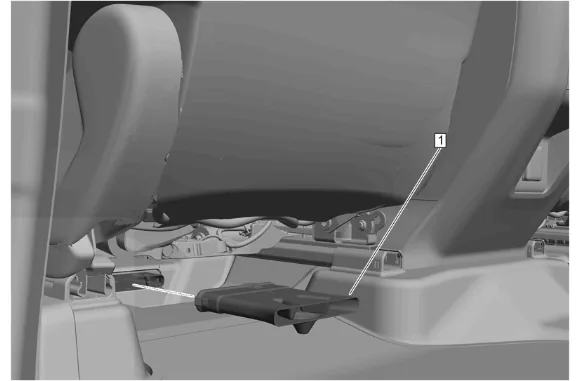
- Floor Rear Air Outlet Duct Adapter - Left Side (1) » Remove
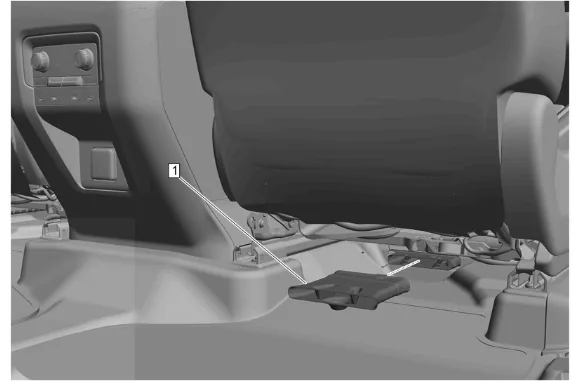
- Floor Rear Air Outlet Duct Adapter - Right Side (1) » Remove
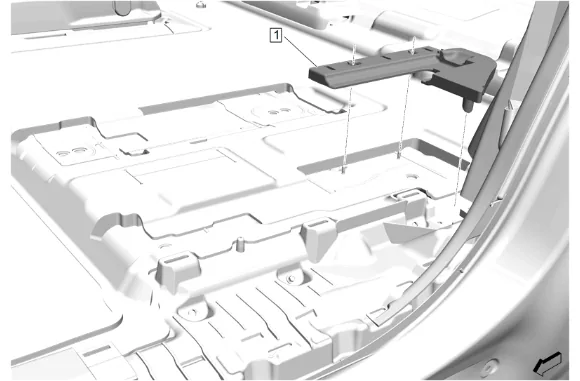
- Rear Seat Floor Filler Trim Panel (1) » Remove [2x]
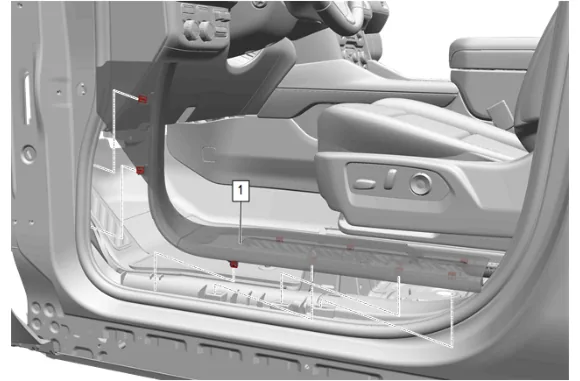
- Use a flat bladed plastic tool to disengage the front side door sill garnish molding retaining clips on both sides of the vehicle.
- Front Side Door Sill Garnish Molding (1) » Remove [2x]
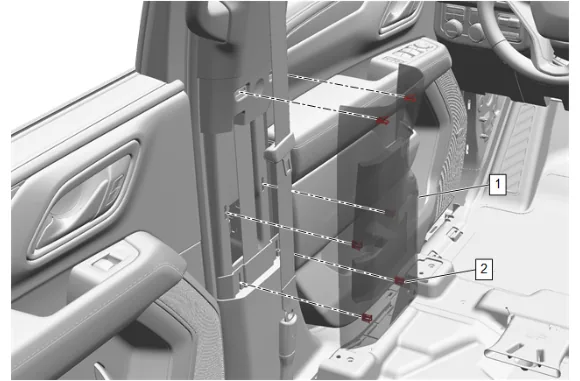
- Use a flat bladed plastic tool between the center pillar center trim panel (1) and the center pillar upper trim panel to disengage the upper retaining clips (2) on both sides of the vehicle.
- Pull from both sides of the center pillar center trim panel (1) to release the middle and lower retaining clips (2) on both sides of the vehicle.
- Center Pillar Center Trim Panel (1) » Remove [2x]
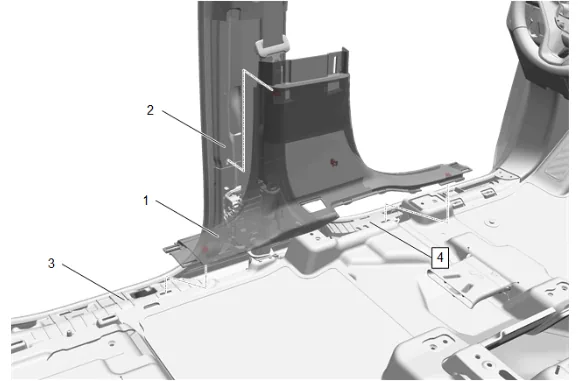
- Remove the center pillar lower guide molding lower hole cover.
- Use a flat bladed plastic tool between the center pillar lower trim panel (1) and the center pillar (2) to disengage retaining clips on both sides of the vehicle.
- Pull upward from the front and rear of the panel to disengage the retaining clips from the rear side door sill trim plate bracket (3) and the front side door sill trim plate bracket (4) on both sides of the vehicle.
- Center Pillar Lower Trim Panel (1) » Reposition [2x]
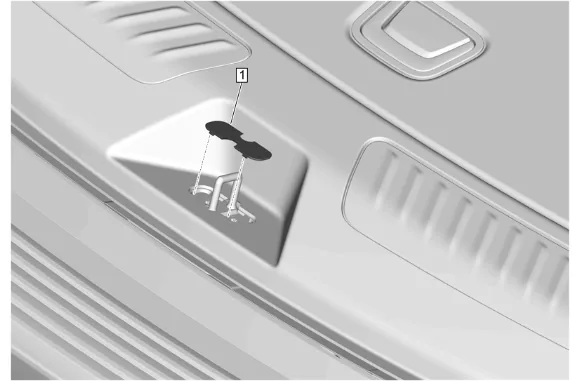
- Liftgate Lock Striker Cover (1) » Remove
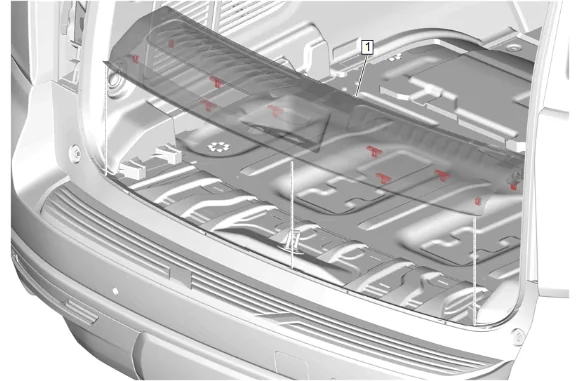
- Using a flat-bladed plastic trim tool, release the retaining clips.
- Rear End Trim Finish Panel (1) » Remove
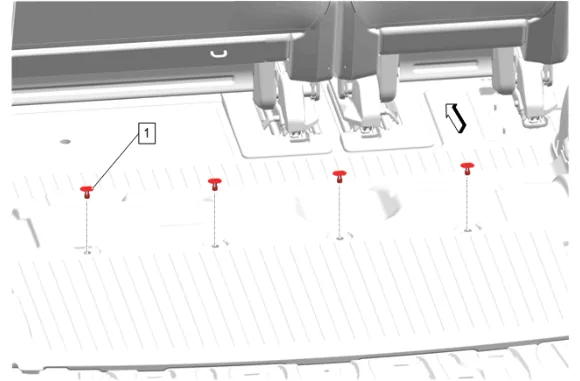
- Rear Compartment Floor Mat Retainer (1) » Remove [4x]
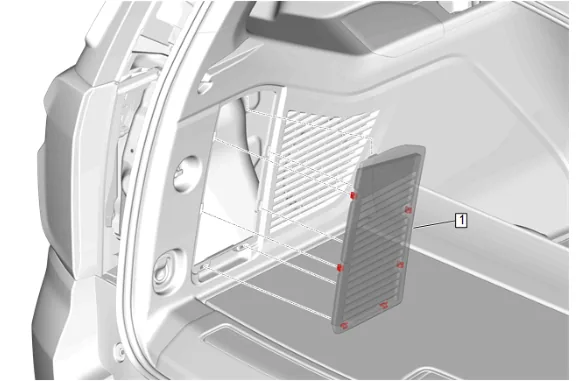
- Use a flat-bladed plastic trim tool to disengage the quarter stowage pocket door (1) and retaining clips.
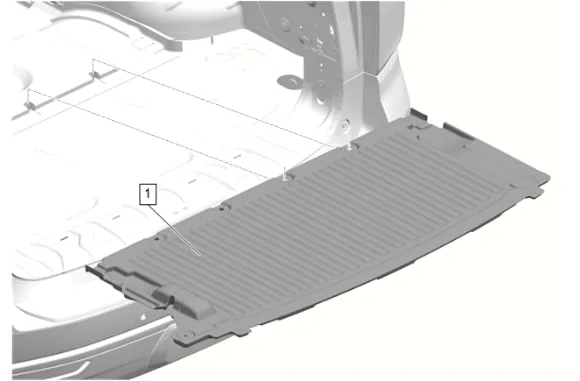
- Reach through the quarter stowage pocket door opening in the quarter lower rear trim panel to release the rear compartment floor mat (1) from the retaining stud under the jack.
- Carefully slide the rear compartment mat (1) out from behind the quarter lower rear trim panels one side at a time.
- Rear Compartment Floor Mat (1) » Remove
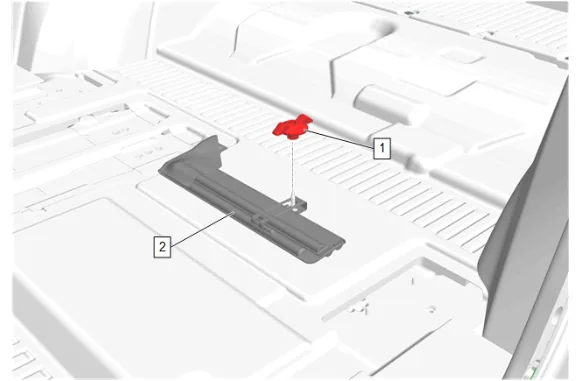
- Tool Stowage Retainer (1) » Remove
- Tool Stowage Bag (2) » Remove
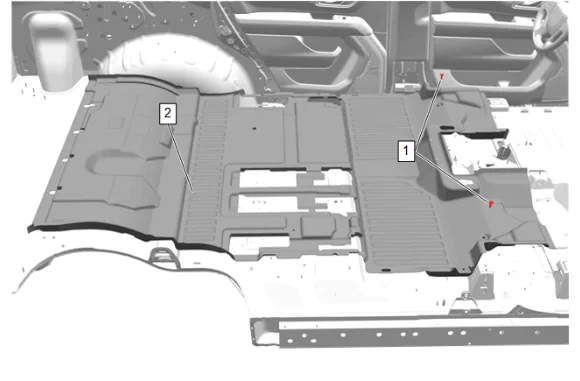
- Floor Carpet Retainer (1) » Remove [2x]
- Carefully slide the rear floor mat (2) out from behind the quarter lower rear trim panels one side at a time.
- Rear Floor Mat (2) » Remove Installation Procedure
-
Rear Floor Mat (2) » Install
-
Carefully slide the rear compartment floor mat (1) under the quarter lower rear trim panels one side at a time.
-
Floor Carpet Retainer (1) » Install [2x]
-
Tool Stowage Bag (2) » Install
-
Tool Stowage Retainer (1) » Install and tighten — Fastener Specifications
-
Rear Compartment Floor Mat (1) » Install
-
Carefully slide the rear compartment floor mat (1) under the quarter lower rear trim panels one side at a time.
-
Reach through the quarter stowage pocket door opening in the quarter lower rear trim panel to secure the rear compartment floor mat (1) on the retaining stud under the jack.
-
Quarter Stowage Pocket Door (1) » Install
-
Rear Compartment Floor Mat Retainer (1) » Install [4x]
-
Rear End Trim Finish Panel (1) » Install
-
Liftgate Lock Striker Cover (1) » Install
-
Center Pillar Lower Trim Panel (1) » Install [2x]
-
Install the center pillar lower guide molding lower hole cover.
-
Center Pillar Center Trim Panel (1) » Install [2x]
-
Front Side Door Sill Garnish Molding (1) » Install [2x]
-
Rear Seat Floor Filler Trim Panel (1) » Install [2x]
-
Floor Rear Air Outlet Duct Adapter - Right Side (1) » Install
-
Floor Rear Air Outlet Duct Adapter - Left Side (1) » Install
-
Install the rear seats. Rear Seat Removal and Installation
-
{ If equipped } Install the front center seat. Front Center Seat Removal and Installation
-
Install the driver and the passenger seats. Front Seat Removal and Installation
-
Enable the SIR System. SIR Disabling and Enabling