Automatic Transmission Case Extension Replacement (2WD)
Automatic Transmission - 10L80 MHS MQC | Repair Instructions - On Vehicle | Document ID: 5596332 Automatic Transmission Case Extension Replacement (2WD) Single Use Fasteners and Components Automatic Transmission Case Extension Seal Removal Procedure
- Raise and support the vehicle. Lifting and Jacking the Vehicle
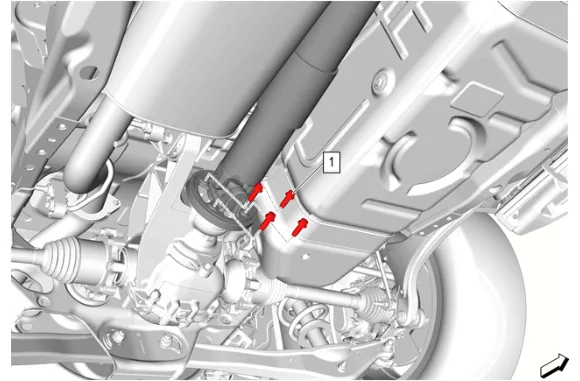
- Rear Propeller Shaft Bolt (1) » Remove [4x]
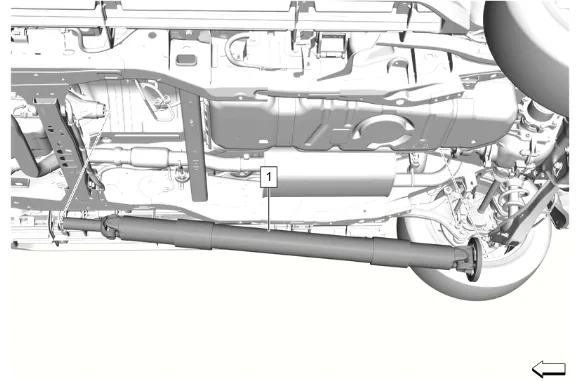
- Propeller Shaft (1) » Remove
- Support the transmission with a suitable jack.
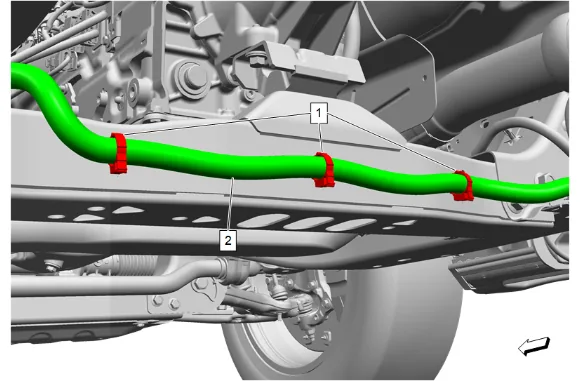
- Remove the wiring harness (2) from the 3 wiring harness retainers (1) and reposition the wiring harness as necessary.
- If replacing the transmission support crossmember, transfer the 3 wiring harness retainers to the new transmission support crossmember.
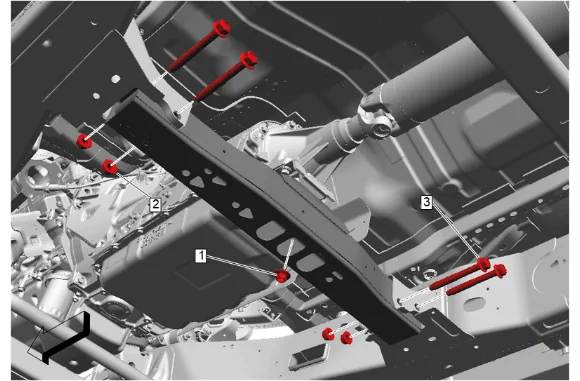
- Transmission Mount Nut (1) » Remove
- Transmission Support Crossmember Nut (2) » Remove [4x]
- Transmission Support Crossmember Bolt (3) » Remove [4x]
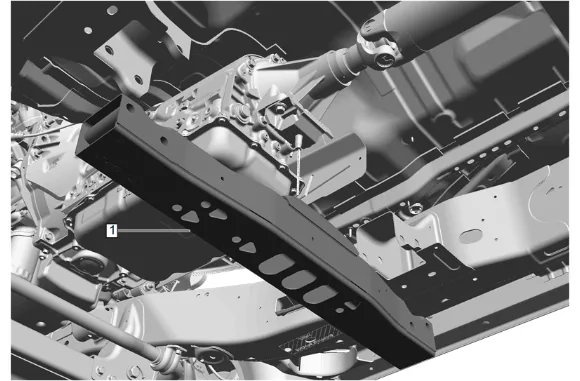
- Transmission Support Crossmember (1) » Remove
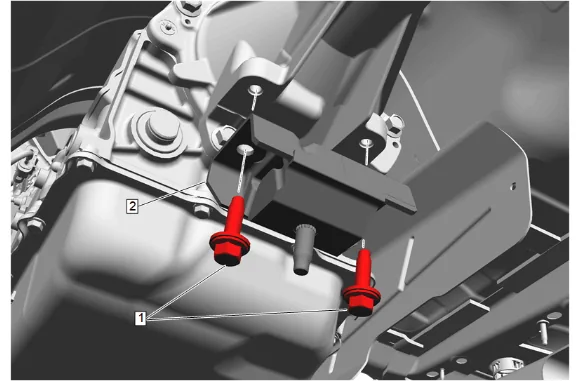
- Transmission Mount Bolt (1) » Remove [2x]
- Transmission Mount (2) » Remove
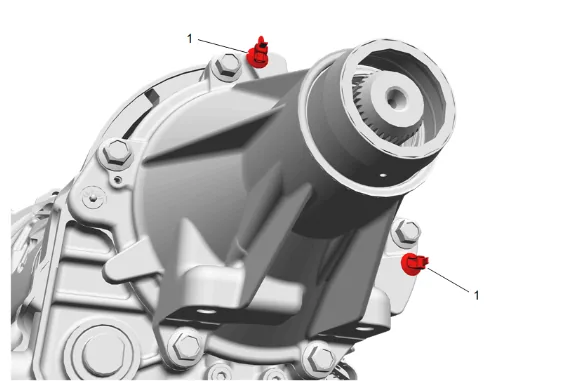
- Remove the 2 wiring harness retainers (1).
-
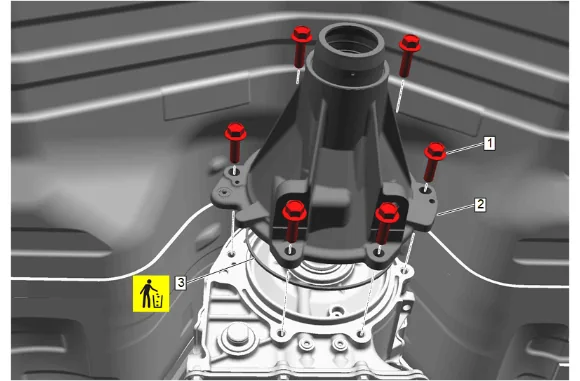
Automatic Transmission Case Extension Bolt (1) » Remove [6x]
-
Automatic Transmission Case Extension (2) » Remove
-
Automatic Transmission Case Extension Seal (3) » Remove and DISCARD Installation Procedure
-
Automatic Transmission Case Extension Seal (3) » Install NEW
-
Lubricate the inner diameter of the transmission output shaft seal with NEW transmission fluid prior to installing the automatic transmission case extension. Adhesives, Fluids, Lubricants, and Sealers
-
Automatic Transmission Case Extension (2) » Install
- Automatic Transmission Case Extension Bolt (1) » Install and tighten in sequence [6x] — Fastener Specifications
-
Install the 2 wiring harness retainers (1).
-
Transmission Mount (2) » Install
-
Transmission Mount Bolt (1) » Install and tighten [2x] — Fastener Specifications
-
Transmission Support Crossmember (1) » Install
-
Transmission Support Crossmember Bolt (3) » Install [4x]
-
Transmission Support Crossmember Nut (2) » Install and tighten [4x] — Fastener Specifications
-
Transmission Mount Nut (1) » Install and tighten — Fastener Specifications
-
Position the wiring harness (2) as necessary then install the harness into the 3 wiring harness retainers (1).
-
Remove the transmission jack.
-
Propeller Shaft (1) » Install
-
If NEW threaded components are being installed, loosen the adhesive using a metal pick or similar tool before proceeding. If threaded components are reused, prepare the threaded components using the following steps: 15.1. Remove any loose cured adhesive from the external threads of the components using a lint free cloth. 15.2. Thread the cleaned components into the internal mating threads and remove to loosen trapped cured adhesive. 15.3. Apply thread locking adhesive to the external threads of the components. Adhesives, Fluids, Lubricants, and Sealers 15.4. Ensure there are no gaps in the thread locking adhesive once applied to the component.
-
Rear Propeller Shaft Bolt (1) » Install and tighten [4x] — Fastener Specifications
-
Lower the vehicle.
-
If necessary, check the transmission fluid level and condition. Transmission Fluid Level and Condition Check