Radio Antenna Amplifier Replacement
Removal Procedure
- Disable the SIR system. SIR Disabling and Enabling
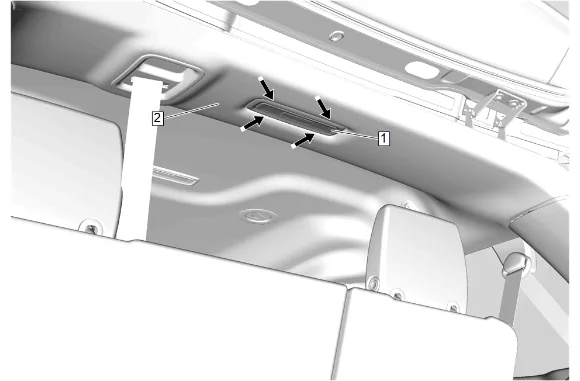
- Insert a suitable flat-bladed plastic trim tool between the cargo center courtesy lamp (1) and headlining trim panel (2).
- Separate the cargo center courtesy lamp (1) from the headlining trim panel (2).
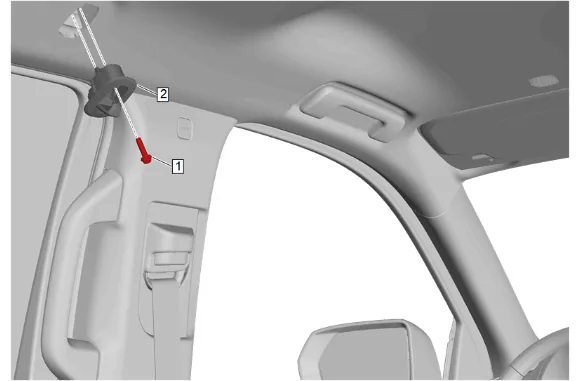
- Place the rear 2 coat hook (2) in the open position.
- Coat Hook Bolt (1) » Remove [2x]
- Coat Hook (2) » Remove [2x]
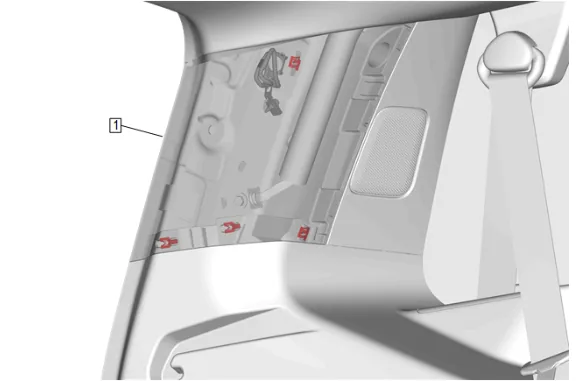
- Using a flat-bladed plastic trim tool, release the retaining clips.
- Pull the body side rear window garnish molding (1) outwards enough to access the tether fastener.
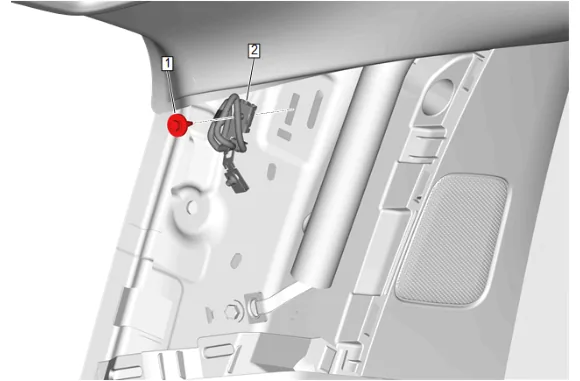
- Body Side Rear Window Garnish Molding Bolt (1) » Remove
- Body Side Rear Window Garnish Molding Tether Retaining Clip (2) » Remove
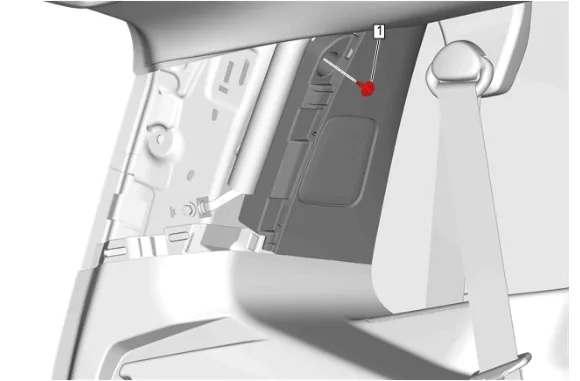
- Body Rear Corner Upper Garnish Molding Bolt (1) » Remove
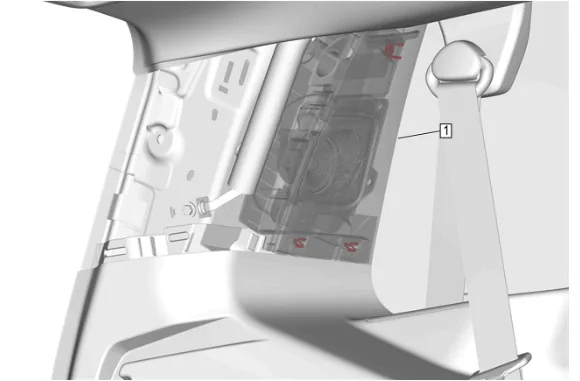
- Using a flat-bladed plastic trim tool, release the retaining clips.
- Body Rear Corner Upper Garnish Molding (1) » Reposition
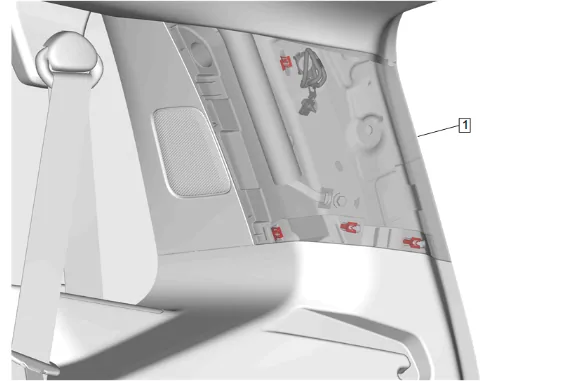
- Using a flat-bladed plastic trim tool, release the retaining clips.
- Pull the body side rear window garnish molding (1) outwards enough to access the tether fastener.
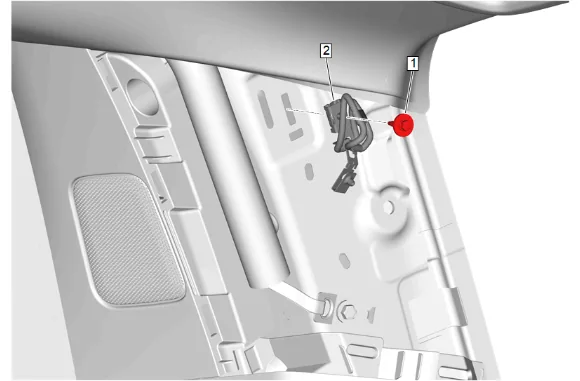
- Body Side Rear Window Garnish Molding Bolt (1) » Remove
- Body Side Rear Window Garnish Molding Tether Retaining Clip (2) » Remove
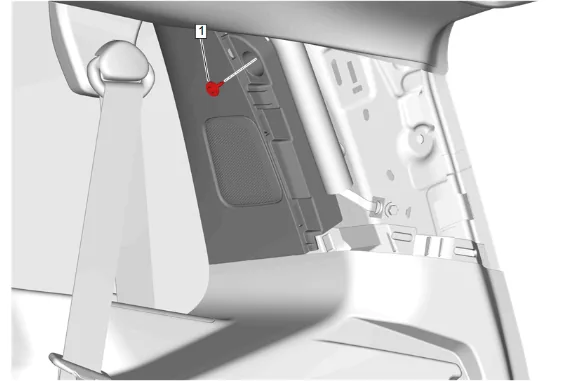
- Body Rear Corner Upper Garnish Molding Bolt (1) » Remove
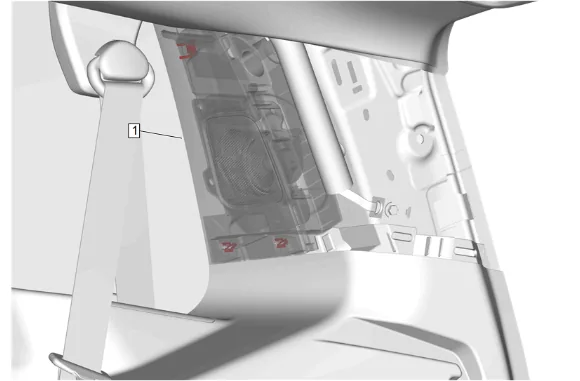
- Using a flat-bladed plastic trim tool, release the retaining clips.
- Body Rear Corner Upper Garnish Molding (1) » Reposition
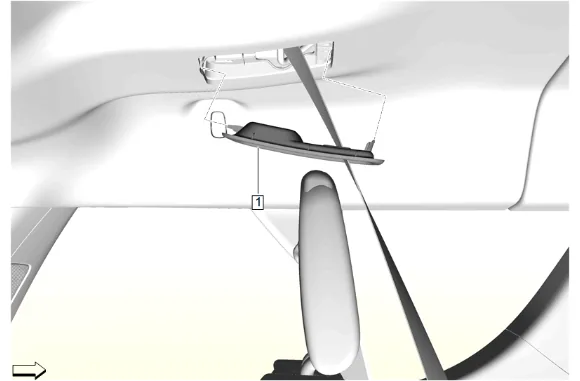
- Using a suitable plastic trim tool, release the retaining tabs.
- Rear Seat Center Belt Opening Bezel - 3rd Row Seat (1) » Remove
- Feed the 3rd row seat center belt through the rear seat center belt opening bezel (1).
- Feed the back half of the seat belt opening bezel through the headlining opening.
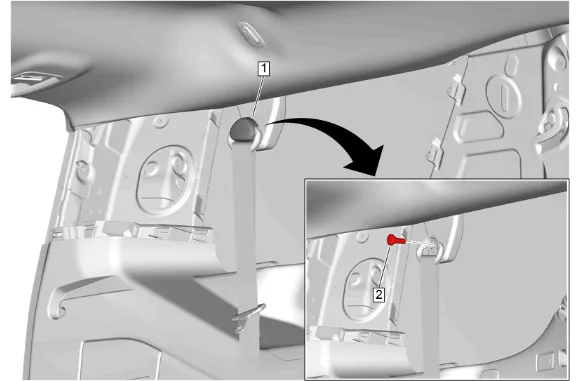
- 3rd Row Seat Belt Guide Cover (1) » Open
- Rear Seat Belt Guide Bolt (2) » Remove [2x]
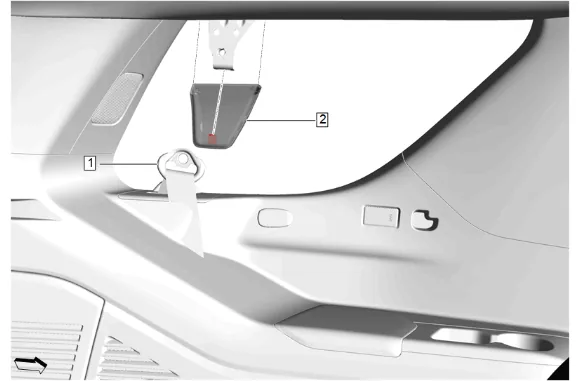
- 3rd Row Seat Belt Guide (1) » Reposition
- Using a suitable trim tool, gently pry and pull downwards on the rear seat belt opening bezel (2) to release the retaining clip on both sides of the vehicle.
- Rear Seat Belt Opening Bezel (2) » Remove [2x]
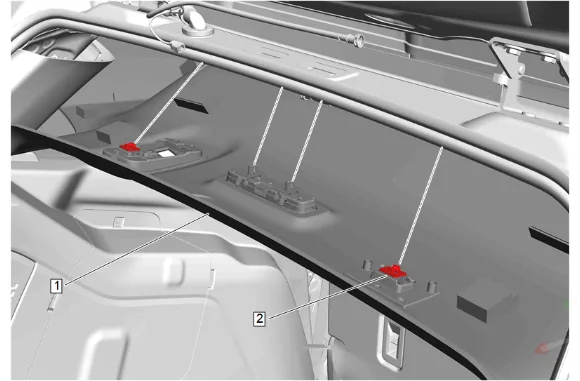
- Lower the rear of the headlining trim panel (1).
- Disengage the retaining clips (2) at the rear of the headliner trim panel.
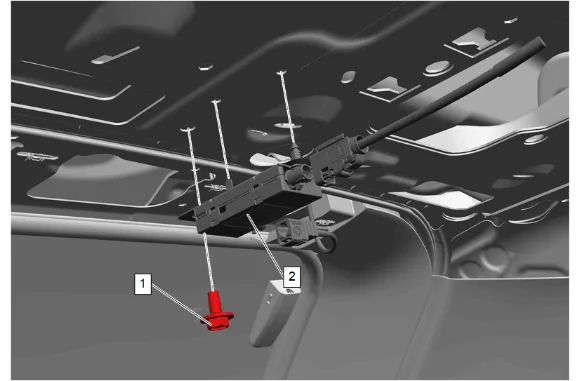
-
Disconnect the electrical connectors.
-
Radio Antenna Module Bolt (1) » Remove
-
Use trim tool to release retainer on the front of radio antenna amplifier (2).
-
Radio Antenna Amplifier (2) » Remove Installation Procedure
-
Radio Antenna Amplifier (2) » Install
-
Radio Antenna Module Bolt (1) » Install and tighten — Fastener Specifications
-
Connect the electrical connectors.
-
Engage the retaining clips (2) at the rear underside of the headlining trim panel (1).
-
Headlining Trim Panel (1) » Install
-
Rear Seat Belt Opening Bezel (2) » Install [2x]
-
3rd Row Seat Belt Guide (1) » Install [2x]
-
Rear Seat Belt Guide Bolt (2) » Install and tighten [2x] — Fastener Specifications
-
3rd Row Seat Belt Guide Cover (1) » Close
-
Feed the back half of the seat belt opening bezel through the headlining opening.
-
Feed the 3rd row seat center belt through the rear seat center belt opening bezel (1).
-
Rear Seat Center Belt Opening Bezel - 3rd Row Seat (1) » Install
-
Body Rear Corner Upper Garnish Molding (1) » Reposition
-
Body Rear Corner Upper Garnish Molding Bolt (1) » Install and tighten — Fastener Specifications
-
Body Side Rear Window Garnish Molding Tether Retaining Clip (2) » Install
-
Body Side Rear Window Garnish Molding Bolt (1) » Install and tighten — Fastener Specifications
-
Body Side Rear Window Garnish Molding (1) » Install
-
Body Rear Corner Upper Garnish Molding (1) » Reposition
-
Body Rear Corner Upper Garnish Molding Bolt (1) » Install and tighten — Fastener Specifications
-
Body Side Rear Window Garnish Molding Tether Retaining Clip (2) » Install
-
Body Side Rear Window Garnish Molding Bolt (1) » Install and tighten — Fastener Specifications
-
Body Side Rear Window Garnish Molding (1) » Install
-
Coat Hook (2) » Install [2x]
-
Coat Hook Bolt (1) » Install and tighten [2x] — Fastener Specifications
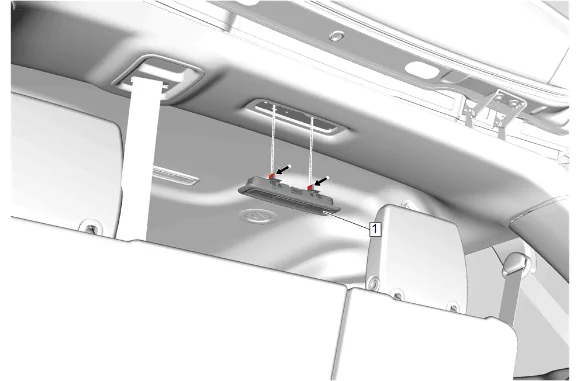
- Connect the electrical connector.
- Cargo Center Courtesy Lamp (1) » Install
- Apply pressure upward on the cargo center courtesy lamp (1) to engage the retaining tabs.
- Enable the SIR System. SIR Disabling and Enabling