Wheel Stud Replacement (F47, ZW7)
Single Use Fasteners and Components Rear Wheel Drive Shaft Nut Rear Wheel Hub Seal [2x] Special Tools Disc Brakes CH-41013 Rotor Resurfacing Kit CH-42450-A Wheel Hub Resurfacing Kit Equivalent regional tools: Special Tools. Driveline DT-45859 Axle Remover Equivalent regional tools: Special Tools. Rear Suspension CH-43631 Ball Joint Separator Equivalent regional tools: Special Tools.
- Set the parking brake in Service Mode. Parking Brake Service Mode Selection
- Disconnect the battery negative cable. Battery Negative Cable Disconnection and Connection
- Raise and support the vehicle. Lifting and Jacking the Vehicle
- Remove the rear tire and wheel assembly. Tire and Wheel Removal and Installation
- Have an assistant apply the brakes.
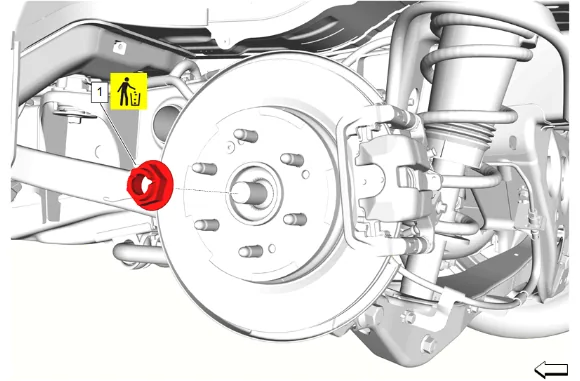
- Rear Wheel Drive Shaft Nut (1) » Remove and DISCARD
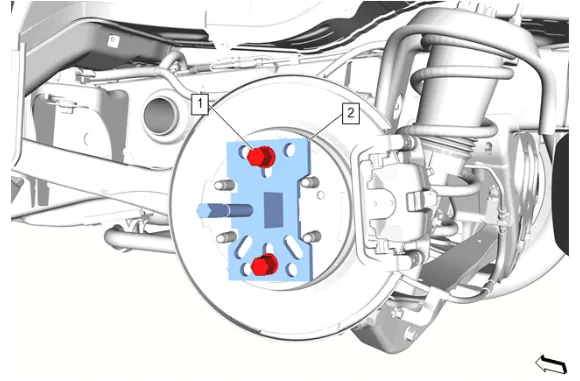
- Install the DT-45859 Axle Remover (2) to the rear wheel hub and secure with 2 wheel nuts (1) hand tightened.
- Using the DT-45859 Axle Remover (2), release the rear wheel drive half shaft from the rear wheel hub.
- Remove the 2 wheel nuts (1) and the DT-45859 Axle Remover (2) from the rear wheel hub.
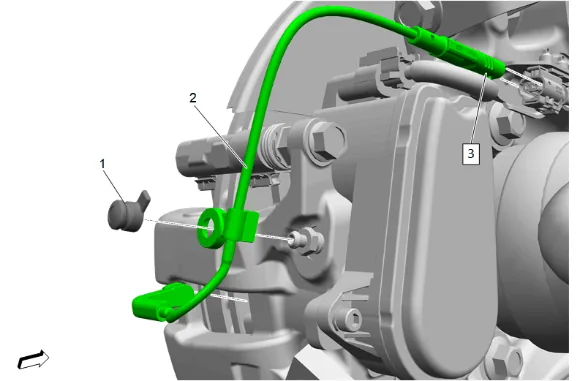
- { If equipped } Rear Brake Bleeder Valve Cap (1) » Remove
- { If equipped } Rear Disc Brake Pad Wear Sensor (2) @ Rear Disc Brake Pad » Remove
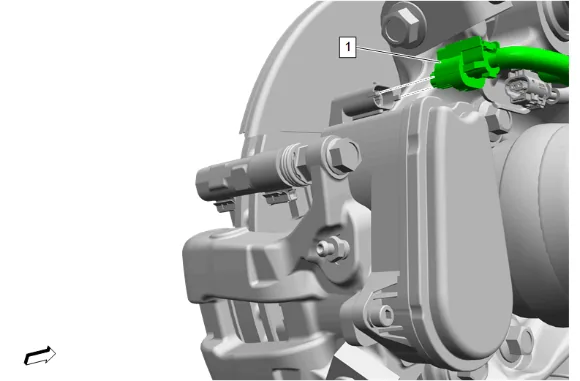
- Electrical Connector (1) @ Rear Parking Brake Actuator » Disconnect
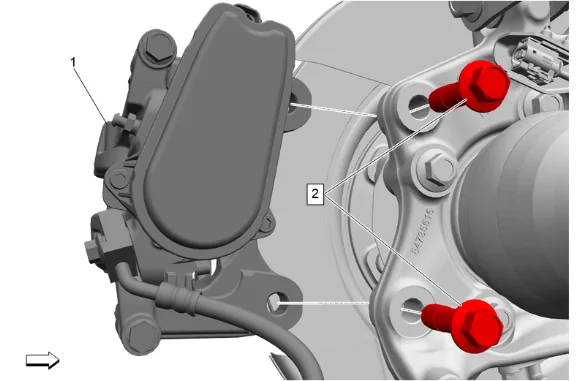
- Rear Brake Caliper Bracket Bolt (2) » Remove [2x]
- Remove the rear brake caliper and bracket (1) and support with heavy mechanics wire.
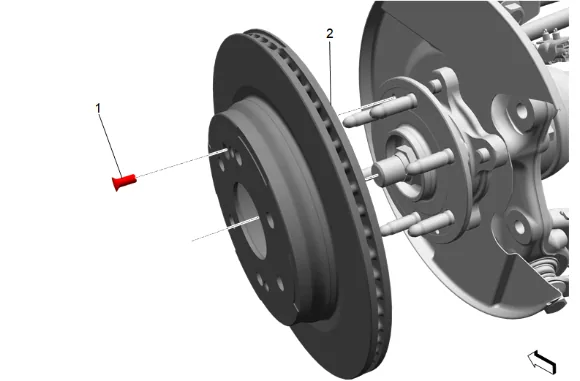
- Rear Brake Rotor Bolt (1) » Remove
- Rear Brake Rotor (2) » Remove
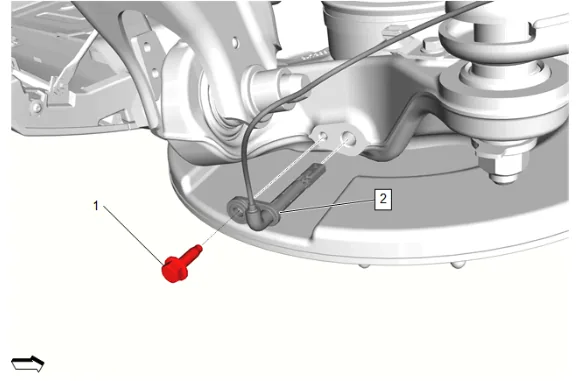
- Rear Wheel Speed Sensor Wiring Harness Bolt (1) » Remove
- Rear Wheel Speed Sensor (2) » Remove
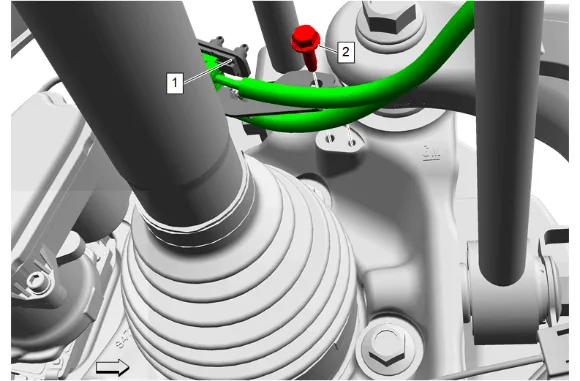
- Chassis Rear Wiring Harness Bracket Bolt (2) » Remove
- Position the chassis rear wiring harness bracket (1) out of the way.
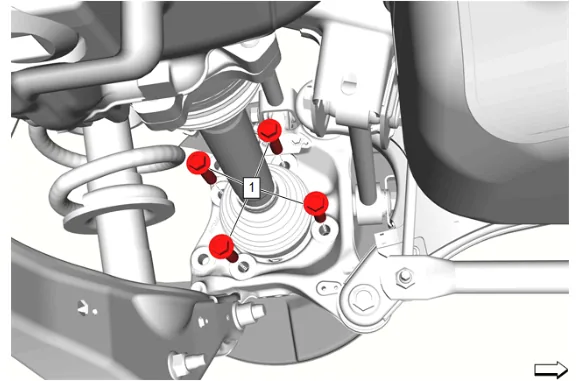
- Rear Wheel Hub Bolt (1) » Remove [4x]
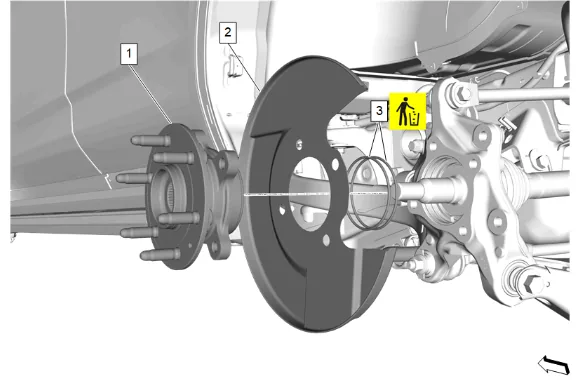
- Rear Wheel Hub (1) » Remove
- Rear Brake Shield (2) » Remove
- Rear Wheel Hub Seal (3) » Remove and DISCARD [2x]
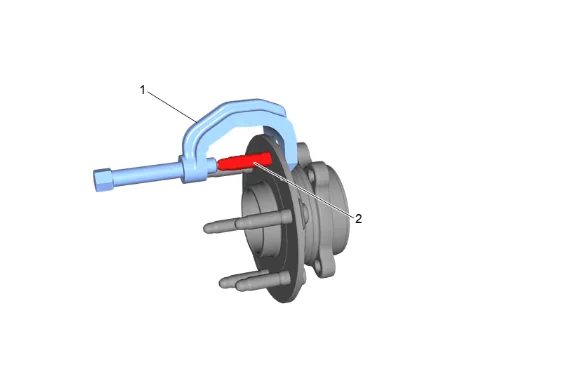
- Using the CH-43631 Ball Joint Separator (1) release the wheel stud (2) from the rear wheel hub.
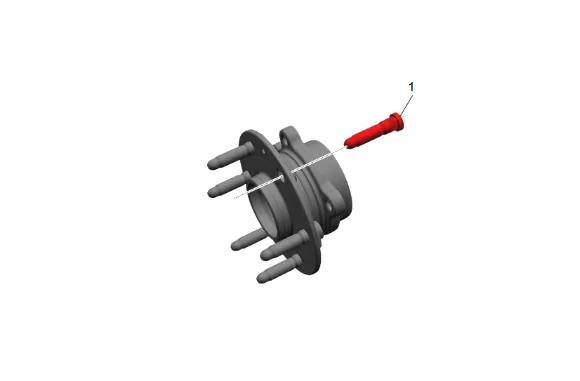
-
Rear Wheel Stud (1) » Remove and DISCARD Installation Procedure
-
Rear Wheel Stud (1) » Install NEW
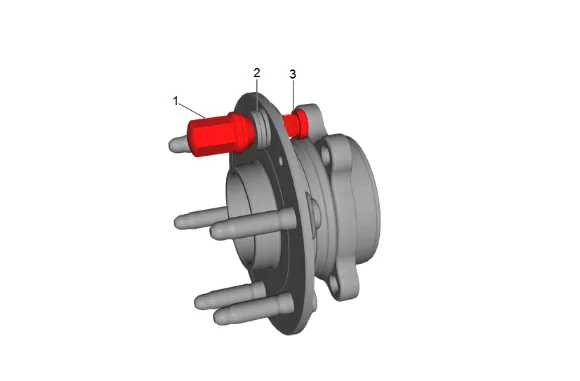
- Install a suitable quantity of washers (2) and an OLD wheel nut (1) to the rear wheel stud (3).
- Tighten the wheel nut (1) until the rear wheel stud (3) is fully seated into the rear wheel hub.
- Remove the OLD wheel nut (1) and washers (2) from the rear wheel stud (3).
- Clean any debris and corrosion from the steering knuckle bearing pilot bore.
- Apply a thin coating of grease evenly ensuring complete coverage of the knuckle pilot bore only. Adhesives, Fluids, Lubricants, and Sealers
- Rear Wheel Hub Seal (3) » Install NEW [2x]
- Rear Brake Shield (2) » Install
- Rear Wheel Hub (1) » Install
-
Rear Wheel Hub Bolt (1) » Install and tighten [4x] — Fastener Specifications
-
Position the chassis rear wiring harness bracket (1) into place.
-
Chassis Rear Wiring Harness Bracket Bolt (2) » Install and tighten — Fastener Specifications
-
Rear Wheel Speed Sensor (2) » Install
-
Rear Wheel Speed Sensor Wiring Harness Bolt (1) » Install and tighten — Fastener Specifications
-
Using the CH-42450-A Wheel Hub Resurfacing Kit, thoroughly clean any rust or corrosion from the mating surface of the hub/axle flange.
-
Using the CH-41013 Rotor Resurfacing Kit, thoroughly clean any rust or corrosion from the mating surface and mounting surface of the brake rotor.
-
Inspect the mating surfaces of the hub/axle flange and the rotor to ensure there are no foreign particles or debris remaining.
-
Rear Brake Rotor (2) » Install
-
Rear Brake Rotor Bolt (1) » Install and tighten — Fastener Specifications
-
If NEW threaded components are being installed, loosen the adhesive using a metal pick or similar tool before proceeding. If threaded components are reused, prepare the threaded components using the following steps: 20.1. Remove any loose cured adhesive from the external threads of the components using a lint free cloth. 20.2. Thread the cleaned components into the internal mating threads and remove to loosen trapped cured adhesive. 20.3. Apply thread locking adhesive to the external threads of the components. Adhesives, Fluids, Lubricants, and Sealers 20.4. Ensure there are no gaps in the thread locking adhesive once applied to the component.
-
Install the rear brake caliper and bracket (1).
-
Rear Brake Caliper Bracket Bolt (2) » Install [2x] — Fastener Specifications
-
Electrical Connector (1) @ Rear Parking Brake Actuator » Connect
- { If equipped } Rear Disc Brake Pad Wear Sensor (2) @ Rear Disc Brake Pad » Install
- { If equipped } Rear Brake Bleeder Valve Cap (1) » Install
- Have an assistant apply the brakes.
- Rear Wheel Drive Shaft Nut (1) » Install NEW and tighten — Fastener Specifications
- Install the rear tire and wheel assembly. Tire and Wheel Removal and Installation
- Remove the support and lower the vehicle.
- Connect the battery negative cable. Battery Negative Cable Disconnection and Connection
- Calibrate the park brake. Park Brake Calibration