Rear Side Door Window Switch Replacement
Removal Procedure
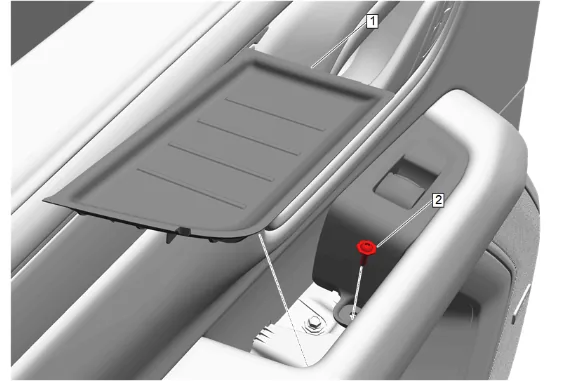
- Rear Side Door Armrest Pull Cup Bolt Cap (1) » Remove
- Rear Side Door Trim Panel Bolt (2) » Remove
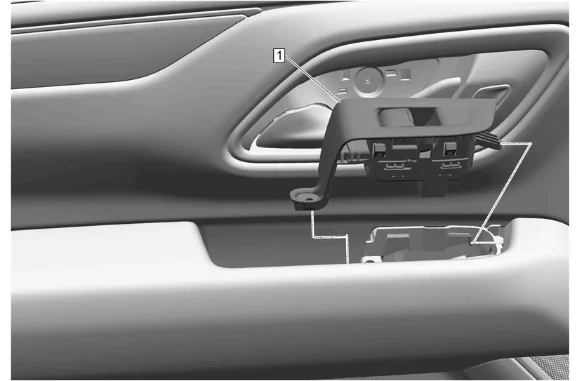
- Using a flat bladed plastic trim tool, start at the rear of the rear side door accessory switch mount plate (1) and gently insert trim tool to lift the rear side door accessory switch mount plate from the door trim.
- Rotate the rear side door accessory switch mount plate (1) up and rearward to unhook the front retaining feature.
- Disconnect the electrical connector.
- Rear Side Door Accessory Switch Mount Plate (1) » Remove
-
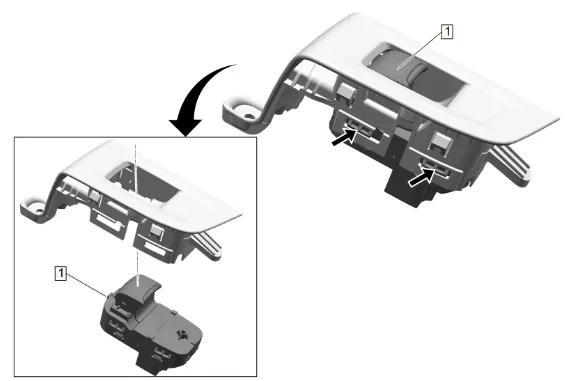
Release the rear side door window switch (1) from the switch mount plate by depressing the tabs along each side of the switch.
-
Rear Side Door Window Switch (1) » Remove Installation Procedure
-
Rear Side Door Window Switch (1) » Install
-
Connect the electrical connector.
-
Rotate the rear side door accessory switch mount plate (1) up and forward to hook the front retaining feature.
-
Rear Side Door Accessory Switch Mount Plate (1) » Install
- Rear Side Door Trim Panel Bolt (2) » Install and tighten — Fastener Specifications
- Rear Side Door Armrest Pull Cup Bolt Cap (1) » Install