Radio Replacement
Removal Procedure
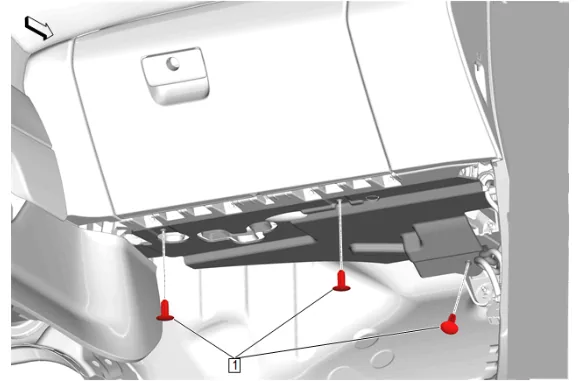
- Instrument Panel Lower Insulator Retainer (1) » Remove [3x]
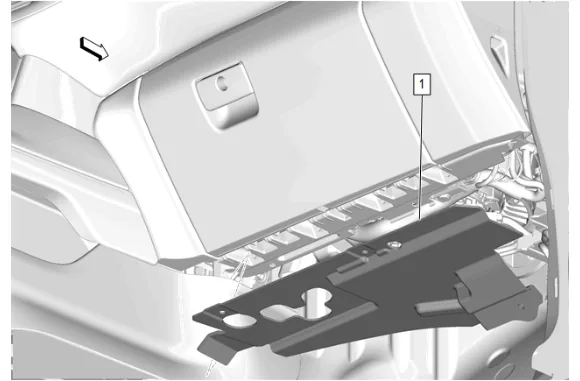
- Instrument Panel Lower Trim Panel Insulator (1) » Remove
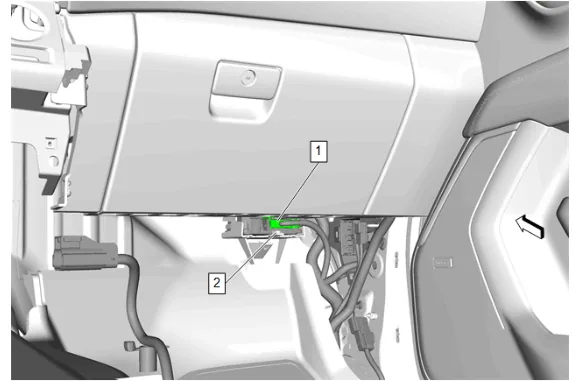
- Electrical Connector (1) » Disconnect
- Retaining Tab (2) » Disengage
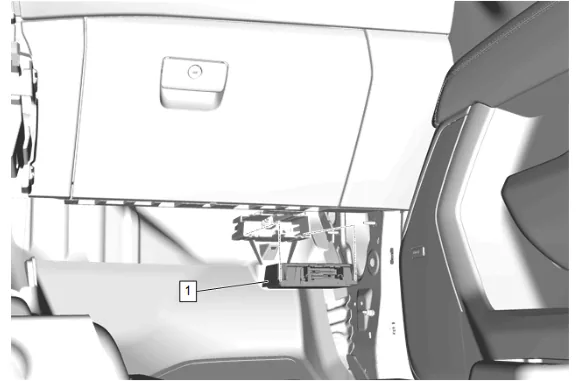
- Multifunction Power Supply Converter (1) » Remove
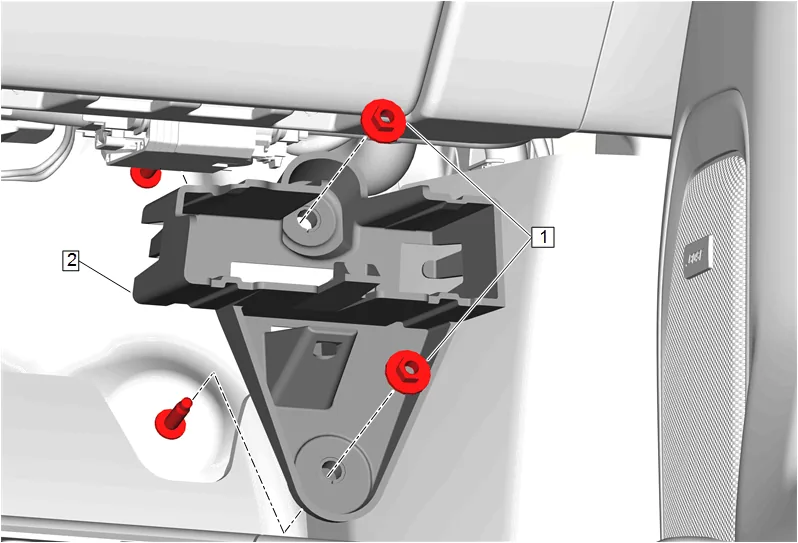
- Multifunction Power Supply Converter Nut (1) » Remove [2x]
- Multifunction Power Supply Converter Bracket (2) » Remove
-
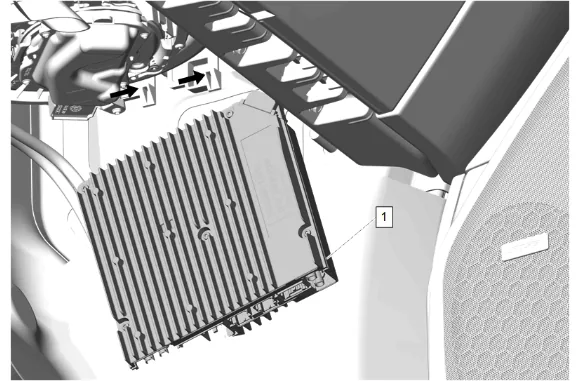
Disconnect the electrical connectors.
-
Release the retaining tabs.
-
Radio (1) » Remove Installation Procedure
-
Radio (1) » Install
-
Secure the retaining tabs.
-
Connect the electrical connectors.
-
Multifunction Power Supply Converter Bracket (2) » Install
-
Multifunction Power Supply Converter Nut (1) » Install and tighten [2x] — Fastener Specifications
-
Multifunction Power Supply Converter (1) » Install
-
Electrical Connector (1) » Connect
-
Retaining Tab (2) » Engage
-
Instrument Panel Lower Trim Panel Insulator (1) » Install
-
Instrument Panel Lower Insulator Retainer (1) » Install [3x]
-
Perform the necessary programming and setup procedure: Control Module References