Air Conditioning Condenser and Evaporator Hose Replacement (LM2)
Air Conditioning Condenser and Evaporator Hose Replacement (LM2) Single Use Fasteners and Components Air Conditioning Compressor and Condenser Hose Seal - Large Air Conditioning Compressor and Condenser Hose Seal - Small [2x] Removal Procedure
- Recover the refrigerant. Refrigerant Recovery and Recharging
- Turn the steering wheel fully to the left.
- Disconnect the battery negative cable. Battery Negative Cable Disconnection and Connection
- Raise and support the vehicle. Lifting and Jacking the Vehicle
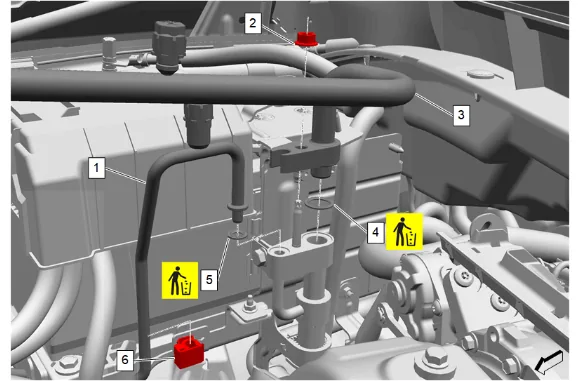
- Air Conditioning Compressor and Condenser Hose Nut (2) @ Air Conditioning Refrigerant Heat Exchanger » Remove
- Air Conditioning Compressor and Condenser Hose (3) @ Air Conditioning Refrigerant Heat Exchanger » Remove
- Air Conditioning Compressor and Condenser Hose Seal - Large (4) » Remove and DISCARD
- Air Conditioning Condenser and Evaporator Hose Clip (6) » Remove
- Air Conditioning Condenser and Evaporator Hose (1) » Remove
- Air Conditioning Compressor and Condenser Hose Seal - Small (5) » Remove and DISCARD
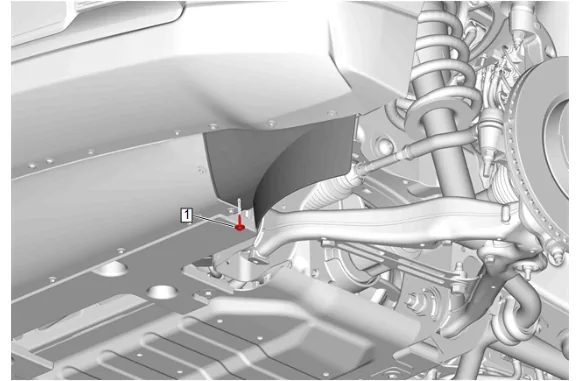
- { If equipped } Front Tire Front Air Deflector Bolt - Right Side (1) » Remove
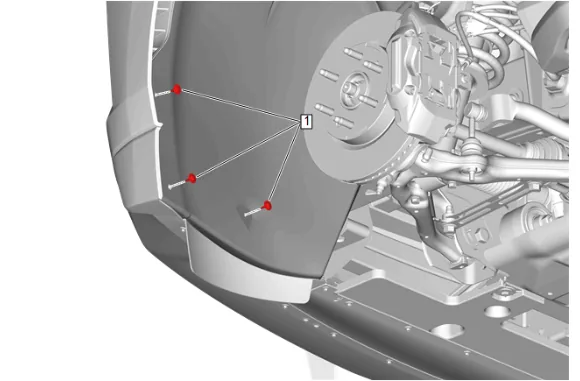
- Front Wheelhouse Liner Bolt - Right Side (1) » Remove [3x]
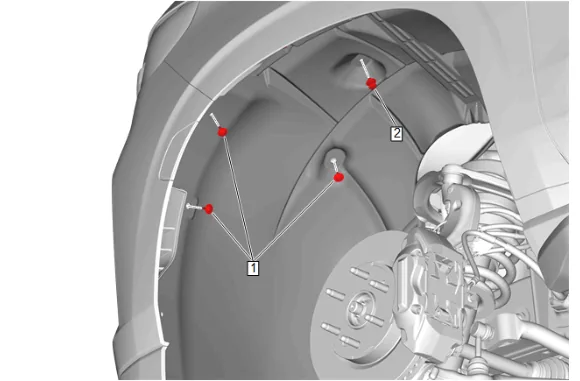
- Front Wheelhouse Liner Bolt - Right Side (1) » Remove [3x]
- Front Wheelhouse Liner Retainer - Right Side (2) » Remove
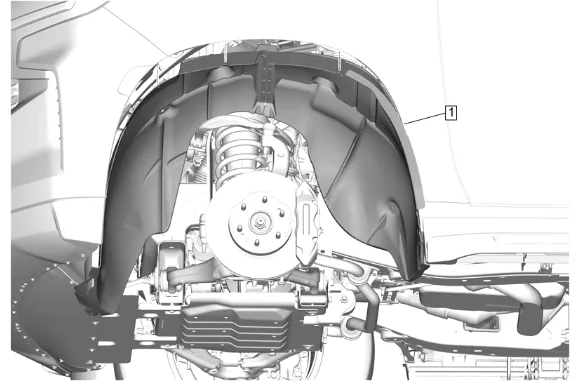
- Front Wheelhouse Liner - Right Side (1) » Reposition
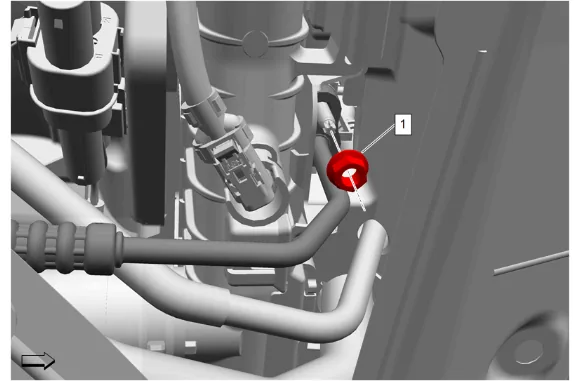
- Air Conditioning Condenser and Evaporator Hose Nut (1) » Remove
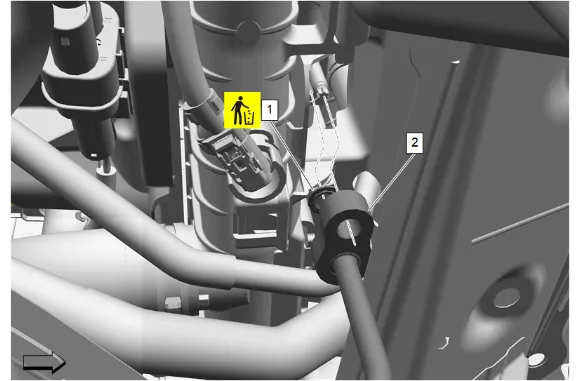
- Air Conditioning Condenser and Evaporator Hose (2) » Remove
- Air Conditioning Compressor and Condenser Hose Seal - Small (1) » Remove and DISCARD
- Remove the air conditioning condenser and evaporator hose (2) from the vehicle. Installation Procedure
- Air Conditioning Compressor and Condenser Hose Seal - Small (1) » Install NEW
- Air Conditioning Condenser and Evaporator Hose (2) » Install
- Air Conditioning Condenser and Evaporator Hose Nut (1) » Install and tighten — Fastener Specifications
- Front Wheelhouse Liner - Right Side (1) » Move into position
- Front Wheelhouse Liner Retainer - Right Side (2) » Install
- Front Wheelhouse Liner Bolt - Right Side (1) » Install and tighten [3x] — Fastener Specifications
- Front Wheelhouse Liner Bolt - Right Side (1) » Install and tighten [3x] — Fastener Specifications
-
{ If equipped } - Right Side Front Tire Front Air Deflector Bolt (1) » Install and tighten — Fastener Specifications
-
Air Conditioning Compressor and Condenser Hose Seal - Small (5) » Install NEW
-
Air Conditioning Condenser and Evaporator Hose (1) » Install
-
Air Conditioning Condenser and Evaporator Hose Clip (6) » Install
-
Air Conditioning Compressor and Condenser Hose Seal - Large (4) » Install NEW
-
Air Conditioning Compressor and Condenser Hose (3) @ Air Conditioning Refrigerant Heat Exchanger » Install
-
Air Conditioning Compressor and Condenser Hose Nut (2) @ Air Conditioning Refrigerant Heat Exchanger » Install and tighten — Fastener Specifications
-
Remove the support and lower the vehicle.
-
Connect the battery negative cable. Battery Negative Cable Disconnection and Connection
-
Recharge the refrigerant. Refrigerant Recovery and Recharging
-
Inspect for refrigerant leaks.