Front Side Door Weatherstrip Replacement - Body Side
Removal Procedure
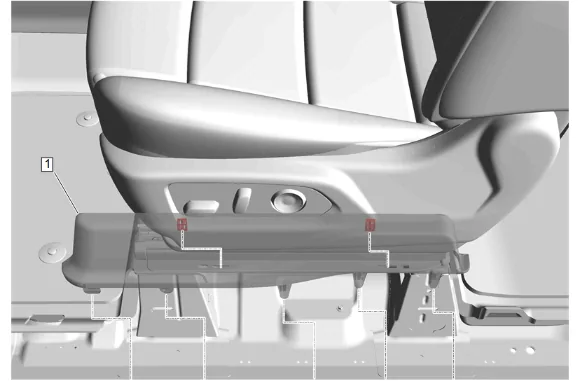
- Using a suitable plastic trim tool, gently pry upwards to release the retaining clips.
- Front Seat Adjuster Track Finish Cover (1) » Remove
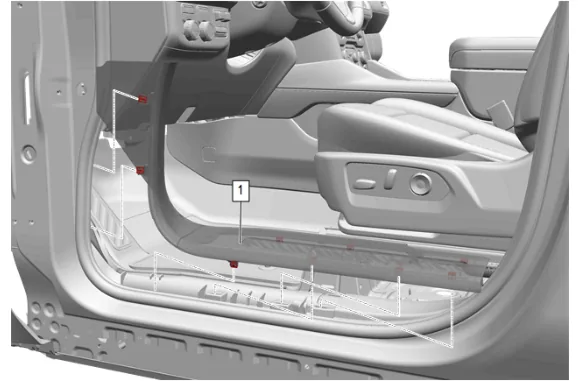
- Starting at the rear of the front side door sill garnish molding (1) pull upward at the b-pillar joint to disengage the garnish molding.
- Work your way forward disengaging all the front side door sill garnish molding retaining clips and then pull rearward to disengage the 2 retaining clips on the forward vertical wall.
- Front Side Door Sill Garnish Molding (1) » Remove
-
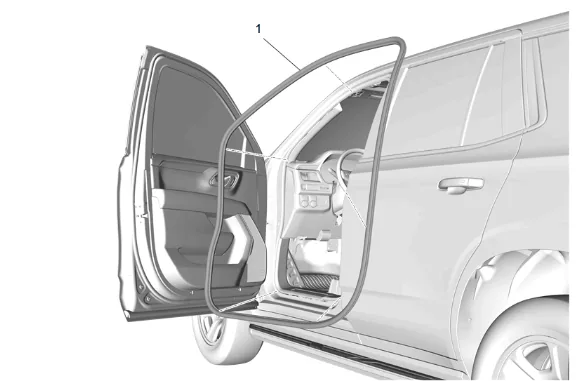
Start at the rear upper corner of the door opening and pull the weatherstrip away from the door opening flange.
-
Front Side Door Weatherstrip - Body Side (1) » Remove Installation Procedure
-
Front Side Door Weatherstrip - Body Side (1) » Install
-
Position the weatherstrip in the upper corner of the center pillar.
-
Working downward along the front edge, install the weatherstrip on the door opening flange.
-
Ensure that the weatherstrip is fully seated around the door opening.
-
Starting at the front of the front side door sill garnish molding (1) engage the 2 retaining clips on the forward vertical wall.
-
Work your way rearward engaging all the front side door sill garnish molding retaining clips.
-
Front Side Door Sill Garnish Molding (1) » Install
-
Front Seat Adjuster Track Finish Cover (1) » Install