Front View Camera Replacement
Removal Procedure
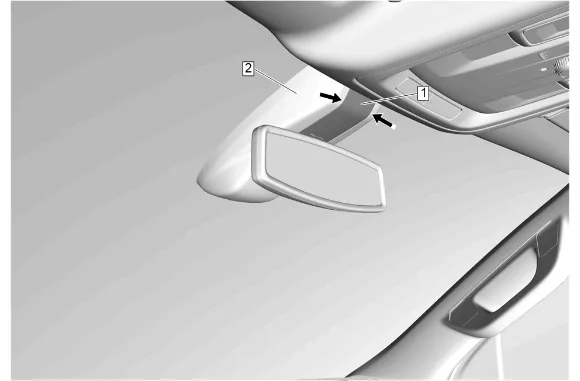
- Insert a suitable flat-bladed plastic trim tool between the windshield multifunction sensor mount bracket cover insert (1) and windshield multifunction sensor mount bracket cover (2).
- Separate the windshield multifunction sensor mount bracket cover insert (1) from the windshield multifunction sensor mount bracket cover (2).
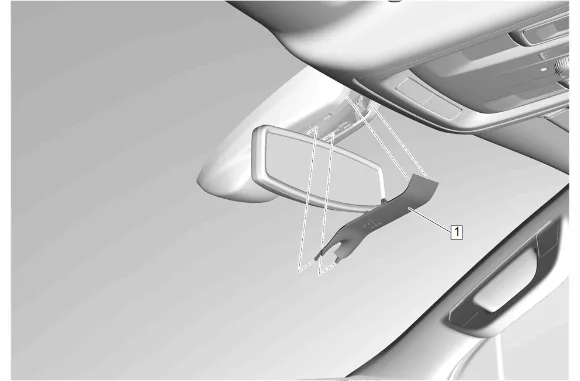
- Windshield Multifunction Sensor Mount Bracket Cover Insert (1) » Remove
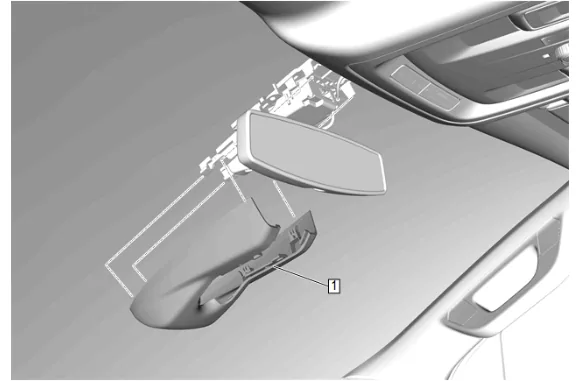
- Using a suitable plastic trim tool, carefully pry downward on the windshield multifunction sensor mount bracket cover (1) to release it from the windshield.
- Pull downward to remove the windshield multifunction sensor mount bracket cover (1) from the windshield.
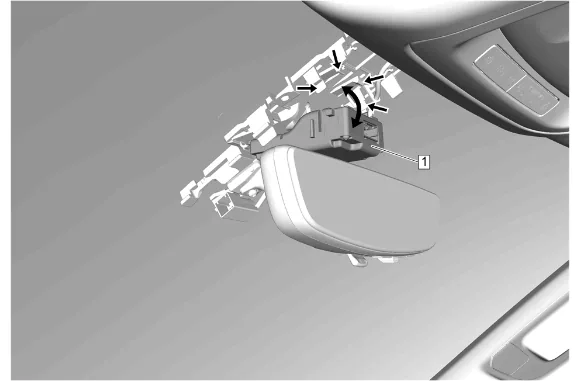
- Disconnect the electrical connector.
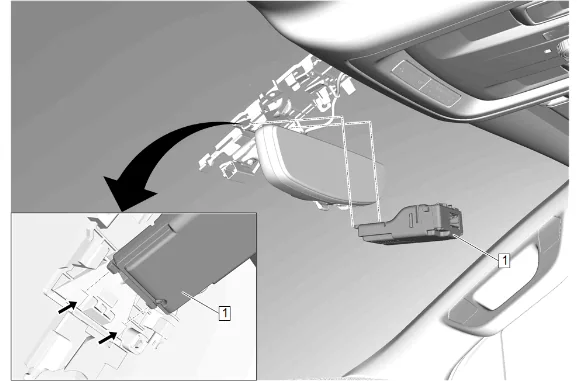
- Release the retaining tabs and rotate the front view camera (1) downward.
-
Slide the front view camera (1) rearward to release.
-
Front View Camera (1) » Remove Installation Procedure
-
Front View Camera (1) » Install
-
Slide the front view camera (1) forward to engage.
-
Rotate the front view camera (1) upward and secure the retaining tabs.
-
Connect the electrical connector.
-
Install the windshield multifunction sensor mount bracket cover (1) ensuring the retaining tabs are fully seated.
-
Windshield Multifunction Sensor Mount Bracket Cover Insert (1) » Install
-
Apply pressure upward on the windshield multifunction sensor mount bracket cover insert (1) to engage the retaining tabs.
-
Perform the necessary programming and setup procedure: Control Module References