Rocker Panel Rear Molding Replacement (B3L)
Removal Procedure
- Extend the assist steps in the vehicle personal optimization chapter in the owners manual.
- Scroll to Deploy Running Boards on the navigation screen.
- Put the assist steps in the extended position.
- Raise and support the vehicle. Lifting and Jacking the Vehicle
- Open both front and rear side doors
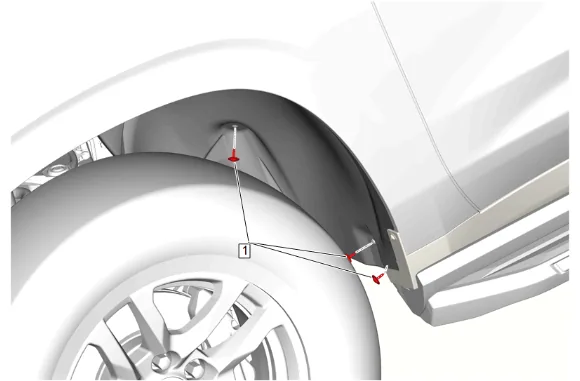
- Front Wheelhouse Liner Bolt (1) » Remove [3x]
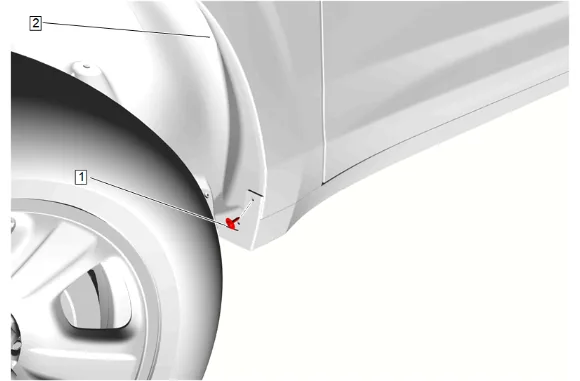
- Rocker Panel Molding Bolt (1) » Remove
- Front Wheelhouse Liner (2) » Reposition
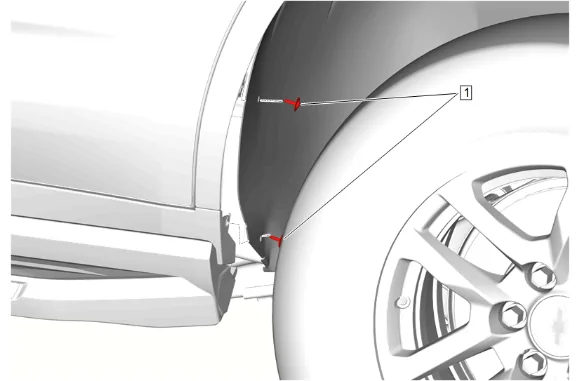
- Rear Wheelhouse Liner Bolt (1) » Remove [2x]
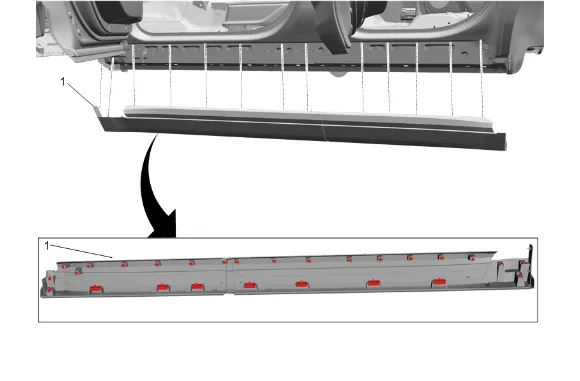
- Using an appropriate trim tool, release the lower rocker panel molding retainers and pull the rocker panel molding (1) away from the body side outer panel.
- Using an appropriate trim tool, release the upper rocker panel molding retainers and pull the rocker panel molding (1) away from the body side outer panel.
- Rocker Panel Molding (1) » Remove
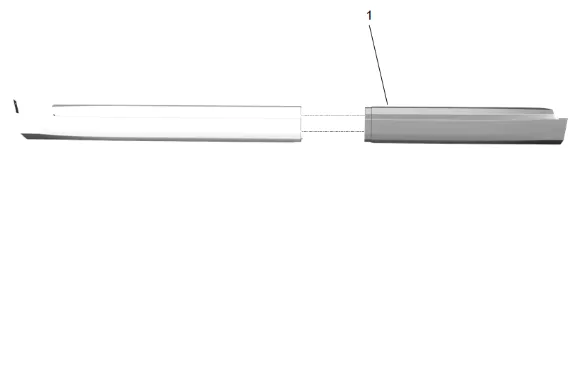
-
Remove the rear rocker panel (1) from the front rocker panel Installation Procedure
-
Install the rear rocker panel (1) to the front rocker panel
-
Position the rocker panel molding (1) to the vehicle and seat the upper rocker panel molding retainers into the body side outer panel.
-
Seat the lower rocker panel molding retainers into the body side outer panel.
-
Rear Wheelhouse Liner Bolt (1) » Install and tighten [2x] — Fastener Specifications
-
Position the front wheelhouse liner (2) to its original location.
-
Rocker Panel Molding Bolt (1) » Install and tighten — Fastener Specifications
-
Front Wheelhouse Liner Bolt (1) » Install and tighten [3x] — Fastener Specifications
-
Close both front and rear side doors.
-
Lower the vehicle.