Charge Air Cooling System Draining and Filling (Static LM2)
Charge Air Cooling System Draining and Filling (Static LM2) Special Tool GE-26568 Coolant and Battery Tester Equivalent regional tools: Special Tools Draining Procedure
- Remove charge air cooler coolant filler cap.
- Raise and support the vehicle. Lifting and Jacking the Vehicle
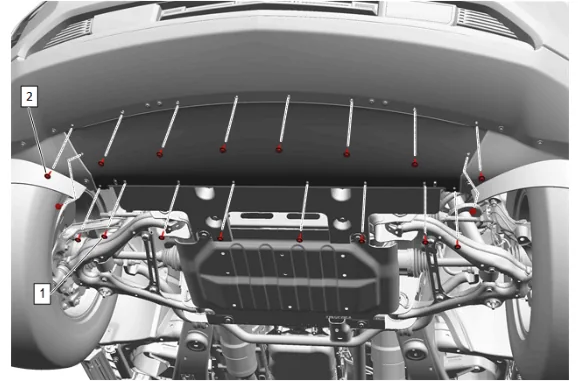
- Front Bumper Fascia Air Deflector Bolt (1) » Remove [10x]
- Front Bumper Fascia Extension Bolt (2) » Remove [8x]
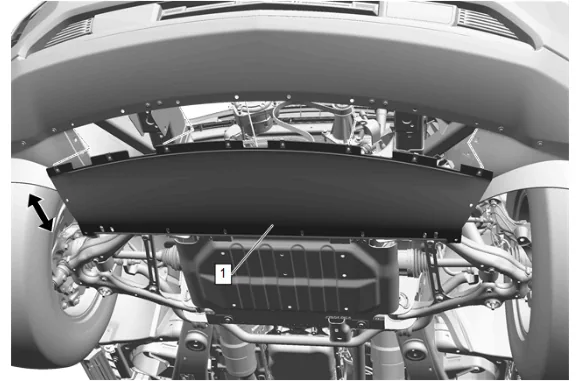
- Pull the front bumper fascia extension (1) rearward and down from the front bumper fascia.
- Place a drain pan under the vehicle.
-
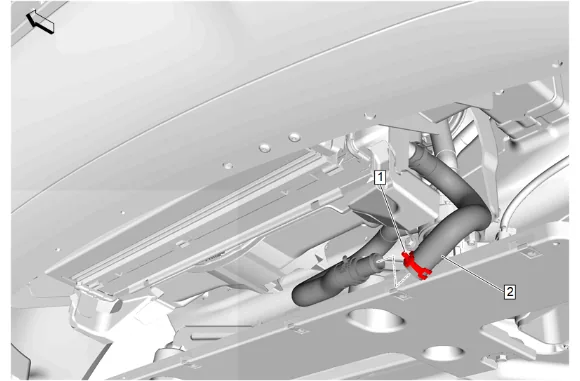
Auxiliary Radiator Inlet Hose Clamp (1) » Disengage — Hose Clamp Replacement Guidelines - Spring Type
-
Separate the auxiliary radiator inlet hose (2) at the hose connector.
-
Drain the cooling system.
-
Connect the auxiliary radiator inlet hose (2) to the hose connector.
-
Auxiliary Radiator Inlet Hose Clamp (1) » Engage — Hose Clamp Replacement Guidelines - Spring Type
-
Front Bumper Fascia Extension (1) » Install
- Front Bumper Fascia Extension Bolt (2) » Install and tighten [8x] — Fastener Specifications
- Front Bumper Fascia Air Deflector Bolt (1) » Install and tighten [10x] — Fastener Specifications
- Remove the drain pan.
- Lower the vehicle.
- Inspect the coolant.
- If the coolant is discolored, perform the flushing procedure. Flushing Filling Procedure
- Prepare a quantity of coolant equal to the charge air cooling system capacity. Adhesives, Fluids, Lubricants, and Sealers Approximate Fluid Capacities
- Inspect the concentration of the coolant mixture using GE-26568 Coolant and Battery Fluid Tester.
- Slowly fill the cooling system to the coolant fill line with the proper coolant mixture .
- Install charge air cooler coolant filler cap.
- Start the engine.
- Run the engine at 2,000-2,500 RPM until the engine reaches normal operating temperature. Engine should reach an operating temperature of 86°C (187°F).
- Allow the engine to idle for 3 minutes.
- Turn the engine OFF.
- Allow the engine to cool.
- Remove charge air cooler coolant filler cap.
- Fill the cooling system to the proper level.
- Install charge air cooler coolant filler cap.
- Rinse away any excess coolant from the engine and the engine compartment.