Front Floor Rear Console Trim Plate Replacement (DCH)
Removal Procedure
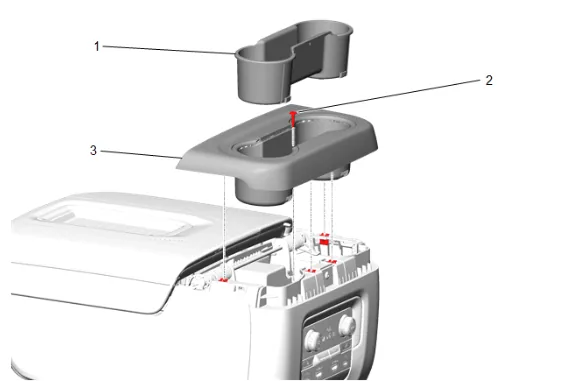
- Front Floor Console Rear Cup Holder Liner (1) » Remove
- Front Floor Console Cup Holder Bolt (2) » Remove
- Using a flat-bladed plastic trim tool, release the retaining clips.
- Front Floor Console Rear Cup Holder (3) » Remove
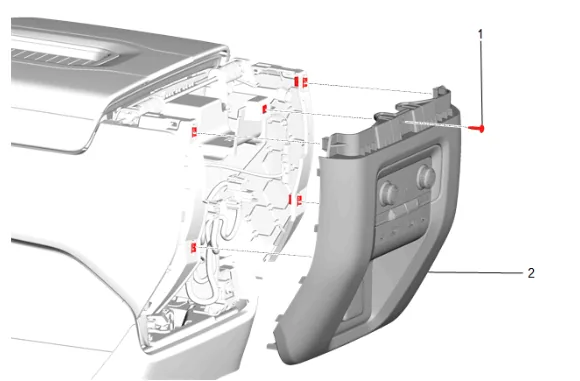
- Front Floor Console Rear Cover Bolt (1) » Remove
- Using a flat-bladed plastic trim tool, release the retaining clips.
- Front Floor Console Rear Trim Panel (2) » Remove
- Disconnect the electrical connectors.
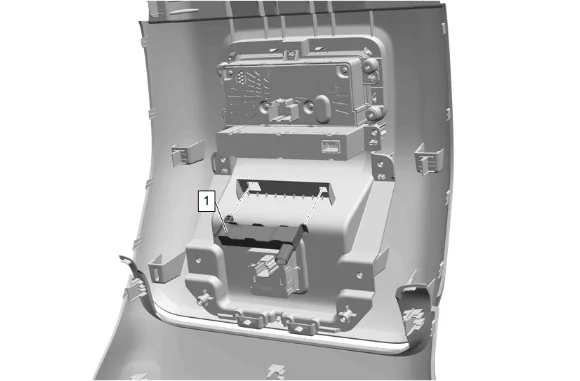
- Disengage the retaining tab that secures the antenna to the panel.
- Low Frequency Console Number 2 Antenna (1) » Remove
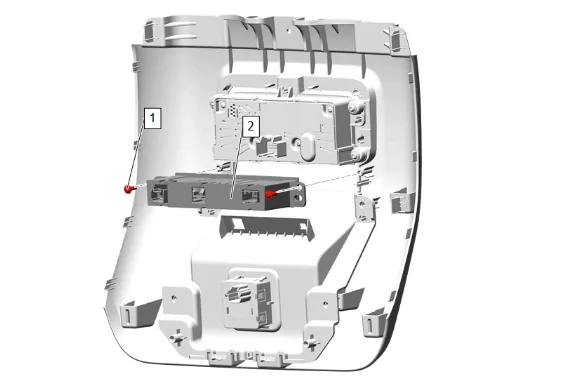
- Front Floor Console Armrest Bolt (1) » Remove [2x]
- Audio/Video Receptacle (2) » Remove
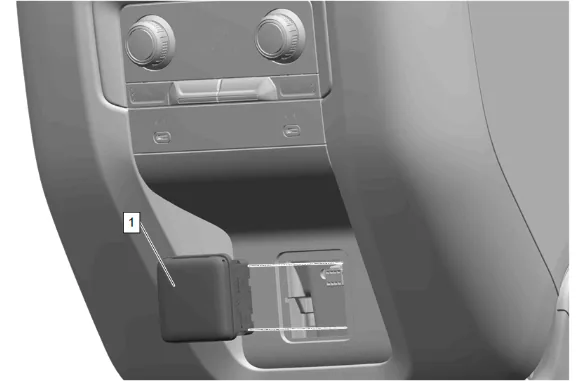
- Using a suitable plastic trim tool, release the retaining tabs.
- Front Floor Console Accessory Power Rear Receptacle (1) » Remove
-
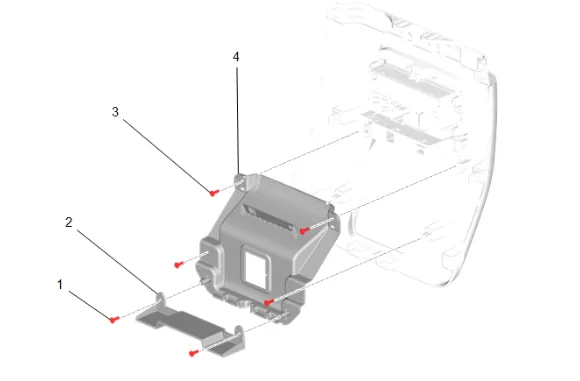
Front Floor Lower Console Bolt (1) » Remove [2x]
-
Front Floor Console Opening Protector (2) » Remove
-
Front Floor Compartment Bolt (3) » Remove [4x]
-
Front Floor Rear Console Trim Plate (4) » Remove Installation Procedure
-
Front Floor Rear Console Trim Plate (4) » Install
-
Front Floor Compartment Bolt (3) » Install and tighten [4x] — Fastener Specifications
-
Front Floor Console Opening Protector (2) » Install
-
Front Floor Lower Console Bolt (1) » Install and tighten [2x] — Fastener Specifications
-
Front Floor Console Accessory Power Rear Receptacle (1) » Install
-
Low Frequency Console Number 2 Antenna (1) » Install
-
Audio/Video Receptacle (2) » Install
-
Front Floor Console Armrest Bolt (1) » Install and tighten [2x] — Fastener Specifications
-
Connect the electrical connectors.
-
Front Floor Console Rear Trim Panel (2) » Install
-
Front Floor Console Rear Cover Bolt (1) » Install and tighten — Fastener Specifications
-
Front Floor Console Rear Cup Holder (3) » Install
-
Front Floor Console Cup Holder Bolt (2) » Install and tighten — Fastener Specifications
- Front Floor Console Rear Cup Holder Liner (1) » Install