Battery Tray Replacement (L84, L87)
Removal Procedure
- Disconnect the negative battery cable. Battery Negative Cable Disconnection and Connection
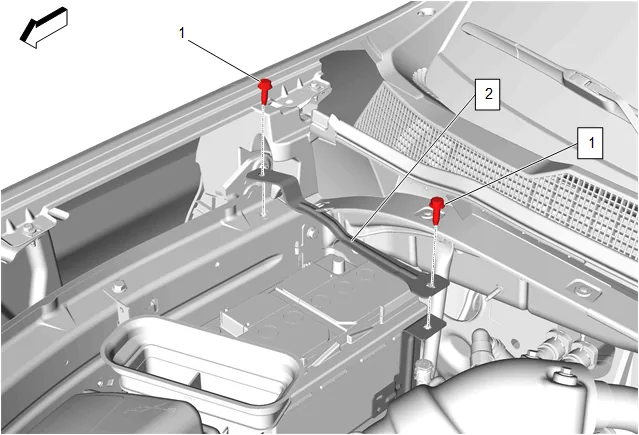
- Battery Hold Down Strap Bolt (1) » Remove [2x]
- Battery Hold Down Strap (2) » Remove
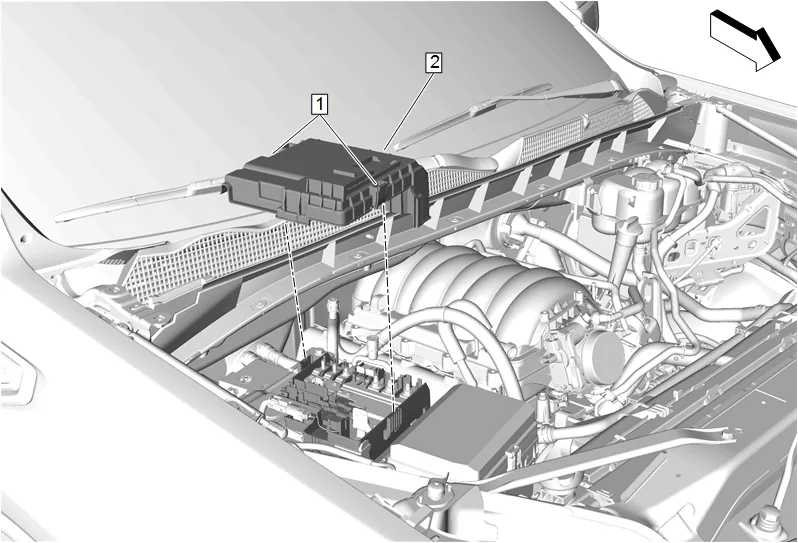
- Retaining Tab (1) » Disengage [2x]
- Front Compartment Fuse Block Cover (2) » Remove
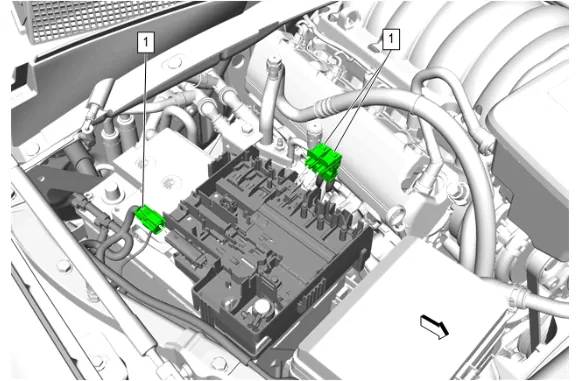
- Electrical Connector (1) » Disconnect [3x]
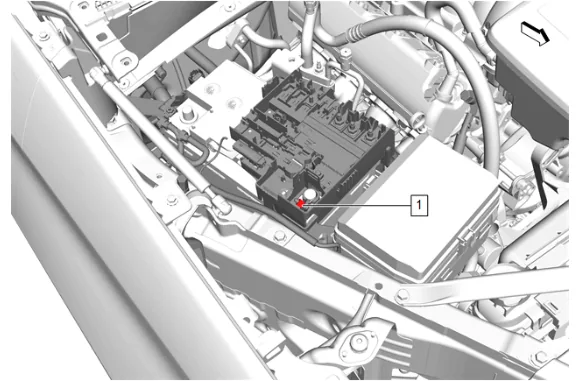
- Battery Positive Post Clamp Nut (1) » Loosen
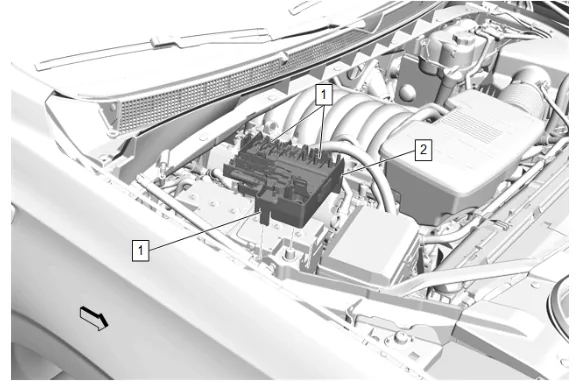
- Retaining Tab (1) » Disengage [3x]
- Battery Distribution Engine Compartment Fuse Block (2) » Reposition away
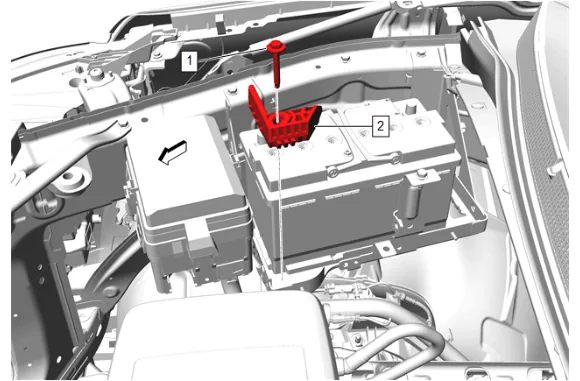
- Battery Hold Down Retainer Bolt (1) » Remove
- Battery Hold Down Retainer (2) » Remove
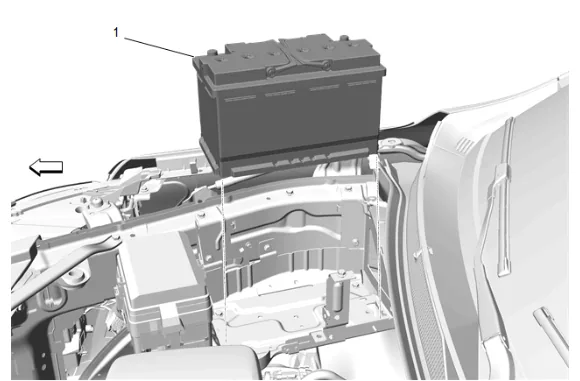
- Battery (1) » Remove
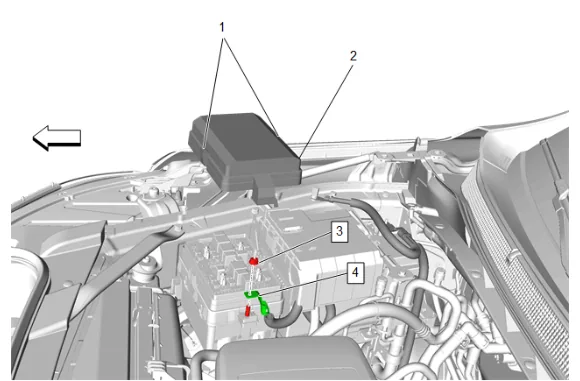
- Retaining Tab (1) » Disengage [2x]
- Engine Wiring Harness Junction Block Cover (2) » Remove
- Battery Positive Cable Nut (3) » Remove
- Starter Solenoid Cable (4) » Remove
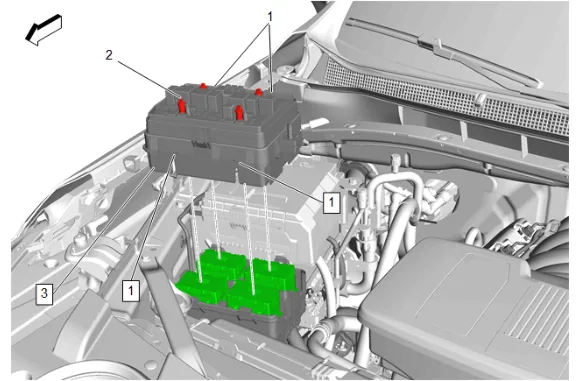
- Engine Wiring Harness Junction Block Bolt (2) » Loosen [4x]
- Retaining Tab (1) » Disengage [4x]
- Engine Wiring Harness Junction Block (3) » Remove
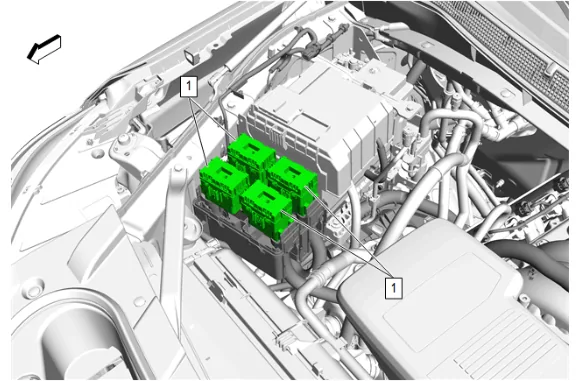
- Electrical Connector (1) » Remove [4x]
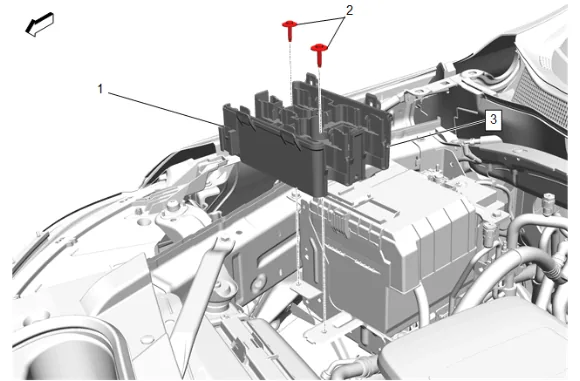
- Engine Wiring Harness Fuse Block Bracket Bolt (2) » Remove [2x]
- Retaining Tab (1) » Disengage
- Engine Wiring Harness Fuse Block Bracket (3) » Remove
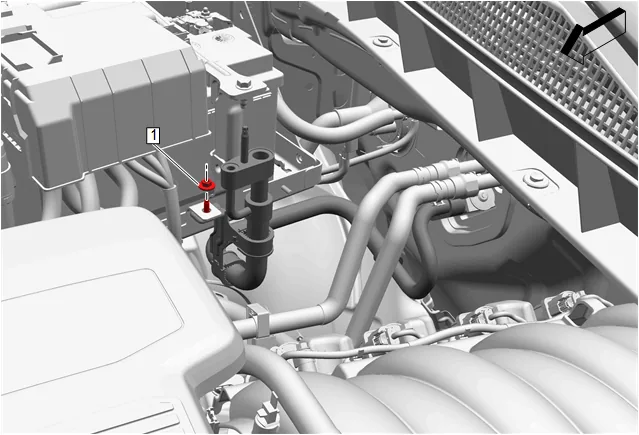
- Air Conditioning Refrigerant Heat Exchanger Nut (1) @ Battery Tray » Remove
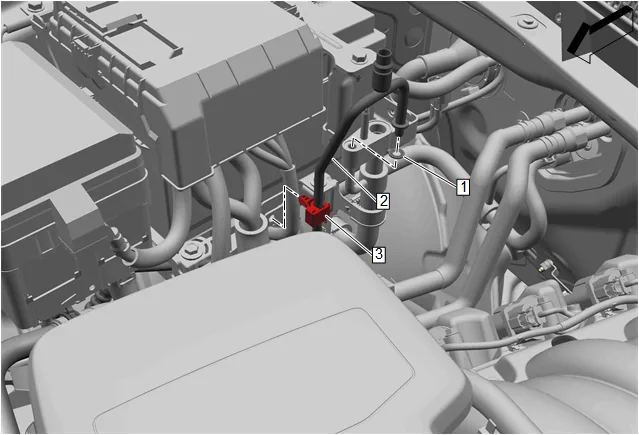
- Air Conditioning Condenser and Evaporator Hose Clip (3) @ Battery Tray » Disengage
- Disengage all wire harness retainers from the battery tray.
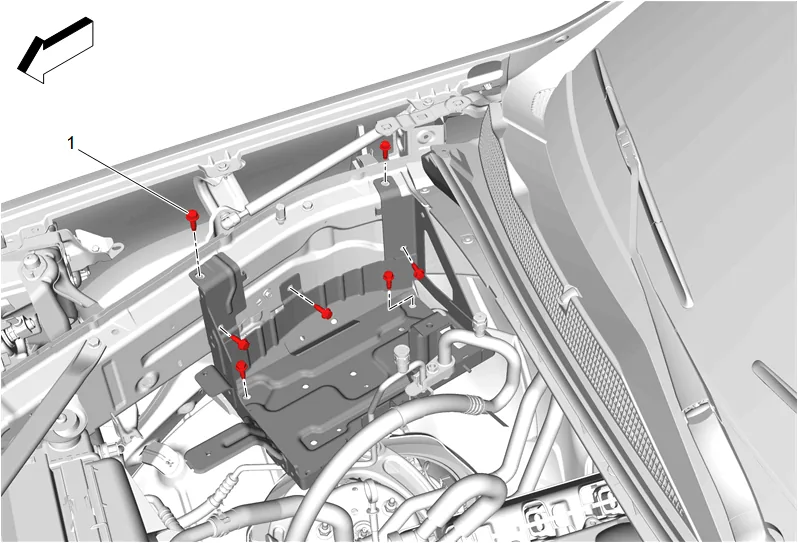
- Battery Tray Bolt (1) » Remove [7x]
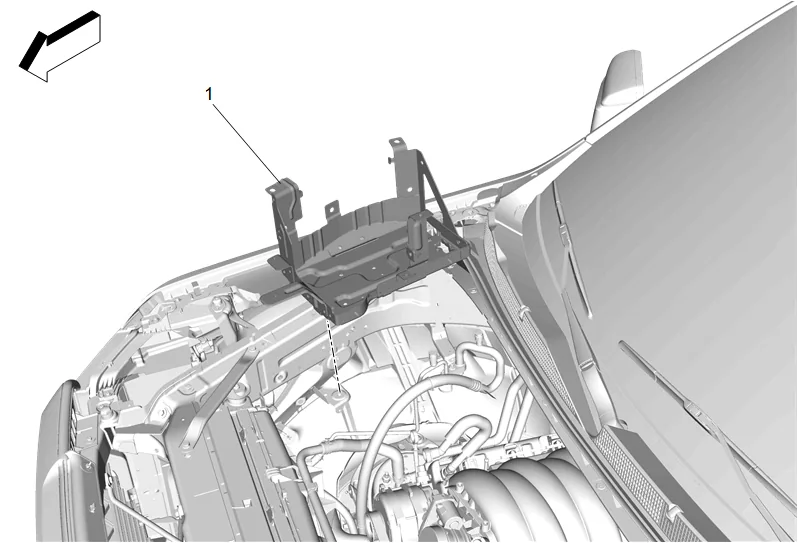
-
Battery Tray (1) » Remove Installation Procedure
-
Battery Tray (1) » Install
-
Engage all wire harness retainers to the battery tray.
-
Battery Tray Bolt (1) » Install and tighten [7x] — Fastener Specifications
-
Air Conditioning Refrigerant Heat Exchanger Nut (1) @ Battery Tray » Install and tighten — Fastener Specifications
-
Air Conditioning Condenser and Evaporator Hose Clip (3) @ Battery Tray » Engage
-
Engine Wiring Harness Fuse Block Bracket (3) » Install
-
Retaining Tab (1) » Engage
-
Engine Wiring Harness Fuse Block Bracket Bolt (2) » Install and tighten [2x] — Fastener Specifications
-
Electrical Connector (1) » Install [4x]
-
Engine Wiring Harness Junction Block (3) » Install
-
Retaining Tab (1) » Engage [4x]
-
Engine Wiring Harness Junction Block Bolt (2) » Tighten [4x] — Fastener Specifications
-
Starter Solenoid Cable (4) » Install
-
Battery Positive Cable Nut (3) » Install and tighten — Fastener Specifications
-
Engine Wiring Harness Junction Block Cover (2) » Install
-
Retaining Tab (1) » Engage [2x]
-
Battery (1) » Install
-
Battery Hold Down Retainer (2) » Install
-
Battery Hold Down Retainer Bolt (1) » Install and tighten — Fastener Specifications
-
Battery Distribution Engine Compartment Fuse Block (2) » Install
-
Retaining Tab (1) » Engage [3x]
-
Battery Positive Post Clamp Nut (1) » Tighten — Fastener Specifications
-
Electrical Connector (1) » Connect [3x]
-
Front Compartment Fuse Block Cover (2) » Install
-
Retaining Tab (1) » Engage [2x]
-
Battery Hold Down Strap (2) » Install
-
If NEW threaded components are being installed, loosen the adhesive using a metal pick or similar tool before proceeding. If threaded components are reused, prepare the threaded components using the following steps: 27.1. Remove any loose cured adhesive from the external threads of the components using a lint free cloth. 27.2. Thread the cleaned components into the internal mating threads and remove to loosen trapped cured adhesive. 27.3. Apply thread locking adhesive to the external threads of the components. Adhesives, Fluids, Lubricants, and Sealers 27.4. Ensure there are no gaps in the thread locking adhesive once applied to the component.
- Battery Hold Down Strap Bolt (1) » Install and tighten [2x] — Fastener Specifications
- Connect the negative battery cable. Battery Negative Cable Disconnection and Connection