Sunroof Window Rear Seal Replacement
Removal Procedure
- Open the sunroof sunshade.
- Place the sunroof window in the vent position.
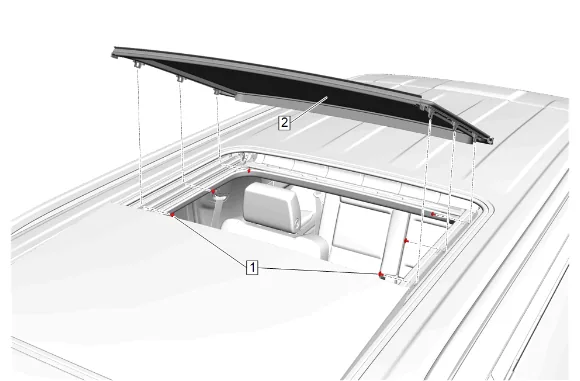
- Reposition the sunroof opening trim finish lace to gain access to the bolts.
- Sunroof Window Bolt (1) » Remove [6x]
- Roof Stationary Window (2) @ Sunroof Window Seal » Disconnect
- Roof Stationary Window (2) » Remove
-
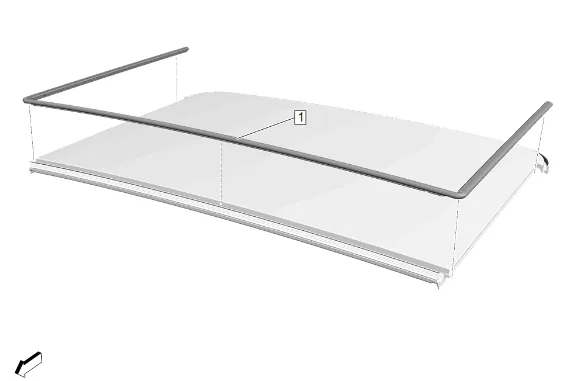
Starting at one end of the sunroof window rear seal (1), pull out and away from the window.
-
Sunroof Window Rear Seal (1) » Remove
-
Clean the mounting area using a lint-free cloth dampened with a 50/50 mixture of isopropyl alcohol and water. Installation Procedure
-
Sunroof Window Rear Seal (1) » Install
-
Starting at one end of the sunroof window rear seal (1), seat the sunroof window rear seal at all contact points on the window.
-
Roof Stationary Window (2) » Install
-
Roof Stationary Window (2) @ Sunroof Window Seal » Connect
-
If a NEW threaded component is being installed, loosen the adhesive using a metal pick or similar tool before proceeding. If threaded component is reused, prepare the threaded component using the following steps: 5.1. Remove any loose cured adhesive from the external threads of the component using a lint free cloth. 5.2. Thread the cleaned component into the internal mating threads and remove to loosen trapped cured adhesive. 5.3. Remove loose debris from internal and external threads using compressed air. 5.4. Apply liquid thread locking adhesive in a strip along half of the length of the external threads, starting at the tip, just prior to installation. Adhesives, Fluids, Lubricants, and Sealers
-
Sunroof Window Bolt (1) » Install and hand tighten [6x]
-
Ensure the proper sunroof window height and opening fit. Sunroof Window Height and Opening Fit Adjustment
-
Install the sunroof opening trim finish lace.
-
Close the sunroof window.
-
Close the sunroof sunshade.