Transmission Converter Cover Replacement - Right Side
Automatic Transmission - 10L80 MHS MQC | Repair Instructions - On Vehicle | Document ID: 5585603 Removal Procedure
- Disconnect the negative battery cable. Battery Negative Cable Disconnection and Connection
- Raise and support the vehicle. Lifting and Jacking the Vehicle
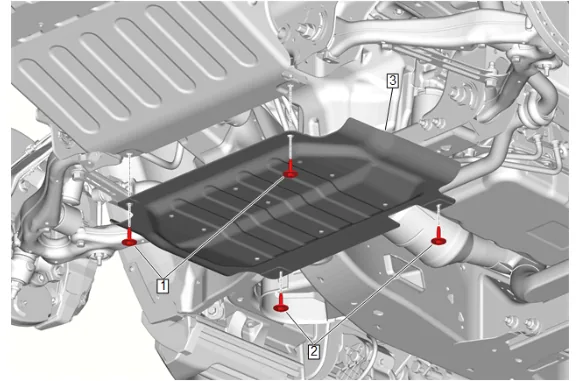
- {with RC1} Remove the underbody skid shield: 3.1. Underbody Skid Shield Bolt (1) » Remove [2x] 3.2. Underbody Splash Shield Bolt (2) » Remove [2x] 3.3. Underbody Skid Shield (3) » Remove
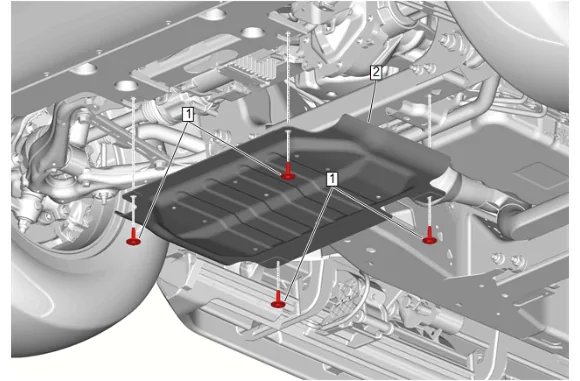
- {without RC1} Remove the underbody skid shield: 4.1. Underbody Skid Shield Bolt (1) » Remove [4x] 4.2. Underbody Skid Shield (2) » Remove
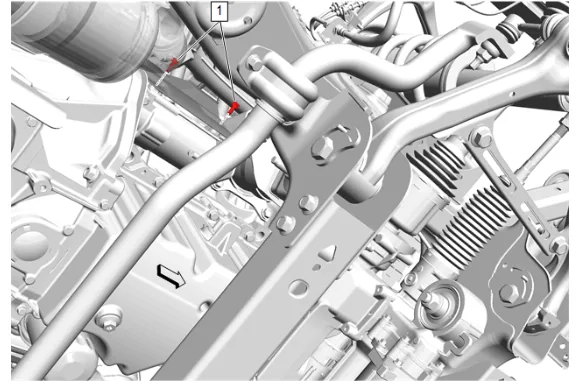
- Starter Heat Shield Bolt (1) » Remove [2x]
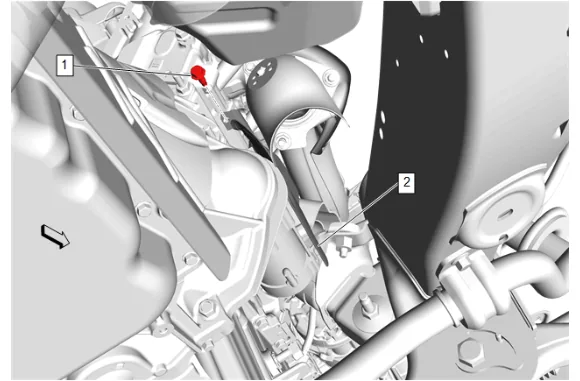
- Starter Heat Shield Bolt (1) » Remove
- Starter Heat Shield (2) » Remove
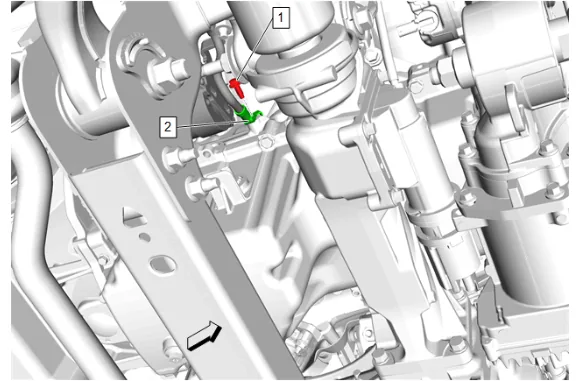
- Battery Negative Cable Ground Bolt (1) » Remove
- Starter Solenoid Cable (2) » Reposition away
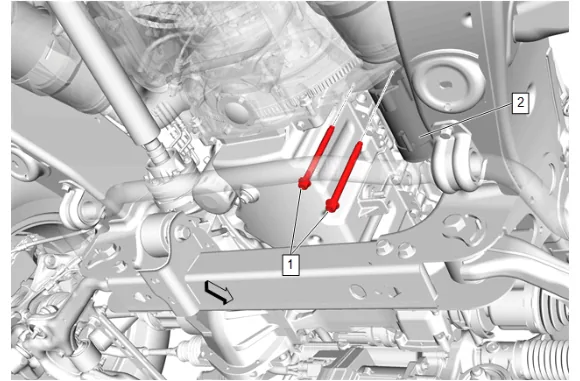
- Starter Mounting Bolt (1) » Remove [2x]
- Reposition the starter (2) to access the electrical connections.
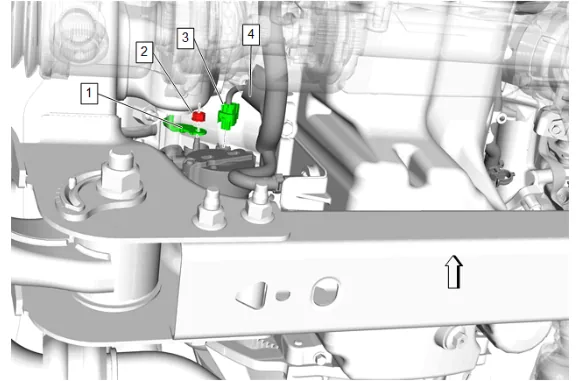
- Protective Sleeve (4) » Reposition
- Starter Solenoid Cable Nut (2) » Remove
- Starter Solenoid Cable (1) » Remove
- Electrical Connector (3) » Disconnect
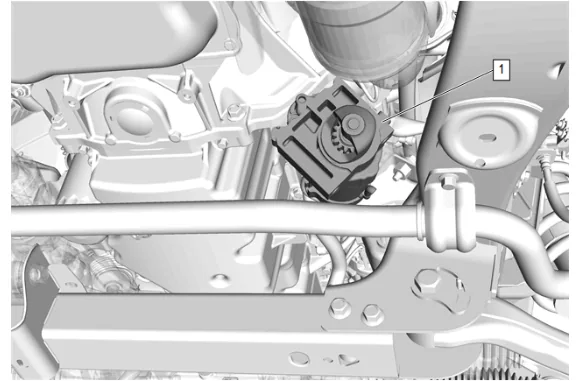
- Starter (1) » Remove
-
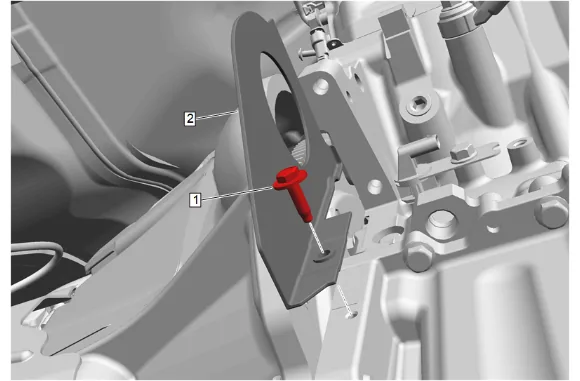
Transmission Converter Cover Bolt (1) » Remove
-
Transmission Converter Cover - Right Side (2) » Remove Installation Procedure
-
Transmission Converter Cover - Right Side (2) » Install
-
Transmission Converter Cover Bolt (1) » Install and tighten — Fastener Specifications
-
Starter (1) » Install
-
Electrical Connector (3) » Connect
-
Protective Sleeve (4) » Install
-
Starter Solenoid Cable (1) » Install
-
Starter Solenoid Cable Nut (2) » Install and tighten — Fastener Specifications
-
Starter Mounting Bolt (1) » Install and tighten [2x] — Fastener Specifications
-
Starter Solenoid Cable (2) » Install
-
Battery Negative Cable Ground Bolt (1) » Install and tighten — Fastener Specifications
-
Starter Heat Shield (2) » Install
-
Starter Heat Shield Bolt (1) » Install and tighten — Fastener Specifications
-
Starter Heat Shield Bolt (1) » Install and tighten [2x] — Fastener Specifications
-
{with RC1} Install the underbody skid shield: 14.1. Underbody Skid Shield (3) » Install 14.2. Underbody Splash Shield Bolt (2) » Install and tighten [2x] — Fastener Specifications 14.3. Underbody Skid Shield Bolt (1) » Install and tighten [2x] — Fastener Specifications
-
{without RC1} Install the underbody skid shield: 15.1. Underbody Skid Shield (2) » Install 15.2. Underbody Skid Shield Bolt (1) » Install and tighten [4x] — Fastener Specifications
-
Lower the vehicle.
-
Connect the negative battery cable. Battery Negative Cable Disconnection and Connection