Automatic Level Control Air Supply Reservoir Coupling Replacement
Automatic Level Control Air Supply Reservoir Coupling Replacement Special Tools Rear Suspension CH-52667 Air Spring Inflator Equivalent regional tools: Special Tools
- Using the scan tool, deflate the automatic level control air supply reservoir
- Raise and support the vehicle. Lifting and Jacking the Vehicle
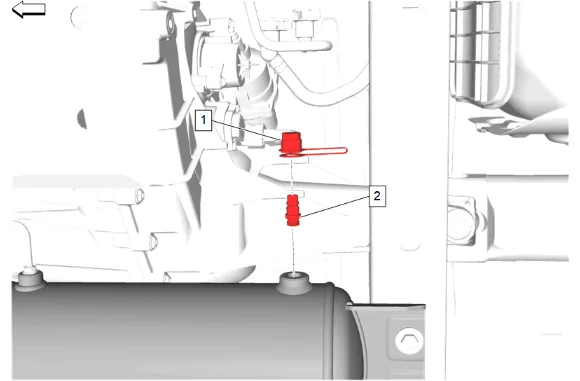
- Automatic Level Control Air Supply Reservoir Coupling Cap (1) » Remove
- Automatic Level Control Air Supply Reservoir Coupling (2) » Remove Installation Procedure
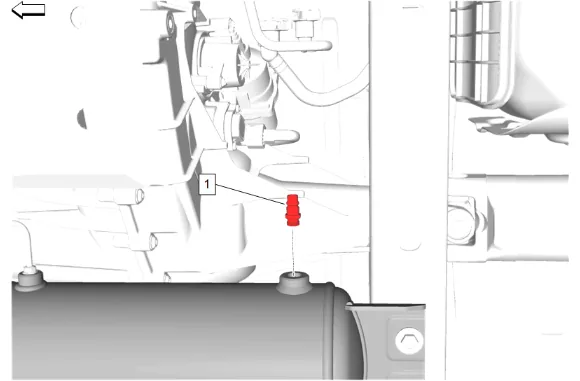
- Automatic Level Control Air Supply Reservoir Coupling (1) » Install and tighten — Fastener Specifications
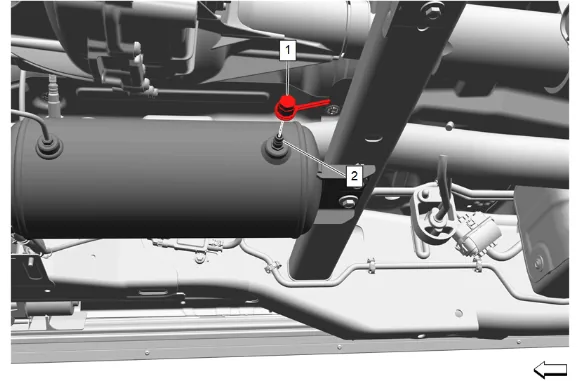
- Install CH-52667 Air Spring Inflator to the automatic level control air supply reservoir air valve (2) and set the regulator on the nitrogen tank to 16 Bar (232 PSI).
- Using CH-52667 Air Spring Inflator, open the valve on the pressure gage to fill the automatic level control air supply reservoir.
- Using CH-52667 Air Spring Inflator and the shop nitrogen tank, fill the automatic level control air supply reservoir to 16 Bar (232 PSI).
- Close the pressure gauge valve and remove CH-52667 Air Spring Inflator from the automatic level control air supply reservoir.
- Install the automatic level control air supply reservoir air valve cap (1) and tighten. Fastener Specifications.
- Partially lower the vehicle, but DO NOT let the wheels touch the ground.
- Using GDS2 tool, use short-term inflate to increase pressure to the air springs: Front: 6 Bar (87 PSI) Rear: 5 Bar (73 PSI)
- Using GDS2, verify automatic level control air supply tank pressure is at 16 Bar (232 PSI), if not repeat steps 2 - 5.
- Remove the support and lower the vehicle.