Front Fender Replacement (B3L - Assist Step)
Removal Procedure
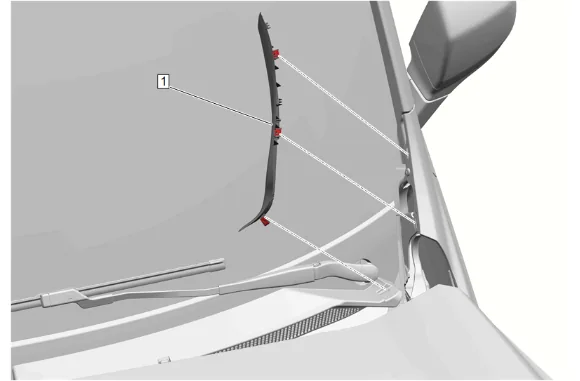
- Apply two layers of masking tape to the painted surface around the top edge of the air inlet grille panel extensions (1) to prevent paint damage.
- Using a suitable plastic trim tool, carefully release the air inlet grille panel extension clips.
- Air Inlet Grille Panel Extension (1) » Remove
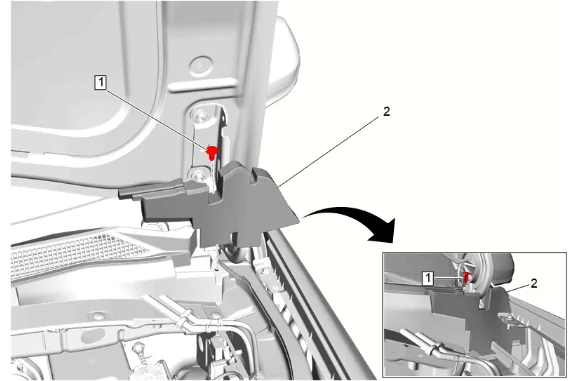
- Hood Rear Outer Air Inlet Seal Retainer (1) » Remove
- Hood Rear Outer Air Inlet Seal (2) » Remove
- Remove the front tire and wheel assembly. Tire and Wheel Removal and Installation
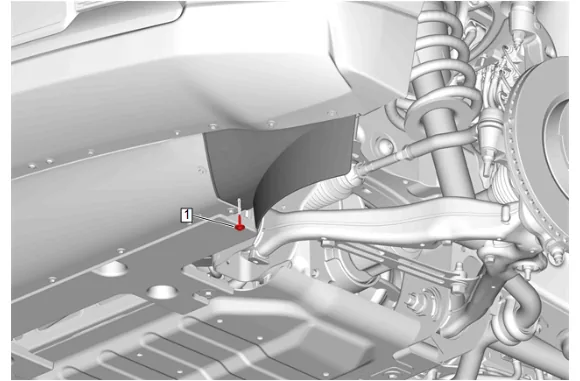
- { If equipped } Front Tire Front Air Deflector Bolt (1) » Remove
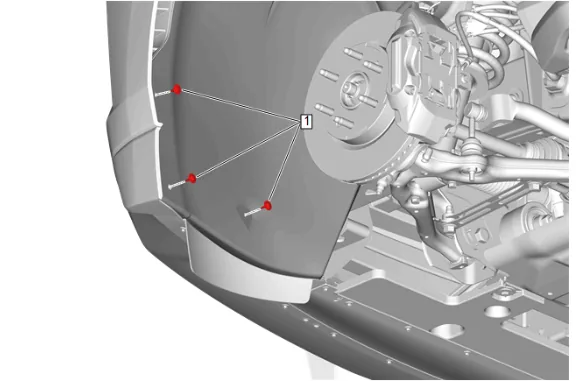
- Front Wheelhouse Liner Bolt (1) » Remove [3x]
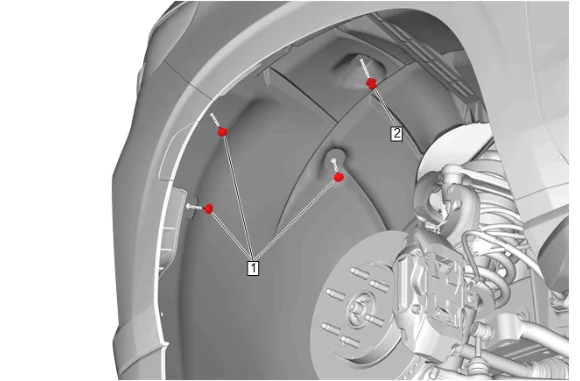
- Front Wheelhouse Liner Bolt (1) » Remove [3x]
- Front Wheelhouse Liner Retainer (2) » Remove
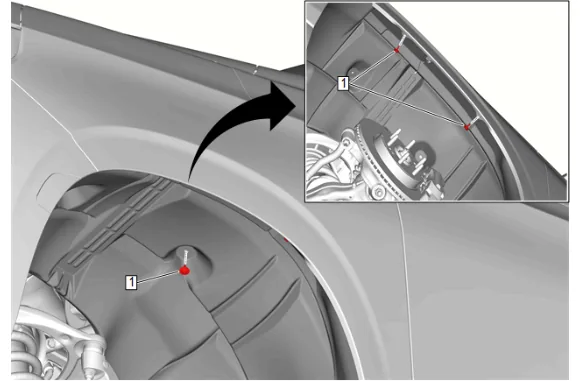
- Front Wheelhouse Liner Bolt (1) » Remove [3x]
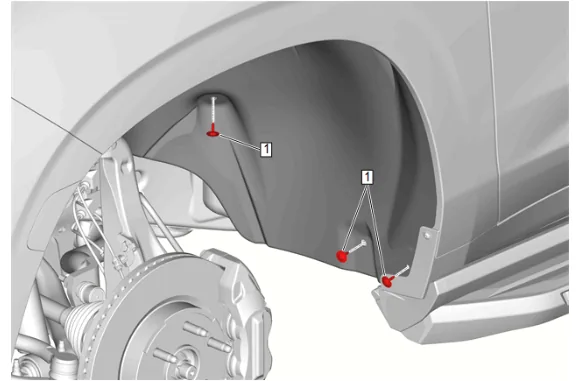
- Front Wheelhouse Liner Bolt (1) » Remove [3x]
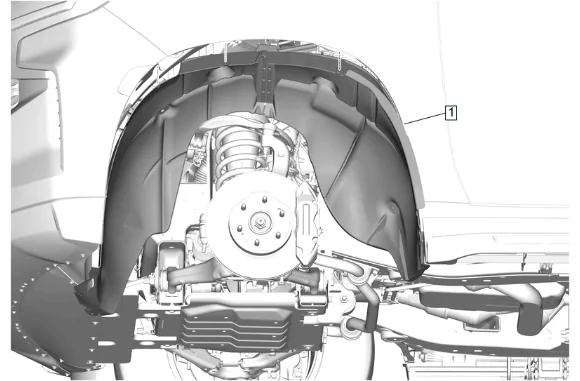
- Front Wheelhouse Liner (1) » Remove
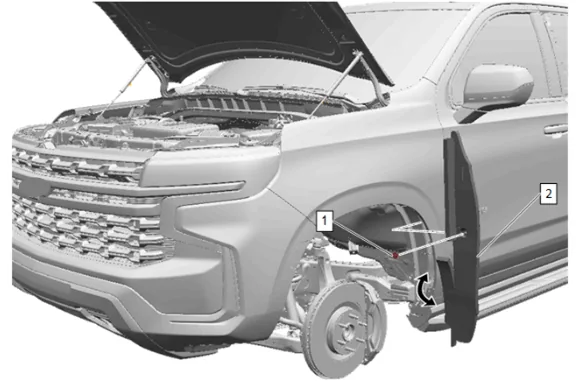
- Front Fender Insulator Retainer (1) » Remove
- Pull the front fender insulator (2) down and out from the front fender.
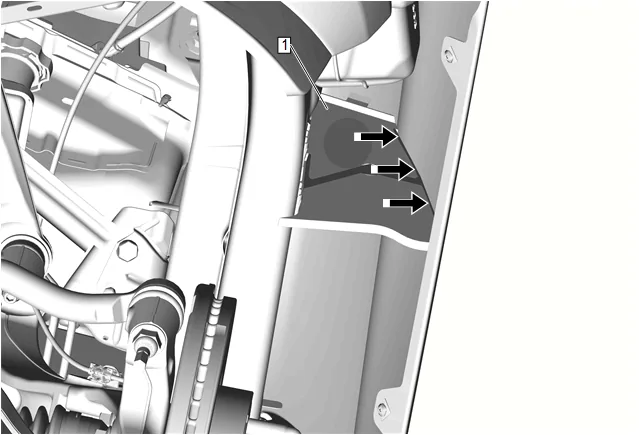
- Using the appropriate tool, release the foam insulation on the front compartment side rail baffle (1) from the fender.
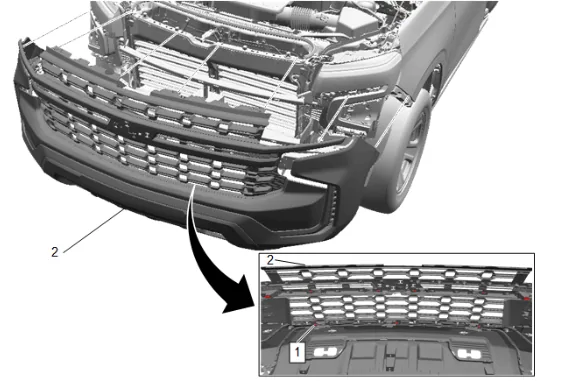
- Front Bumper Fascia (2) » Remove — Front Bumper Fascia Removal and Installation
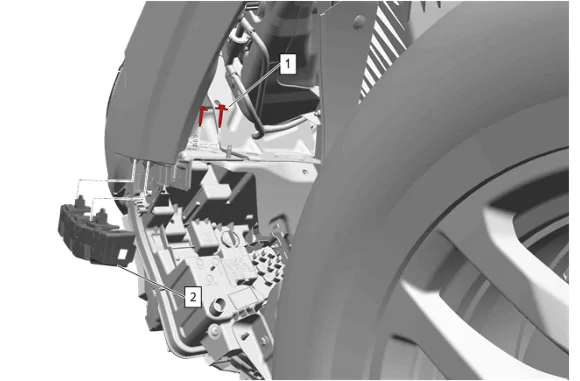
- Front Bumper Fascia Guide Bolt (1) » Remove [2x]
- Front Bumper Fascia Guide (2) » Remove
- Extend the assist steps in the vehicle personal optimization chapter in the owners manual.
- Scroll to Deploy Running Boards on the navigation screen.
- Raise and support the vehicle. Lifting and Jacking the Vehicle
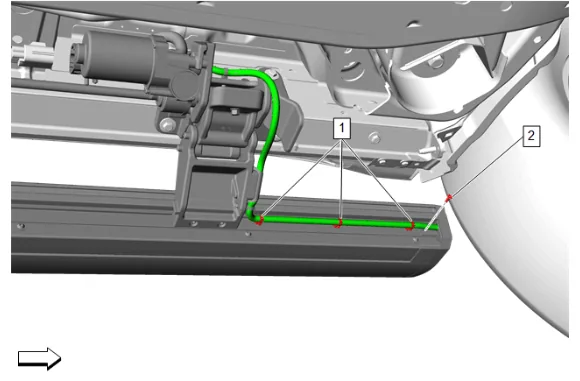
- Retainer (1) » Disengage [3x]
- Assist Step Finish Cap Bolt (2) » Remove
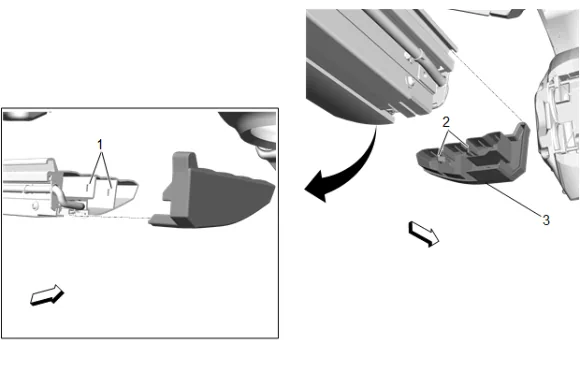
- Assist Step Front Finish Cap (1) » Remove
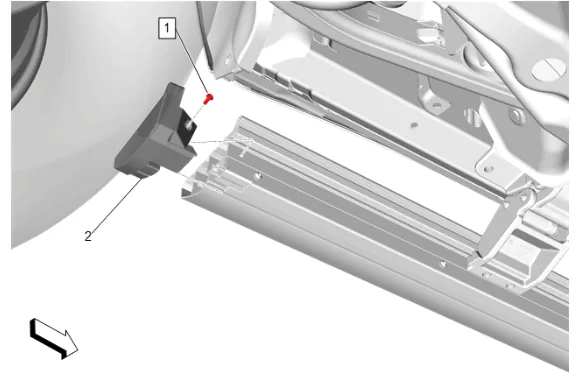
- Assist Step Finish Cap Bolt (1) » Remove
- Assist Step Rear Finish Cap (2) » Remove
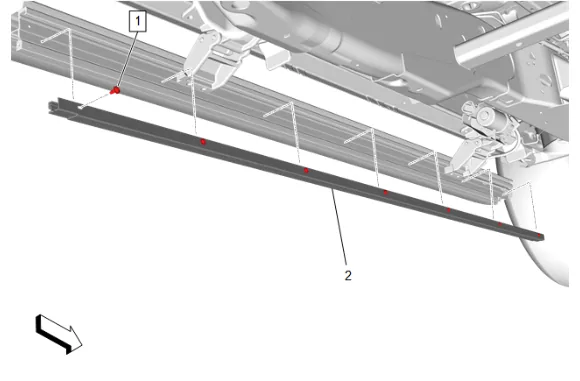
- Assist Step Shield Bolt (1) » Remove [7x]
- Assist Step Insert (2) » Remove
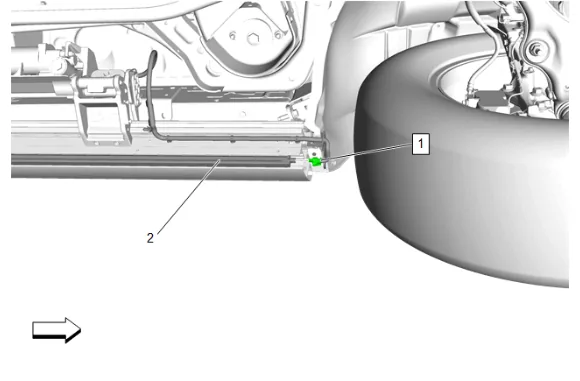
- Electrical Connector (1) @ Assist Step Lamp (2) » Disconnect
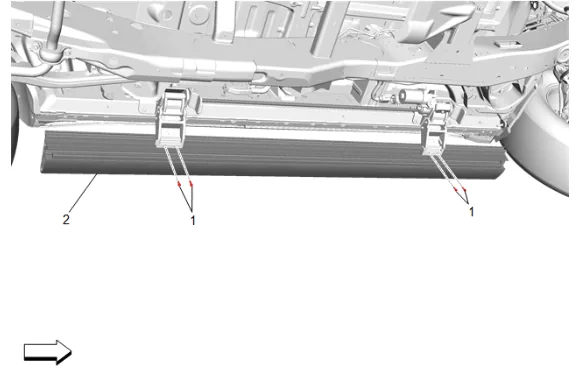
- Assist Step Bracket Bolt (1) » Remove [4x]
- Assist Step (2) » Remove
- Open both front and rear side doors
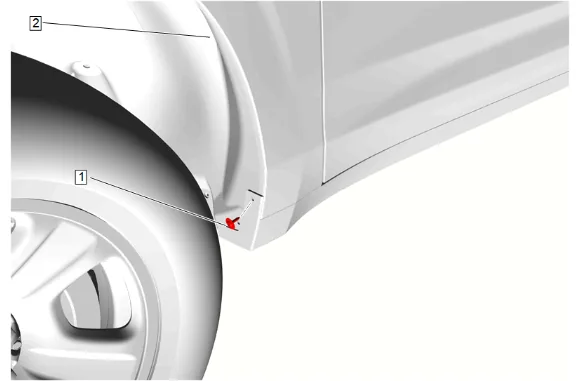
- Rocker Panel Molding Bolt (1) » Remove
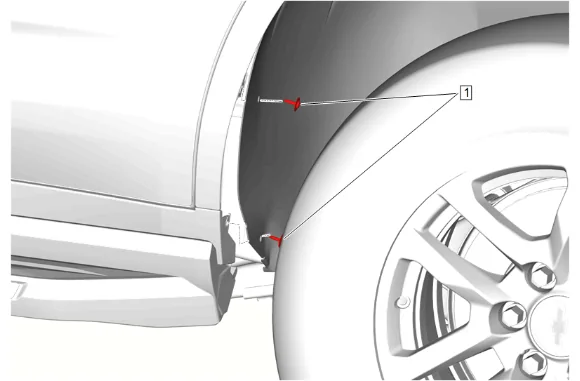
- Rear Wheelhouse Liner Bolt (1) » Remove [2x]
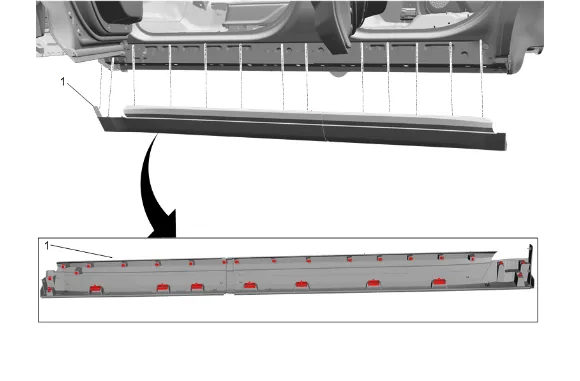
- Using an appropriate trim tool, release the lower rocker panel molding retainers and pull the rocker panel molding (1) away from the body side outer panel.
- Using an appropriate trim tool, release the upper rocker panel molding retainers and pull the rocker panel molding (1) away from the body side outer panel.
- Rocker Panel Molding (1) » Remove
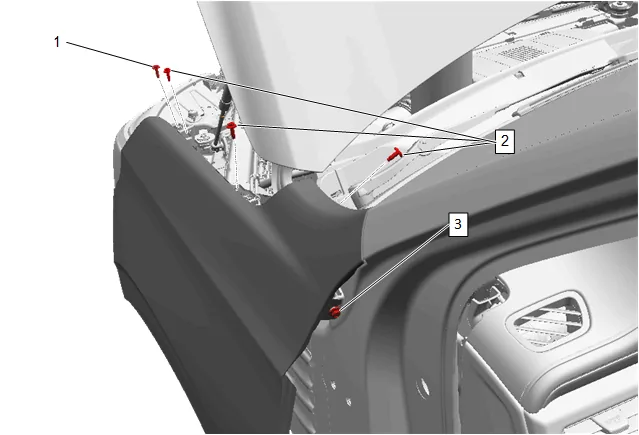
- Headlamp Bolt (1) » Remove
- Front Fender Bolt (2) » Remove [3x]
- Front Fender Bolt (3) » Loosen
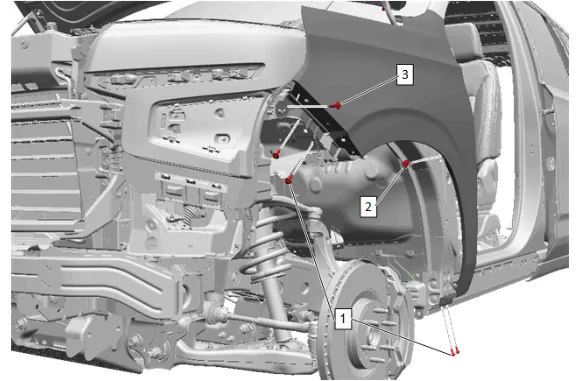
- Front Fender Bolt (1) » Remove [4x]
- Front Fender Nut (2) » Remove
- Headlamp Bolt (3) » Remove
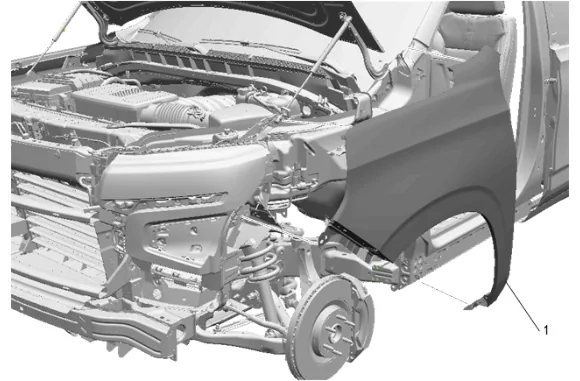
-
Front Fender (1) » Remove Installation Procedure
-
Apply Structural foam 3M™ NVH Dampening Material or Sem Panel Vibration Control Material or equivalent to the front compartment side rail baffle (1).
-
Front Fender (1) » Install
-
Front Fender Bolt (1) » Install and tighten [4x] — Fastener Specifications
-
Front Fender Nut (2) » Install and tighten — Fastener Specifications
-
Headlamp Bolt (3) » Install and tighten — Fastener Specifications
-
Headlamp Bolt (1) » Install and tighten — Fastener Specifications
-
Front Fender Bolt (2) » Install and tighten [3x] — Fastener Specifications
-
Front Fender Bolt (3) » Tighten — Fastener Specifications
-
Position the rocker panel molding (1) to the vehicle and seat the upper rocker panel molding retainers into the body side outer panel.
-
Seat the lower rocker panel molding retainers into the body side outer panel.
-
Rear Wheelhouse Liner Bolt (1) » Install and tighten [2x] — Fastener Specifications
-
Rocker Panel Molding Bolt (1) » Install and tighten — Fastener Specifications
-
Assist Step (2) » Install
-
Assist Step Bracket Bolt (1) » Install and tighten [4x] — Fastener Specifications
-
Electrical Connector (1) @ Assist Step Lamp (2) » Connect
-
Assist Step Insert (2) » Install
-
Assist Step Shield Bolt (1) » Install and tighten [7x] — Fastener Specifications
-
Assist Step Front Finish Cap (1) » Install
-
Assist Step Finish Cap Bolt (2) » Install and tighten — Fastener Specifications
-
Retainer (1) » Engage [3x]
-
Assist Step Rear Finish Cap (2) » Install
-
Assist Step Finish Cap Bolt (1) » Install and tighten — Fastener Specifications
-
Front Bumper Fascia Guide (2) » Install
-
Front Bumper Fascia Guide Bolt (1) » Install and hand tighten [2x]
-
Front Bumper Fascia (2) » Install — Front Bumper Fascia Removal and Installation
-
Front Fender Insulator (2) » Install
-
Front Fender Insulator Retainer (1) » Install
-
Front Wheelhouse Liner (1) » Install
-
Front Wheelhouse Liner Bolt (1) » Install and tighten [3x] — Fastener Specifications
-
Front Wheelhouse Liner Bolt (1) » Install and tighten [3x] — Fastener Specifications
-
Front Wheelhouse Liner Retainer (2) » Install
-
Front Wheelhouse Liner Bolt (1) » Install and tighten [3x] — Fastener Specifications
-
Front Wheelhouse Liner Bolt (1) » Install and tighten [3x] — Fastener Specifications
-
{ If equipped } Front Tire Front Air Deflector Bolt (1) » Install and tighten — Fastener Specifications
-
Install the front tire and wheel assembly. Tire and Wheel Removal and Installation
-
Hood Rear Outer Air Inlet Seal (2) » Install [2x]
-
Hood Rear Outer Air Inlet Seal Retainer (1) » Install
-
Air Inlet Grille Panel Extension (1) » Install [2x]
-
Remove the double layer of masking tape around the perimeter of the painted surfaces.
-
Using a 50/50 mixture of isopropyl alcohol and clean drinkable water with a clean towel, remove any left over adhesive residue from the masking tape.