Front Brake Crossover Pipe Connector Replacement
- Disconnect the battery negative cable. Battery Negative Cable Disconnection and Connection
- Raise and support the vehicle. Lifting and Jacking the Vehicle
- Remove the front tire and wheel assembly. Tire and Wheel Removal and Installation
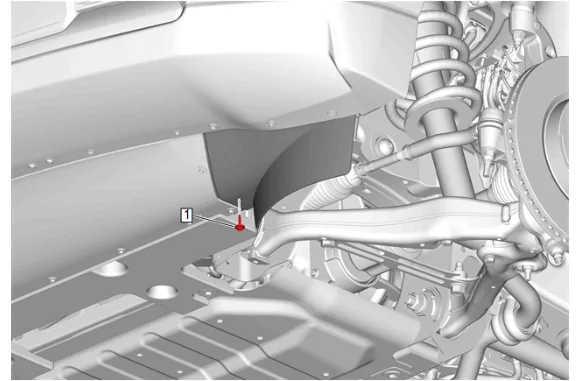
- { If equipped } Front Tire Front Air Deflector Bolt (1) » Remove
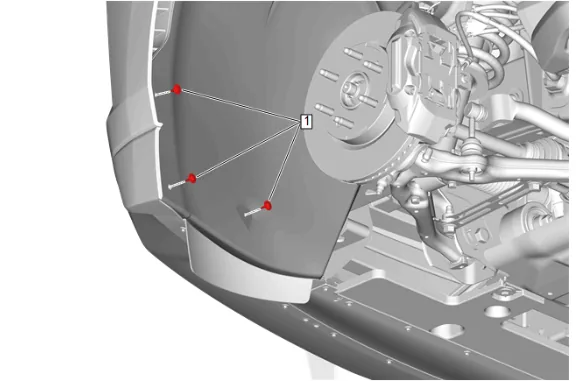
- Front Wheelhouse Liner Bolt (1) » Remove [3x]
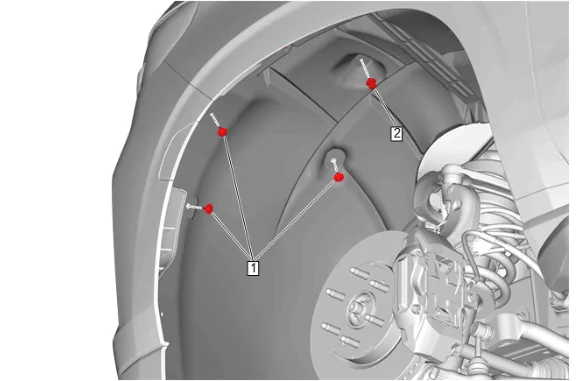
- Front Wheelhouse Liner Bolt (1) » Remove [3x]
- Front Wheelhouse Liner Retainer (2) » Remove
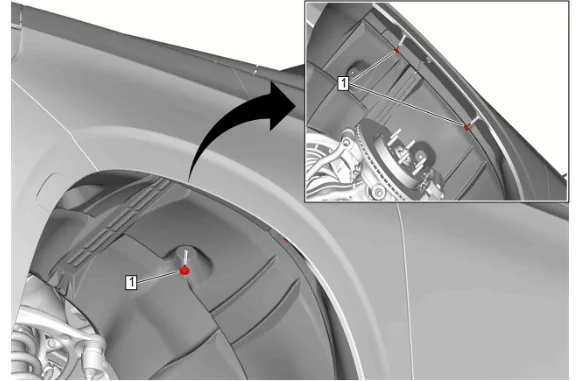
- Front Wheelhouse Liner Bolt (1) » Remove [3x]
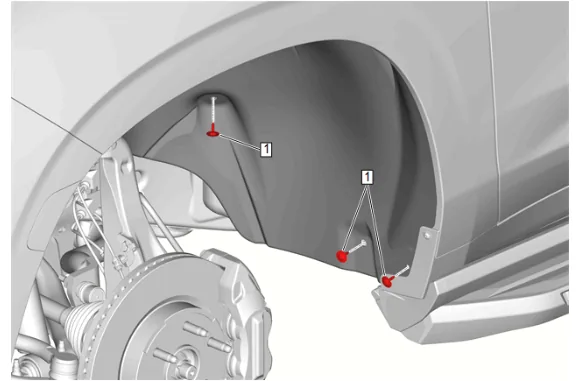
- Front Wheelhouse Liner Bolt (1) » Remove [3x]
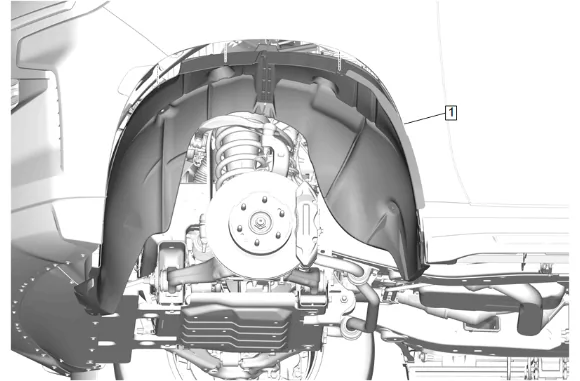
- Front Wheelhouse Liner (1) » Remove
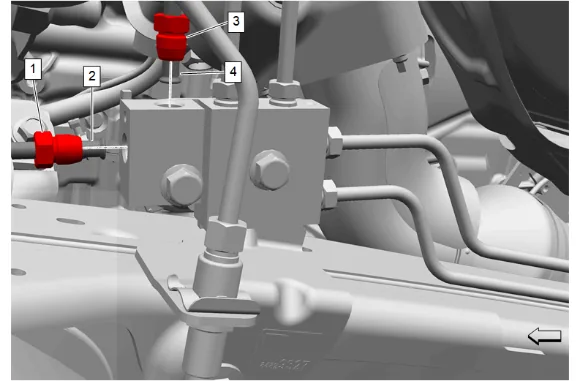
- Front Brake Front Pipe Nut (1) @ Front Brake Crossover Pipe Connector » Remove
- Front Brake Crossover Pipe (2) @ Front Brake Crossover Pipe Connector » Remove
- Front And Rear Brake Pipe Nut (3) @ Front Brake Crossover Pipe Connector » Remove
- Front And Rear Brake Pipe (4) @ Front Brake Crossover Pipe Connector » Remove
- Cap the front and rear brake pipe (4) outlet and the front brake crossover pipe (2) inlet to avoid fluid loss and contamination.
-
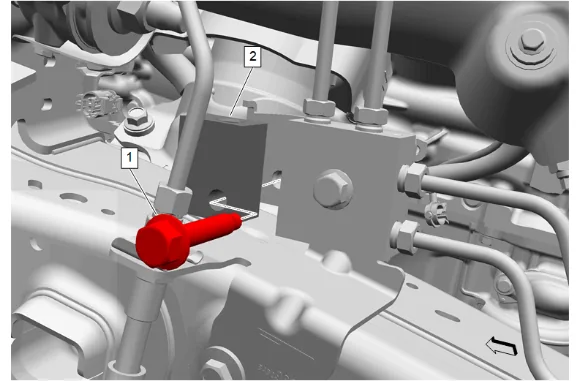
Front Brake Crossover Pipe Connector Bolt (1) » Remove
-
Front Brake Crossover Pipe Connector (2) » Remove Installation Procedure
-
Front Brake Crossover Pipe Connector (2) » Install
-
Front Brake Crossover Pipe Connector Bolt (1) » Install and tighten — Fastener Specifications
-
Remove the caps from the front and rear brake pipe (4) and the front brake crossover pipe (2).
-
Front And Rear Brake Pipe (4) @ Front Brake Crossover Pipe Connector » Install
-
Front And Rear Brake Pipe Nut (3) @ Front Brake Crossover Pipe Connector » Install and tighten — Fastener Specifications
-
Front Brake Crossover Pipe (2) @ Front Brake Crossover Pipe Connector » Install
-
Front Brake Front Pipe Nut (1) @ Front Brake Crossover Pipe Connector » Install and tighten — Fastener Specifications
-
Front Wheelhouse Liner (1) » Install
-
Front Wheelhouse Liner Bolt (1) » Install and tighten [3x] — Fastener Specifications
-
Front Wheelhouse Liner Bolt (1) » Install and tighten [3x] — Fastener Specifications
-
Front Wheelhouse Liner Retainer (2) » Install
-
Front Wheelhouse Liner Bolt (1) » Install and tighten [3x] — Fastener Specifications
-
Front Wheelhouse Liner Bolt (1) » Install and tighten [3x] — Fastener Specifications
-
{ If equipped } Front Tire Front Air Deflector Bolt (1) » Install and tighten — Fastener Specifications
-
Connect the battery negative cable. Battery Negative Cable Disconnection and Connection
-
Bleed the brake system. Hydraulic Brake System Bleeding
-
Install the front tire and wheel assembly. Tire and Wheel Removal and Installation
-
Remove the support and lower the vehicle.
-
Fill the brake master cylinder reservoir to the maximum-full level with GM approved brake fluid from a clean, sealed brake fluid container. Brake Master Cylinder Reservoir Filling